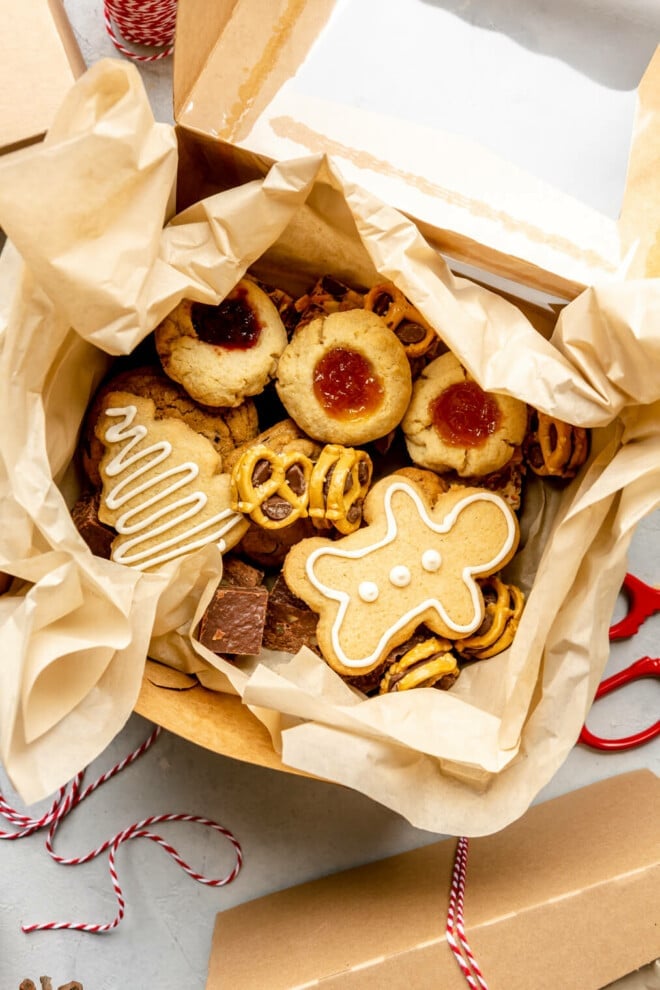
With my signature cookie box formula, tips to make certain cookies ahead of time, and even a breakdown on supplies and shipping costs, this is your one-stop-shop for building your own all-star holiday cookie boxes this year. My formula will yield 8 delicious cookie boxes that each cost less than $12, making these an ideal budget-friendly gift this year.
Holiday Cookie Boxes
Holiday cookie boxes are my favorite way to provide homemade gifts to my friends, loved ones, and people in my life who could benefit from a little love each year. In this guide, I’m walking you through everything you need to know to pull your own holiday cookie box together. I’m going to cover the best cookies for filling your boxes, tips on how to make them ahead (and store them for maximum freshness), what supplies are best, how to package them, and even a few pieces of advice on how to ship your boxes (if needed).
I hope this article leaves you feeling inspired! Cookie boxes can come together very slowly over the weeks leading up to the gifting season and can have a BIG impact on those you gift. They’re just so special.
Make sure you scroll to the bottom to get your FREE Cookie Box eBook! It includes all the recipes, the supplies needed, freezing instructions, printable labels, and more.
What is a Christmas Cookie Box?
A Christmas Cookie Box is a small(ish) box (or tin) filled with an assortment of cookies. While there are some store-bought options out there, I think that the homemade variety are the way to go.
Homemade Christmas Cookie Boxes are usually filled with a small collection, anywhere between 4 and 10, of different cookies. There are usually a few cookies of each kind, they’re wrapped festively, labeled with information on what’s inside (mine usually include dietary notes as well, like gluten-free or dairy-free), and they’re delivered during December as a way to share some Christmas joy.
The Perfect Christmas Cookie Box Formula
I don’t mean to toot my horn too much, but y’all, my Christmas cookie box formula is THE BEST. As a scientist, I can’t help but get scientific about everything …but especially a baking-at-scale project.
If you’re wanting to put together your own holiday cookie box, here’s my formula:
7 different kinds of treats total is ideal:
- 4 different kinds of cookies (ideally, cookies that are firm when cooled)
- 1 type of bark (chocolate bark, graham cracker bark, saltine bark, etc.)
- 1 type of fudge (any kind!)
- 1 kind of quick candy (think: Rolo pretzels, chocolate-covered pretzels, puppy chow, toffee, etc.)
I think that this formula makes for a delightful box that will have your recipient overjoyed by the options AND it’s a manageable list for you (the baker) to pull together.
Here’s how I built my box this year using this formula:
- Cookie 1: Chocolate Chip Cookies [36 total, 4-5 in each box]
- Cookie 2: Sugar Cookies (cut into fun holiday shapes) [24 total, 3 in each box]
- Cookie 3: 7 Layer Magic Bars [24 total, 3 in each box]
- Cookie 4: Thumbprint Cookies (for a fruity break to the chocolate) [24 total, 3 in each box]
- Bark: Pistachio Bark (on graham crackers) [makes 24 total, 3 in each box]
- Fudge: Walnut Fudge (so easy) [36 pieces total, 4-5 in each box]
- Quick Candy: Candied Rolo Pretzels (even easier) [makes 50 total, 6-7 in each box]
If you make one batch of each kind of treat below, you will have enough to make 8 cookie boxes that are SURE to delight your loved ones.
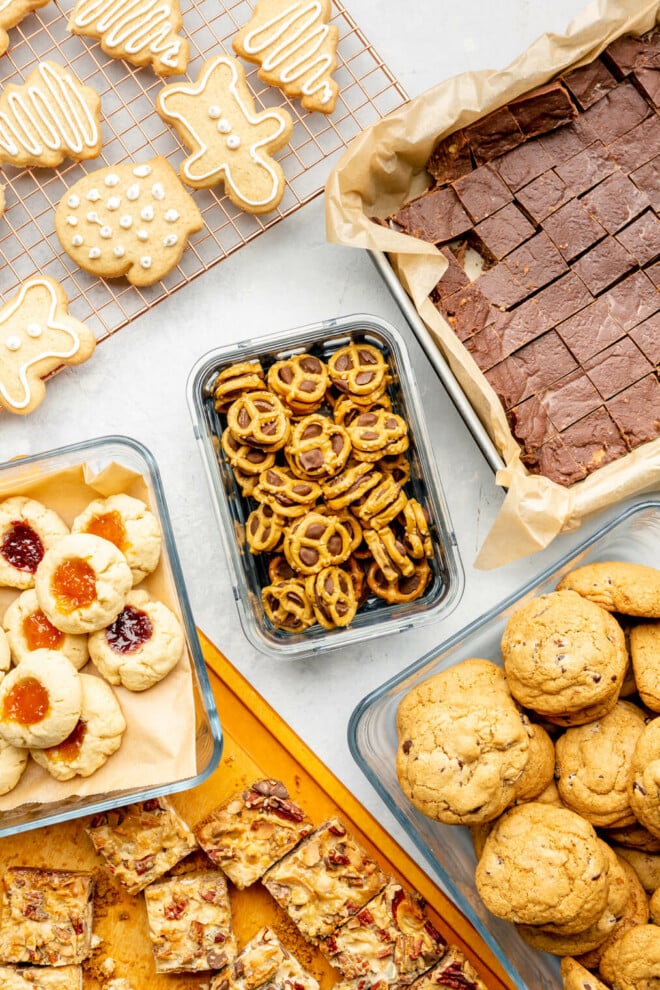
Christmas Cookie Box Recipes
Here are the 7 Cookie Box recipes I used this year!
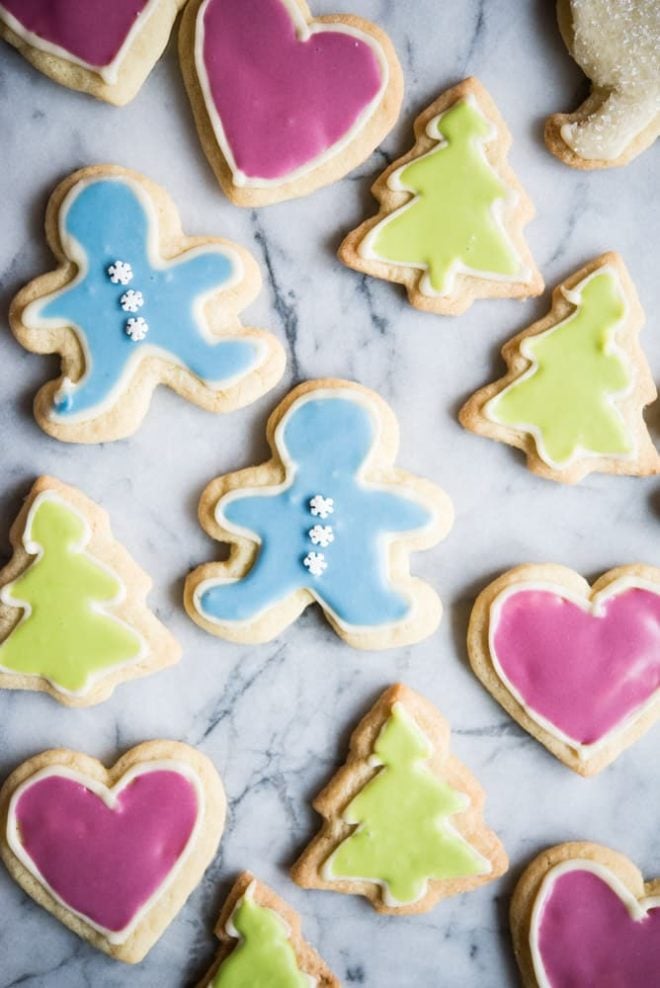
Sugar Cookies
Servings: 24 cookies
Ingredients:
For the cookies:
- 1 ½ cups gluten-free flour, plus additional for rolling
- ¾ teaspoon baking powder
- ¼ teaspoon sea salt
- ½ cup butter, softened
- ¾ cup white sugar
- 1 egg
- 1 teaspoon vanilla extract
- Cookie cutters
For the icing:
- 1 cup powdered sugar, sifted
- 1-2 tablespoons milk of choice or water
- Food coloring, if desired
- Sprinkles, if desired
Instructions:
- In a small bowl, whisk together the flour, baking powder, and salt, then set aside.
- In a large bowl, beat the butter and sugar on high with an electric mixer or stand mixer for 1-2 minutes, until fluffy. Add the egg and vanilla and beat again until fully combined.
- Add the flour to the butter mixture 1/2 cup at a time, mixing constantly, until the flour is fully incorporated and a soft dough has formed. Cover the bowl and refrigerate for one hour, up to overnight.*
- Preheat the oven to 350 F and line a baking sheet with parchment paper.
- Sprinkle flour over your counter, or over a large piece of parchment paper, then take half of the dough and place it on the floured surface. Sprinkle flour over the dough and use a rolling pin to roll it out to even 1/4-inch thickness. If the dough sticks at any time, you can add more flour to prevent it, or place another piece of parchment paper over top if you are still experiencing sticking. If the dough cracks around the edges, simply pinch it back together and roll over it again.
- Once the dough is rolled out, cut your shapes, taking care to cut them as closely together as possible to utilize all of the dough. Once you have cut out all of the shapes, carefully place the cookies one inch apart on the cookie sheet. At this point you can roll the extra dough into a ball then roll and cut again. Repeat this process for remaining dough.
- Bake the cookies for 8-10 minutes, until the edges are browned, then remove from the oven and let cool.
- To make the frosting: Whisk the powdered sugar and milk until the icing is thin enough to spread, but not so thin it will run off the cookies.
- Spoon a small amount of icing into a piping (or plastic) bag to outline the cookies. This step makes filling them in with colored icing much easier later.
- Once you’re finished outlining the cookies, divide the rest into individual bowls and add food coloring to your liking. Add the food coloring to your piping bag, or Ziploc bag with the tip cut off, and use it to outline, then fill in your cookies.
- Decorate the cookies with sprinkles, then set aside to let the icing harden slightly, about 30 minutes. Store in an airtight container for up to 5 days, or eat immediately. Enjoy!
To Freeze:
Prepare the cookies as directed, allow the icing to fully harden, then place them in an airtight container and store them in the freezer for up to 3 months.
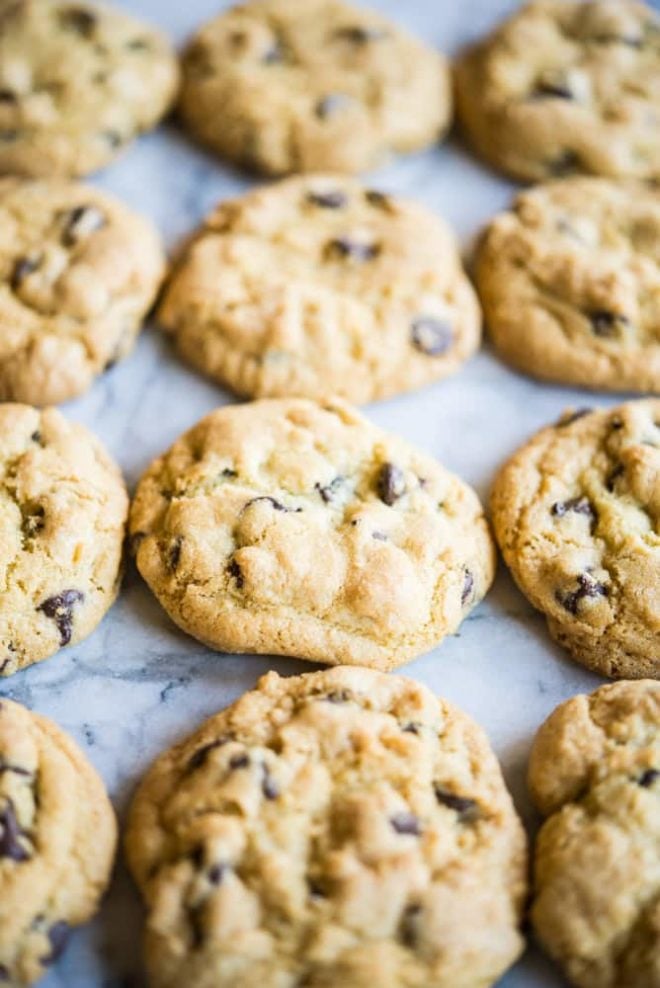
Chocolate Chip Cookies
Servings: 36 cookies
Ingredients:
- 2 ⅓ cup gluten-free flour
- 1 teaspoon baking soda
- ½ teaspoon sea salt
- 1 cup butter
- ¾ cup brown sugar
- ¾ cup white sugar
- 2 teaspoons vanilla extract
- 2 eggs
- 2 cups dark chocolate chips
Instructions:
- In a medium-sized bowl, whisk together the flour, baking soda, and salt, then set aside.
- Add the butter and sugar to a large bowl, or the bowl of your stand mixer, and mix with an electric mixer for about 1 minute, until fluffy. Add the vanilla and eggs to the butter mixture and beat again, until fully combined.
- Add the flour mixture to the butter mixture 1/2 cup at a time, until the flour is fully incorporated into the dough. Stir in the chocolate chips, then cover the dough and refrigerate for at least one hour, up to overnight.
- Preheat the oven to 350 F and line a cookie sheet with parchment paper.
- Scoop the dough into 1-inch balls and place 12 balls of dough on the cookie sheet. Bake for 11-15 minutes, until the tops of the cookies are browned and crisp. Repeat this step until all cookies have baked.
- Let the cookies cool, then enjoy!
To Freeze:
Prepare the cookies as directed, allow them to cool, then place them in an airtight container and store them in the freezer for up to 3 months.
7-Layer Magic Bars
Servings: 24 cookie bars
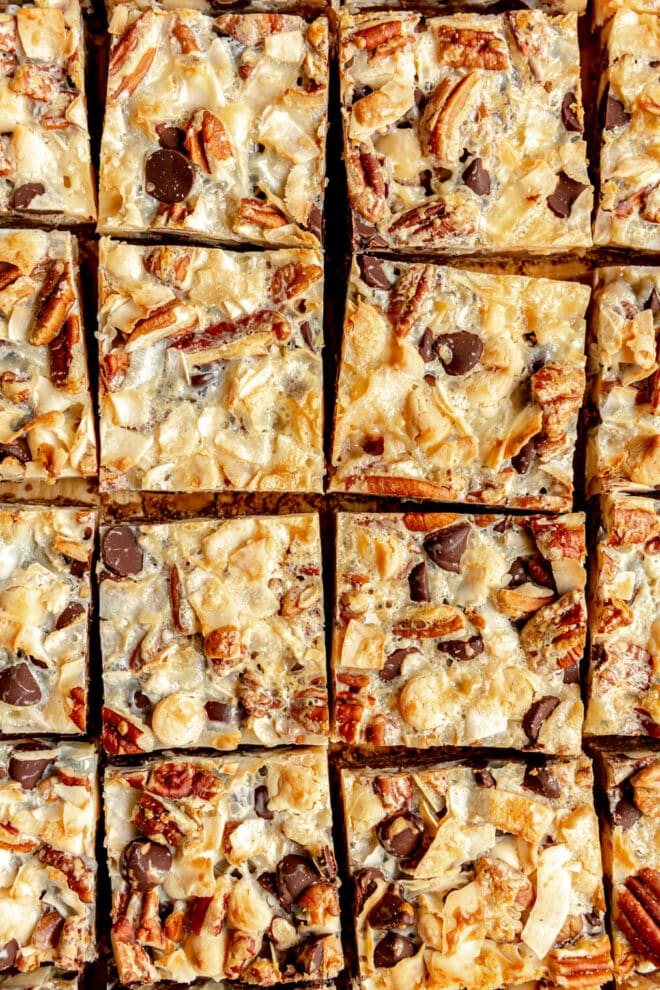
Ingredients:
- 16 ounces graham crackers, processed into crumbs
- ½ cup butter, melted
- 1 cup dark chocolate chips
- 1 cup white chocolate chips
- 1 cup pecan pieces
- 1 cup unsweetened coconut flakes
- 1, 14-ounce can sweetened condensed milk
Instructions:
- Preheat the oven to 350°F and line a 9×13 pan with parchment paper.
- Make the graham cracker crust by processing together the graham cracker crumbs and butter, then press the crust into the bottom of the 9×13 pan.
- Sprinkle the toppings (chocolate + white chocolate chips, pecans, and coconut flakes) on top of the crust.
- Pour the sweetened condensed milk over top of the toppings.
- Bake the cookie bars for 25-30 minutes until lightly browned.
- Let the cookie bars cool, then transfer them to the fridge for 30 minutes to set.
- Slice once cooled.
To Freeze:
Prepare the magic bars as directed. Once the bars are cooled and set, cut them into squares. Store them in an airtight container in the freezer for up to 3 months.
Thumbprint Cookies
Servings: 24 cookies
Ingredients:
- 1 cup butter, softened
- 1 cup white sugar
- 2 teaspoons vanilla extract
- ½ teaspoon almond extract, optional
- 2 egg yolks
- ¼ teaspoon sea salt
- 2 ⅔ cups gluten-free flour
- 1 cup of no-sugar-added jam of your choice (such as apricot, raspberry, blueberry, etc.)
Instructions:
- Preheat the oven to 350 F.
- Add the butter and sugar to a large bowl and beat with an electric mixer for 1 minute, until fluffy.
- Add the vanilla, almond extract, egg yolks, and salt to the bowl with the butter and sugar and beat for another 30 seconds, until just combined.
- Then, add the flour 1/2 cup at a time, beating constantly, until the dough is fully formed.
- Line two baking sheets with parchment paper, then roll the dough into one tablespoon-sized balls, make an indentation in each with a teaspoon, or your finger, and fill with jam.
- Bake for 18-20 minutes, until the cookies brown around the outside, then let cool for at least 15 minutes before serving.
To Freeze:
Prepare the cookies as directed, allow them to cool, then place them in an airtight container and store them in the freezer for up to 3 months.
Pretzel Rolo Candies
Servings: 50 candies
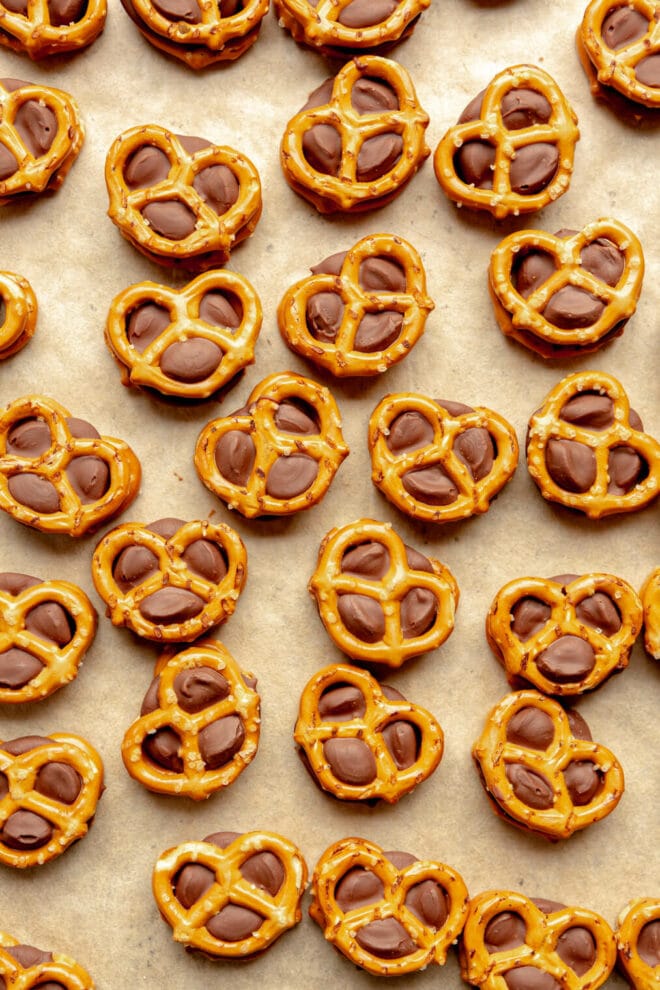
Ingredients:
- 1 bag Rolo candies
- 1, 8-ounce bag pretzels
Instructions:
- Preheat the oven to 250°F and line a sheet pan with parchment paper.
- Lay half of the pretzels out on the sheet pan.
- Top each pretzel with a Rolo candy.
- Place the sheet pan in the oven for 3 minutes, until the Rolos are softened.
- Once the sheet pan is out of the oven, top each pretzel/Rolo duo with a second pretzel, and press down to squish the Rolo in between the two pretzels.
- Let cool completely.
To Freeze:
Prepare the candies as directed, then place them in an airtight container and store them in the freezer for up to 3 months.
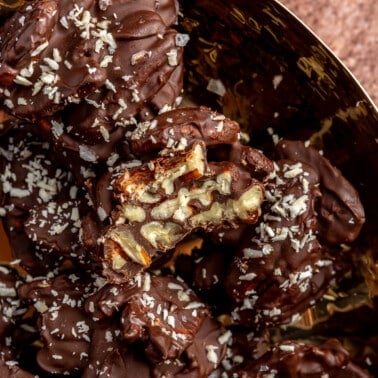
Chocolate Graham Cracker Bark
Servings: 12 pieces

Ingredients:
- 2 8-ounce boxes graham crackers
- 2 cups dark chocolate chips
- 2 tablespoons almond butter (or nut butter of choice)
- ¼ cup shelled pistachios, roughly chopped
- 1 teaspoon flaky sea salt
Instructions:
- Bring 2-3 inches of water to a simmer in a medium/small-sized pot. To a glass bowl that will fit over the pot of water (but not touch the water), add the chocolate chips. Melt the chocolate chips in the bowl, stirring regularly. This should take about 7-9 minutes. Remove the bowl from the hot water and set aside once melted.
- Spread the graham crackers out on a parchment paper-lined baking sheet
- Drizzle the chocolate on top of the graham crackers and, using the spatula, smooth the chocolate until you have an even coat over the crackers.
- Drizzle the almond butter over the chocolate in even swoops and then using a fork, run lines through the almond butter and chocolate across the length of the sheet pan and then again across the width (forming a lattice).
- Sprinkle the pistachios across the top of the chocolate and top with the sea salt.
- Place the sheet in the freezer for about 30 minutes or refrigerator for one hour, until the chocolate is firm. Using a knife, cut the bark into bite-sized pieces.
To Freeze:
Prepare the bark as directed, then place in an airtight container and store them in the freezer for up to 3 months.
Chocolate Walnut Fudge
Servings: 36 pieces
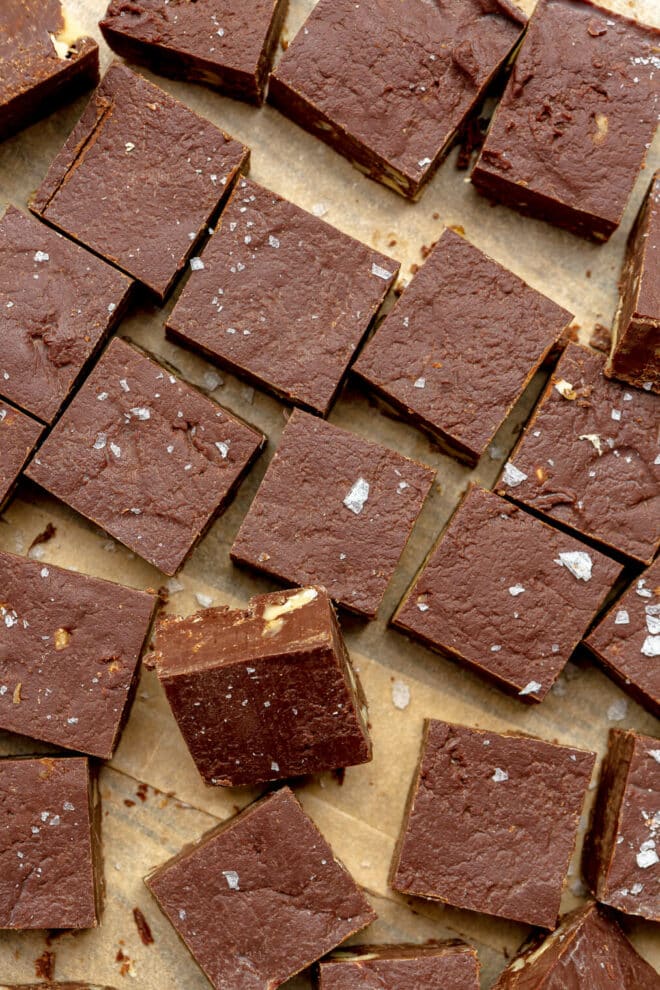
Ingredients:
- 4 cups dark chocolate chips
- 14-ounces sweetened condensed milk
- ¼ teaspoon sea salt
- 1 cup chopped walnuts
- 1 teaspoon vanilla extract
Instructions:
- Melt the chocolate and the condensed milk with the salt together over medium/low heat in a medium saucepan for about 5-10 minutes until smooth.
- Stir in the vanilla and walnuts, then pour the fudge mixture into an 8×8 pan that’s either greased or lined with parchment paper.
- Let the fudge chill for 2 hours and slice.
To Freeze:
Prepare the fudge as directed, then place them in an airtight container and store them in the freezer for up to 3 months.
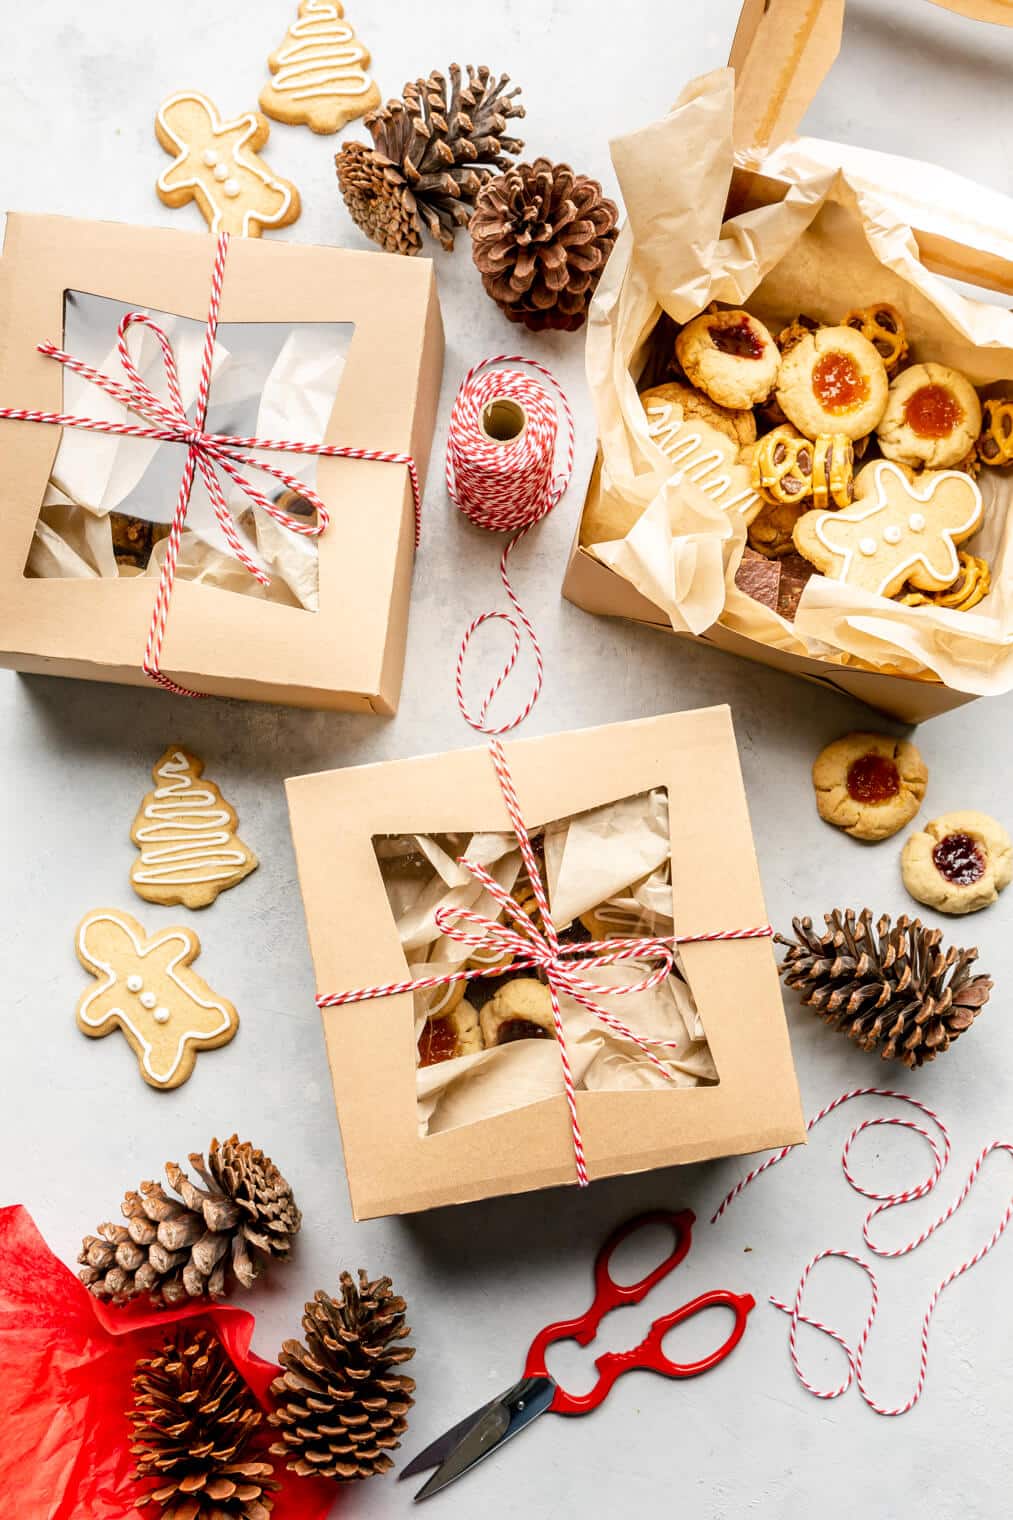
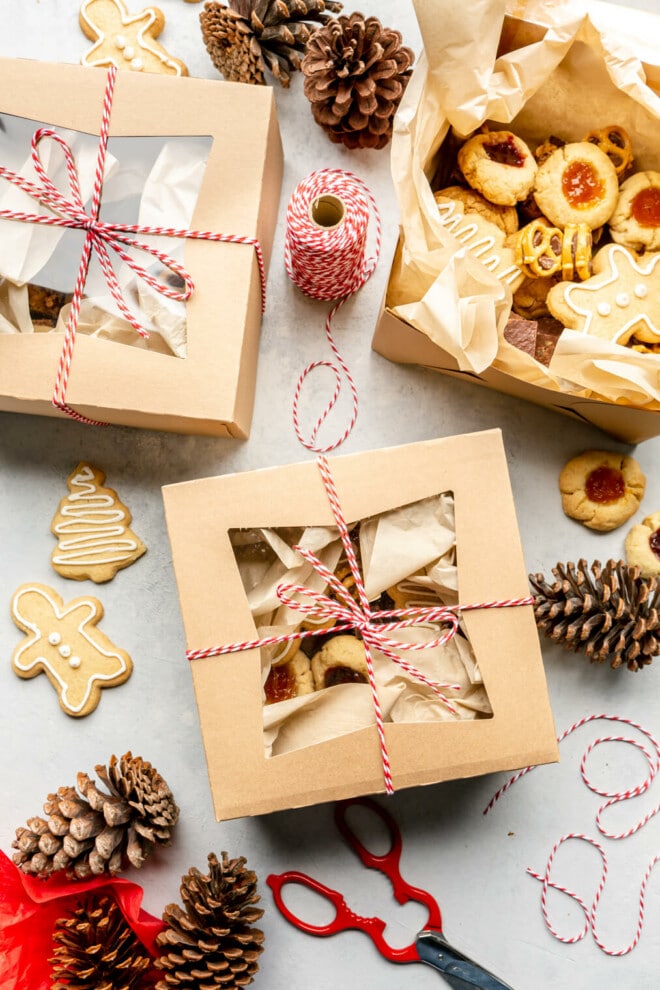
Christmas Cookie Box Supplies Needed
In addition to your ingredient shopping list (which is included in the FREE eBook below), here is a quick list of supplies you may find helpful in building your cookie boxes:
Supplies Needed for Holiday Cookie Boxes:
- Gift Packaging Box with Window (we searched far and wide – these are the BEST!)
- Tissue Paper (I love a red paper!)
- Twine (to close the box and also wrap cookies together)
- Labels (to print your cookie list on)
- Template for Labels (provided in the free eBook below)
Here are a few kitchen equipment supplies you may consider grabbing as well:
- Baking Sheet
- Silicone Spatula
- Hand Mixer
- Glass Bowls
- Measuring Cups
- Measuring Spoons
- Parchment Paper
- 8×8 Baking Pan
- 9×13 Baking Pan
- Cooling Rack
- Cookie Cutters
- Rolling Pin
- Metal Spatula
- Cookie Scoop
The Best Cookies for a Holiday Cookie Box
I like to think that the best cookies for a holiday cookie box are those that will hold up to being lightly tossed around. While there’s a way to package more delicate cookies (in tissue, for example), the fuss is extra work. I’m a big fan of choosing cookies that are big on flavor, easy on time, and easily transported.
Kinds of Cookies to Consider:
- Chocolate Chip Cookies
- Gingerbread Cookies
- Sugar Cookies
- Thumbprint Cookies
- Fudge
- Bars
- Bark
- Hard candies (like candy canes)
- Caramels
- Toffee
Can you bake cookies and then freeze them?
You can absolutely bake your cookies in advance and then freeze them after! My grandmother, Grandma Lois, was an absolute (all jokes aside) PROFESSIONAL when it came to Christmas Cookie Season. She started her cookie baking months in advance and froze them over time. She even had a chest freezer installed to help hold them all.
The best way to make and then freeze your cookies:
- Make your dough as you planned. If your dough needs to be chilled before baked, you can also just freeze your dough! This is how I prep my chocolate chip cookies, in fact.
- Bake your cookies, let them cool completely (to avoid moisture build up in the freezer), then transfer to an air-tight bag and freeze solid. I recommend separating cookies in layers with parchment or wax paper.
- If your cookies need frosting on them (like gingerbread or sugar cookies), I recommend freezing them “naked” and then frosting just before you box up your cookies. Icing and frostings are better fresh, in my opinion.
Here are a few tips on how to make each of the treats in my list ahead of time:
- Chocolate Chip Cookies: make the dough and freeze in rolls, slice into rounds and bake the day before you send.
- Sugar Cookies: bake and freeze, ice a few days before gifting.
- 7 Layer Magic Bars: make in its entirety, freeze as a solid batch, let it thaw in the fridge overnight, then cut into squares for your cookie boxes.
- Thumbprint Cookies: bake totally, as written (jam included) and freeze.
- Pistachio Bark: make it in it’s entirety, freeze as a solid sheet, then break as you put into your boxes, no need to defrost before.
- Fudge: make and then freeze in the pan, thaw in the fridge overnight, slice and the put into your boxes.
- Rolo Candies: while they do freeze, I recommend just making them the day before
How do you assemble a Christmas Cookie Box?


To assemble your cookie box, I recommend the following order:
- A layer (or two) of tissue paper.
- The sturdier cookies on the bottom (7 Layer Magic Bars, Chocolate Chip Cookies, fudge)
- The less sturdy cookies next (Thumbprint Cookies, bark, and Sugar Cookies)
- The easy candy sprinkled on top (Rolo Pretzels)
It’s also fun to wrap little stacks of cookies together in pieces of twine to help break up the box, if you like. Some cookie boxes have little compartments in them, but I’ve always found these boxes to be VERY expensive for a one-off gift. The cardboard boxes I use are much more cost-effective, still cute, and still sturdy if you pack them well.
Lastly, place your label on the box that identifies what’s within, wrap with twine, and then you’re done!
How much does it cost to ship a Christmas Cookie Box?
If you’re planning to ship your cookie box (I’ve done this many times!), I have some advice for you! While you may be able to find a perfectly-fitting box, I’ve found that it tends to be more expensive to ship in a non-standard box than it is to ship in a USPS Priority Flat Rate Box.
If you use the cookie box with the window that I have linked here, it will fit perfectly in a medium priority flat rate box – you will just need a little tissue to pack on top to keep it from sliding. The cost to ship each cookie box in a medium flat rate box is $14.
Who should I gift a Christmas Cookie Box to?
If you’re feeling a little stuck on who may be a good candidate for a cookie box this year, here’s an example of the people I always consider:
- Extended family members (I usually make 1 box per family unit, and will sometimes throw in a bone for 4 legged family members)
- Co-workers
- Pastor
- Mail Delivery Professional
- Post Office Professional (we know ours well!)
- Teachers
- Baby Sitters
- Professional Mentor
- Industry Partner
- House Cleaner and/or Office Janitor
- Building Security Person
- Nearby Fire Department
- Coaches
- Garbage and Recycling Professionals
Don’t forget to check out the FREE holiday cookie eBook here!


I didn’t see the link to the free ebook. Is it no longer available?
Hi Sam! You can get the eBook HERE.
yes please
Thanks for the idea! I was struggling with what to send as a thank you to some folks I volunteer with and this was perfect! I made five of the recipes and they were great. The magic layer bars were delicious. The thumbprint cookies spread all over my baking tray, so not sure what happened there. However, I just let them cool and broke them up into pieces and they tasted great. My daughter said they’re actually her favorite! I also love the suggestion with how to package and ship everything. Very well thought out!
We are so glad that this was helpful and gave you some ideas, Heidi! Thank you so much for taking the time to share with us. Happy holidays! -Team FF