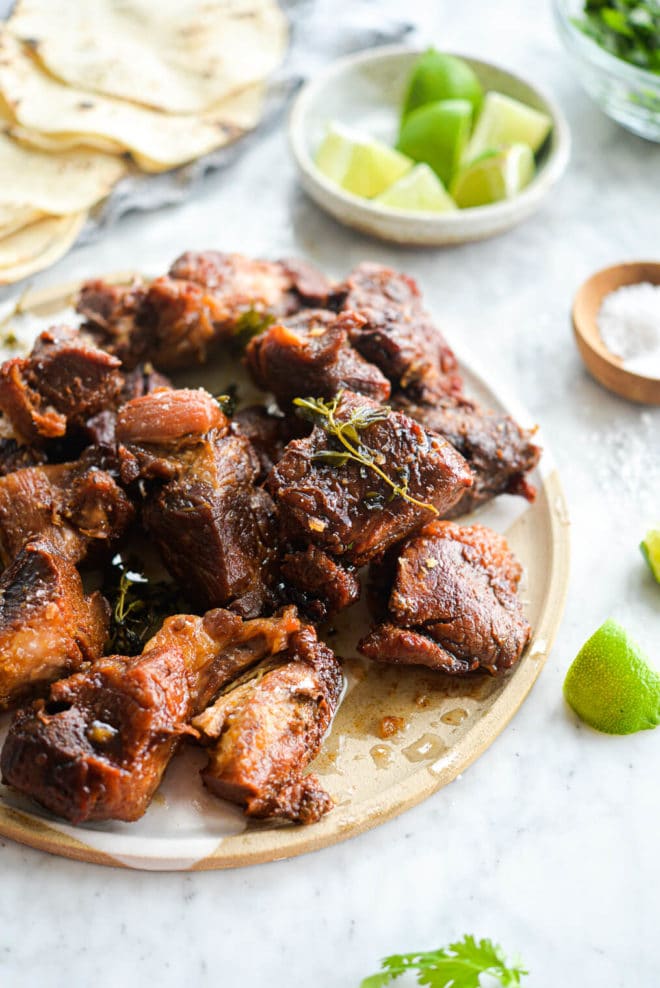
These yummy authentic carnitas are perfectly tender and juicy on the inside with a nice crisp on the outside!

This recipe is derived from Cassy’s family recipe notes! Unlike modern adaptations that require a slow cooker (or Instant Pot) and then a crisp in the oven, this method happens all in one pot, slowly, over time. The pork is actually boiled in pork fat, which is what gives the carnitas their incredibly tender and massively flavorful finish.
What Are Carnitas?
Carnitas actually means “little meats” in Spanish and is a wildly popular Mexican dish. It’s essentially pork shoulder/butt (one of the fattier cuts of pork) that has been cooked until super tender, shredded, and then crisped. Traditionally, this all happens in a pot of lard (pork fat), but many recipes (including several on FedandFit.com) call for omitting the lard, cooking the pork shoulder in the slow cooker or Instant Pot, shredding it, drizzling it with butter, and then crisping it in the oven.
Ingredient Notes
Below, you’ll find everything you’ll need for authentic carnitas. The list may feel intimidating to you if you haven’t purchased some of these items before, but everything should be available in your local grocery store:
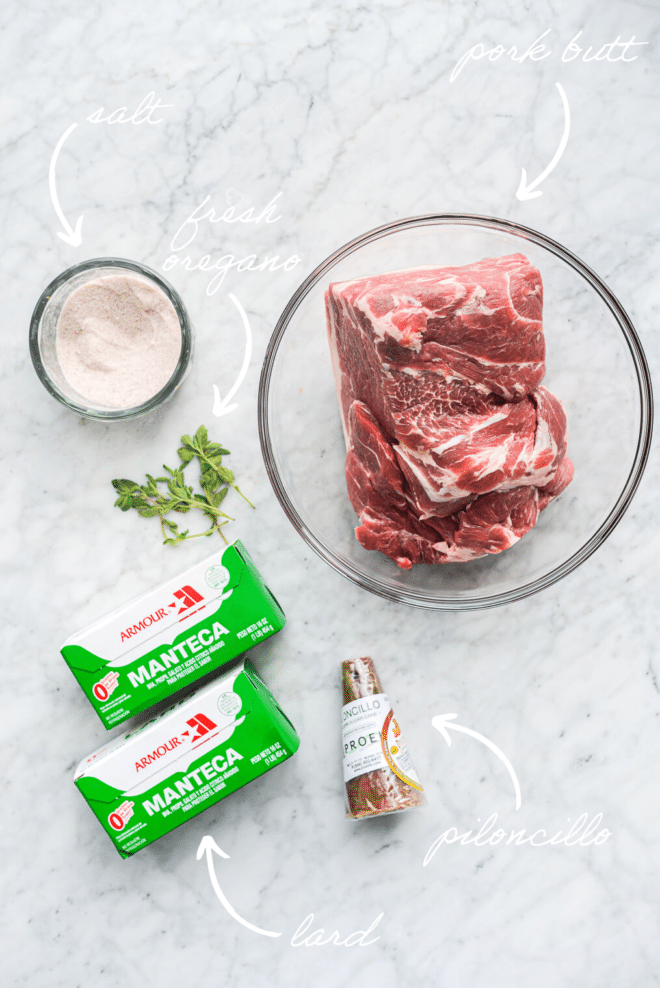
For the Carnitas
- Pork Butt – to start, you’ll need 1 (6-pound) pork butt cut into 2- to -4 inch pieces.
- Lard – because this is a traditional carnitas recipe, you’ll also need lard. About 2 pounds of lard will do the trick.
- Fresh Oregano – 4 sprigs of fresh oregano adds some really delicious flavor to the finished carnitas.
- Piloncillo – traditional carnitas also have a hint of sweetness from Mexican sugar cone (also known as piloncillo). You’ll need a ½ cup of chopped piloncillo here.
- Salt – to counter the sweetness and enhance the flavors here, you’ll need one tablespoon of salt, plus more to taste.
For Serving (optional)
- Corn Tortillas – for serving, you’ll need toasted corn tortillas.
- Cilantro + Onion Pico – to garnish your carnitas tacos, finely chop ½ an onion and ½ of a cup of cilantro to form a cilantro and onion pico.
- Limes – grab some fresh limes for serving too!
How To Make
Here’s how you’ll bring together this really delicious authentic carnitas recipe:


- Add the pork and lard to a pot – to a large pot over medium heat, add the cut up pork to the pot followed by the lard.
- Boil – put the lid on the pot, and bring the lard to a boil over medium heat. Let the pork boil in the lard for 45 minutes.
- Add the oregano, sugar, and salt – once the 45 minutes is up, add the sugar, oregano, and salt to the pot, stir, and continue to boil for another 45 minutes (or until all of the carnitas pieces have a light golden brown color) uncovered.
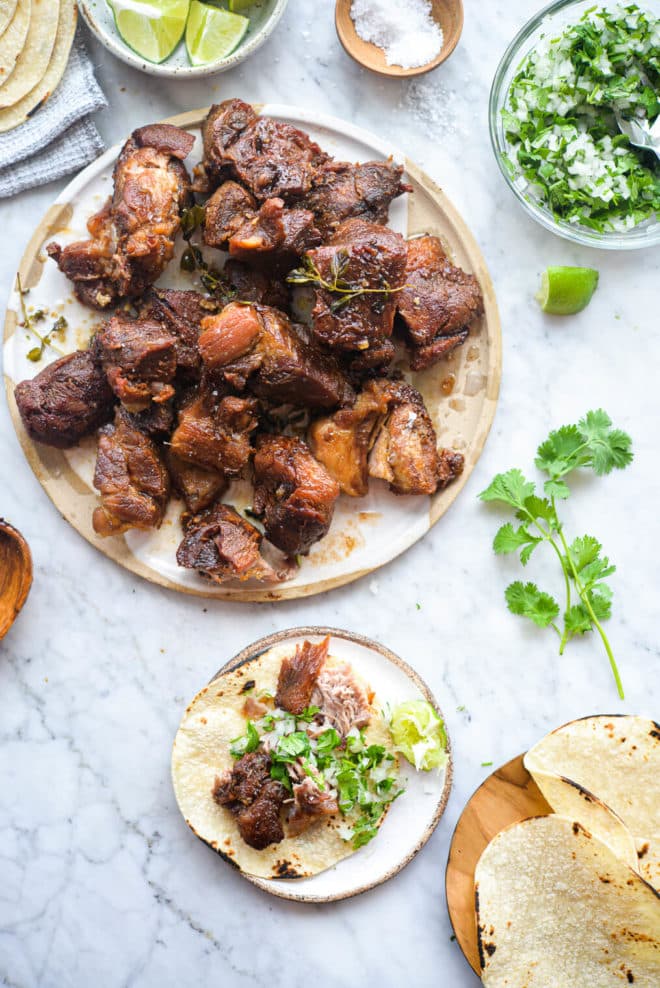
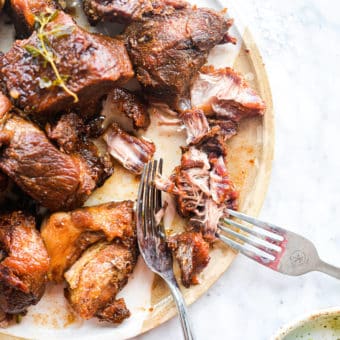
- Shred and serve – remove the carnitas from the pot, break the pieces apart with a fork, and serve in toasted corn tortillas topped with the onion and cilantro pico, a fresh squeeze of lime, and a sprinkle of crunchy sea salt.
Recipe Tips and Tricks
Here are a few tips and tricks for the best authentic carnitas possible:
- Trust the process – even though you might be tempted to cook the carnitas longer or until they develop a darker color, that can actually make the meat more tough than tender. Once you see the tops of the carnitas pieces turning a light golden brown, they’re done. (The entire piece of pork does not have to be dark brown.)
- Reuse the lard – if you plan to make this recipe (or another that calls for lard) often, save and reuse the lard. To do this, skim off the solids, let the lard cool slightly to handling temperature, and then pour it into a large mason jar or another similar glass vessel. Refrigerate and use within 2 weeks!
- Toss the bone in the pot too – if you do have a bone-in pork shoulder/butt and you can’t get all of the meat off of it, add the bone to the pot with the other pieces — the meat will fall off of it during the cooking process!
- Use brown sugar, honey, or maple syrup – if you can’t find piloncillo, use either an equal amount of brown sugar or a ¼ cup of honey or maple syrup instead.
- Use dried oregano instead of fresh – feel free to use 2 teaspoons of dried oregano if you don’t have (or can’t find) fresh oregano.
How to Serve
Serve your carnitas taco-style (like we did here), on top of nachos, or as the protein in a burrito bowl (think: rice, beans, carnitas, and veggies topped with guacamole and sour cream…YUM!).
How to Store and Reheat
Store leftover carnitas in an airtight container in the refrigerator. Reheat them in the microwave (least crispy reheat), on a sheet pan in the oven, or in a pan on the stovetop with oil (oven and stovetop methods will make for the crispiest reheat).
You can freeze your pork carnitas, but just know that the thawed and reheated carnitas may not be as crispy as they would be right out of the pot. For the crispiest texture possible, pop the thawed carnitas on a sheet pan in the oven to warm and crisp!
Recipe Frequently Asked Questions
What cut of meat is carnitas?
If you’re browsing the meat selection at your local grocery store, you may notice packages of pork labeled “carnitas.” This is actually just precut pieces of pork shoulder/butt. Feel free to grab the precut pack or, to save some money, just buy a pork shoulder/butt and chop it yourself — either way, you’ll need about 6 pounds of pork.
Do you use boneless pork or bone-in pork to make carnitas?
Because you’ll need to cut your pork into chunks before starting the cooking process, either one of these will work just fine. I typically gravitate toward boneless for this application because it tends to just make the entire process easier, but if you don’t mind cutting around a bone, that works too!
Can I make carnitas ahead of time?
Typically in a non-traditional carnitas recipe (like this Instant Pot Carnitas recipe), we’d recommend cooking your pork ahead of time in either the Instant Pot or slow cooker but waiting for the “crisping” step (drizzling melted butter over the shredded pork and letting it crisp in the oven) for the day-of.
Because both the cooking and crisping happens in the same pot (at, essentially, the same time) here, this carnitas recipe will definitely be *best* cooked just before serving. That’ll yield the crispiest, most delicious authentic carnitas possible. If you do have leftovers, though, the best way to reheat them from the refrigerator is to spread them out evenly on a sheet pan, drizzle with melted butter (if desired), and pop into the oven at 375°F for 20 minutes or until totally warmed through. Reheating this way will help to dehydrate any moisture from the fridge.
Authentic Crispy Carnitas Recipe
Ingredients
- 1 6-pound pork butt, cut into 2- to -4 inch pieces
- 2 pounds lard
- 4 sprigs fresh oregano
- ½ cup about 2.6 ounces piloncillo, chopped or grated
- 1 tablespoon salt
For Serving (Optional):
- Corn tortillas toasted
- ½ onion finely chopped
- ½ cup cilantro finely chopped
- Lime wedges
- Flaky sea salt
Instructions
- To a large pot over medium heat, add the pork, followed by the lard.
- Place the lid on the pot, and let the pork boil in the lard for 45 minutes.
- Once the 45 minutes is up, add the sugar, oregano, and salt to the pot, stir, and continue to boil for another 45 minutes (or until all of the carnitas pieces have a light golden brown color) uncovered.
- Remove the carnitas from the pot, break the pieces apart with a fork, and serve in toasted corn tortillas topped with the onion and cilantro pico, a fresh squeeze of lime, and a sprinkle of flaky sea salt.
Recipe Notes
- Trust the process – even though you might be tempted to cook the carnitas longer or until they develop a darker color, that can actually make the meat more tough than tender. Once you see the tops of the carnitas pieces turning a light golden brown, they’re done. (The entire piece of pork does not have to be dark brown.)
- Reuse the lard – if you plan to make this recipe (or another that calls for lard) often, save and reuse the lard. To do this, skim off the solids, let the lard cool slightly to handling temperature, and then pour it into a large mason jar or another similar glass vessel. Refrigerate and use within 2 weeks!
- Toss the bone in the pot too – if you do have a bone-in pork shoulder/butt and you can’t get all of the meat off of it, add the bone to the pot with the other pieces — the meat will fall off of it during the cooking process!
- Use brown sugar, honey, or maple syrup – if you can’t find piloncillo, use either an equal amount of brown sugar or a ¼ cup of honey or maple syrup instead.
- Use dried oregano instead of fresh – feel free to use 2 teaspoons of dried oregano if you don’t have (or can’t find) fresh oregano.


This was the one that started it all for me… I made this about 4 yearsish ago, and now have probably made about two dozen CJ recipes. This is still one of the most delicious things I can whip together. Thanks! Now I just need a good game of Wordle while I enjoy it.