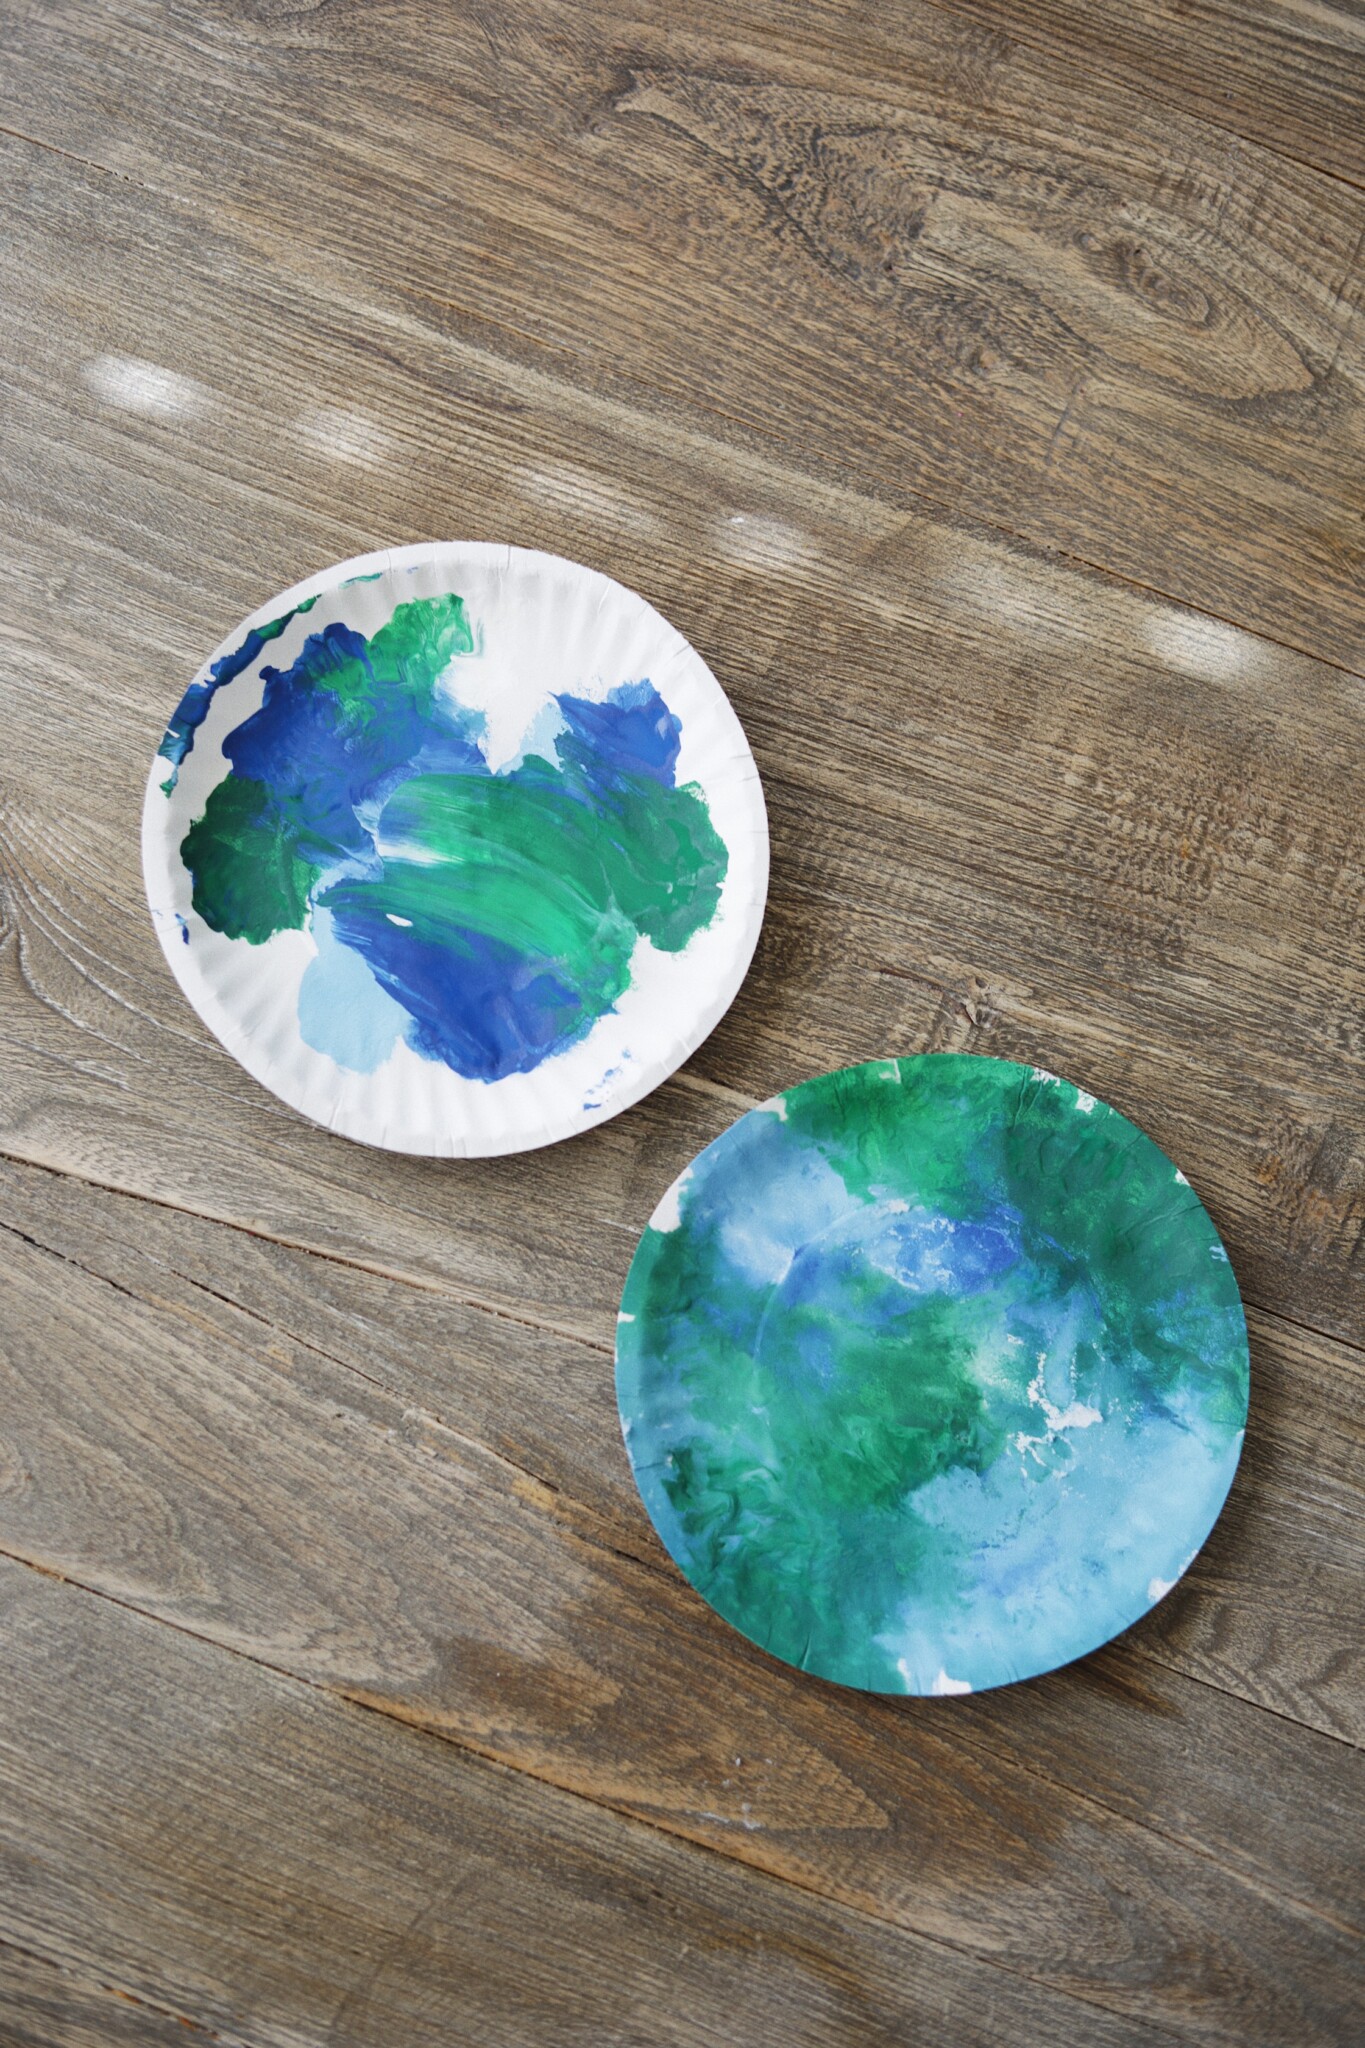
These Earth paintings are such a fun way to get crafty with your favorite kiddos – plus, the end result is a precious masterpiece that you’ll be so proud to hang on the fridge!
Earth Paintings
These Earth paintings are such a fun way to get kiddos involved in a little bit of messy (but not too messy) exploration and fun. One of the neatest things about this craft is that you don’t even need a paint brush to bring it together – it’s essentially finger painting with a lot less mess. Grab your favorite kiddos (whether that’s your own children or your nieces, nephews, students, etc.) and a few artsy supplies, and let them run with it!
This craft is brought to you in *very* proud partnership with our very favorite safer cleaning company, Branch Basics. Get crafty with your favorite kiddos and then let them in on the safer clean-up!
Supplies Needed for Earth Paintings
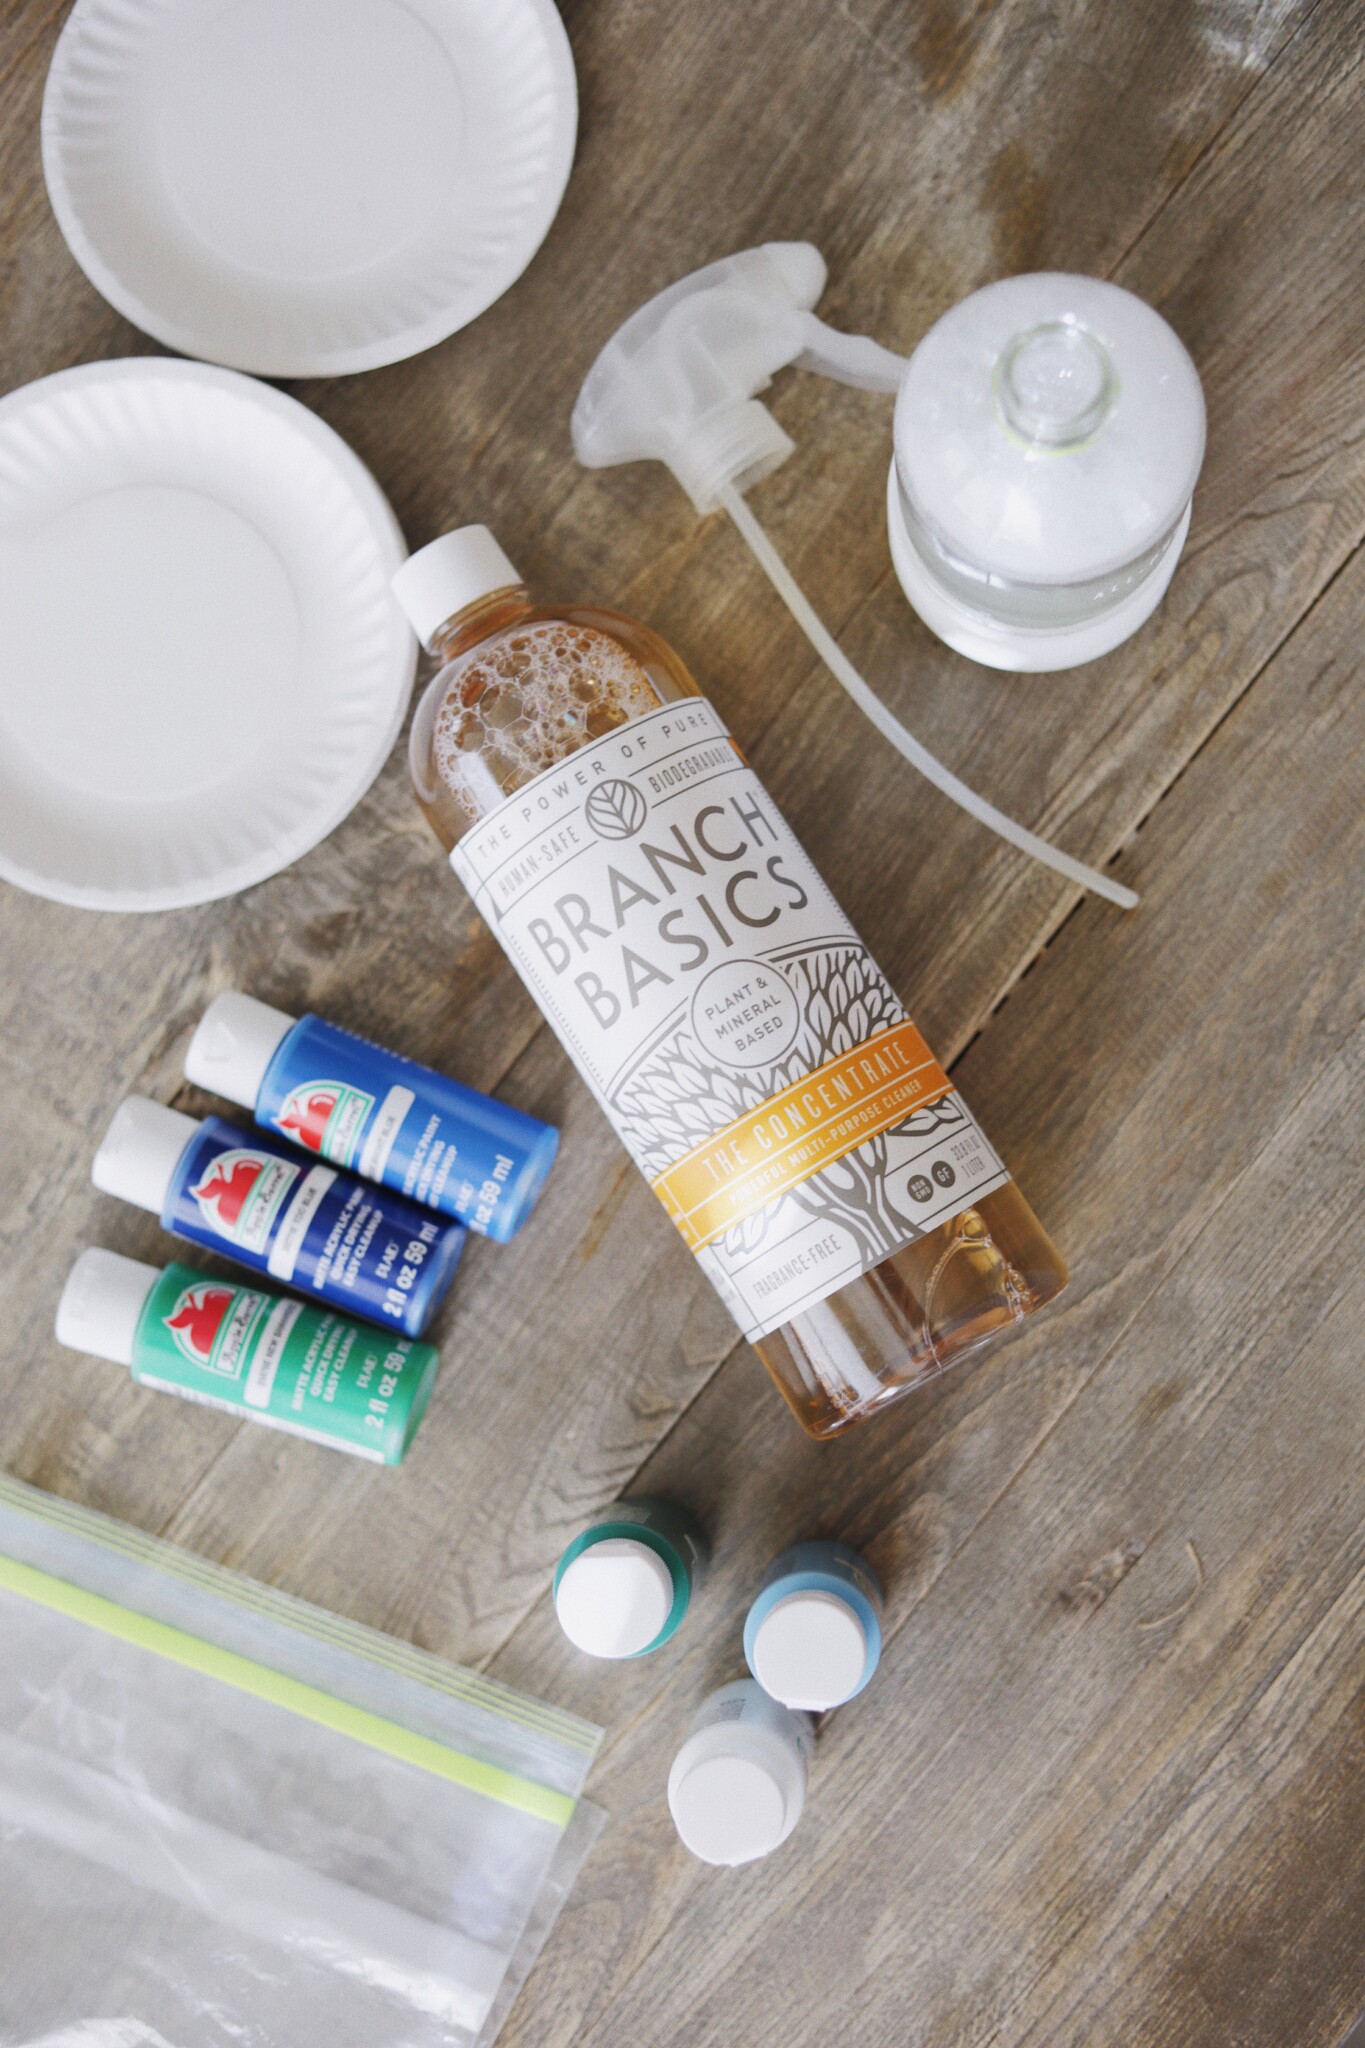
This craft calls for 3 super simple supplies – here’s everything you’ll need to bring it to life:
- Gallon Bags – to start, you’ll need a 1 gallon bag per crafter.
- Paper Plates – each crafter will also need a paper plate – we stuck to 6-inch plates here so that they would for sure fit inside the gallon bags, but feel free to use whatever you have on hand.
- Blue and Green Paint – because these paintings are supposed to resemble the Earth, you’ll just need two paint colors – blue and green!
How to Make Earth Paintings at Home
The process is almost as simple as the supply list. Follow-along here:
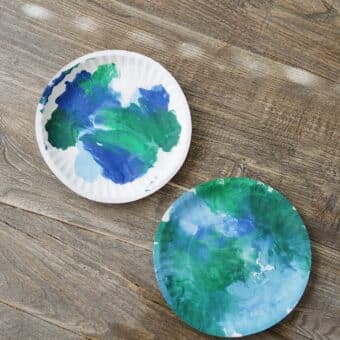
- Place the paint on the plates – to start, squeeze a little bit of both the green and blue paint onto the paper plates. If your kiddos are older, they can absolutely help with this step, but if your kiddos are little (and will have a hard time keeping their hands out of the paint), this is something you can do ahead of time.
- Place the plates inside the bags – once you’ve got a squirt or two of each color on the paper plates, slide them into the large baggies, then zip up the bags, trying to remove as much air from them as possible.
- Finger paint – let your kiddos squish and spread the paint around on the plates (with the bags acting as a barrier) – this is the fun part!
- Remove and let dry – remove the plates from the bags (knowing that you may get paint on yourself in the process) and either hang or lay on an old towel or t-shirt to let dry.
Cleaning Up the Mess
While this craft is about as clean as they come, there’s definitely still potential for a mess, but here’s the good news: CLEAN UP can be easy (and safe) too. We used Branch Basics concentrate + water to make their all-purpose cleaner, and it did the job perfectly! Plus, because of the natural formulations of Branch Basics products, you can totally get your kiddos in on the clean-up action too.
If you’re interested in cleaning up more of your cleanup (it’s easy, safe, cost-effective, and actually works, I promise!), use code FEDANDFIT for 15% off of a Branch Basics Starter Kit.
Video
Earth Paintings
Ingredients
- Paper Plates 1 per crafter
- Blue and Green Paint
- Gallon Bags 1 per crafter
Instructions
- To start, squeeze a little bit of both the green and blue paint onto the paper plates. If your kiddos are older, they can absolutely help with this step, but if your kiddos are little (and will have a hard time keeping their hands out of the paint), this is something you can do ahead of time.
- Once you’ve got a squirt or two of each color on the paper plates, slide them into the large baggies, then zip up the bags, trying to remove as much air from them as possible.
- Let your kiddos squish and spread the paint around on the plates (with the bags acting as a barrier) – this is the fun part!
- Remove the plates from the bags (knowing that you may get paint on yourself in the process) and either hang or lay on an old towel or t-shirt to let dry.