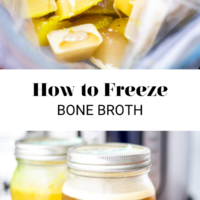
Bone broth is the perfect staple to keep on hand, and this easy-to-follow freezing process ensures you can have broth on hand all year round!
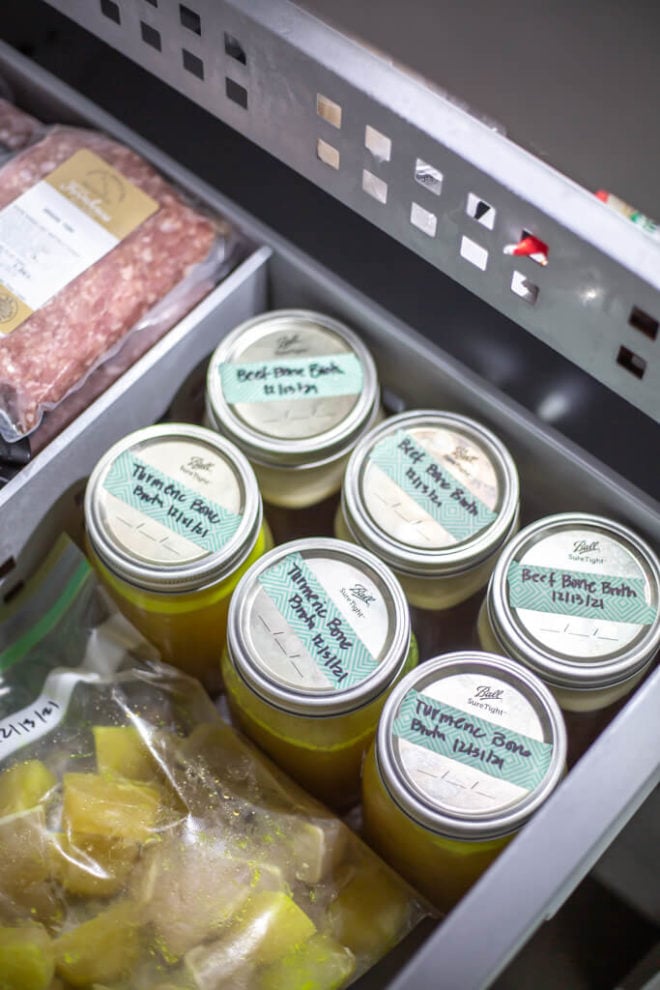
Table of Contents
Origins of Bone Broth
Bone broth has been around for over 2,500 years, with roots in Asian and Greek cultures, and has become a staple in many cultures around the world. Bone broth goes by many names – the French call it “bouillon,” the Spanish and Portuguese call it “caldo,” and in Italy, it is referred to as “brodo.” It can be found in many traditional Asian meals and makes up the base for various soups. Bone broth has long been known for its bountiful health benefits and versatility.
Bone Broth Recipes
There are so many ways to make bone broth, but it does not have to be complicated! Check out our really simple how-to and tasty recipes here:
What are the benefits of bone broth?
Along with the health benefits of bone broth (it’s loaded with essential vitamins and minerals), making bone broth is the true practice of nose-to-tail cooking since you’re using parts of the animal that would otherwise be thrown away or are commonly thought of as inedible. Here are some additional benefits of bone broth:
- Builds and strengthens bones – trace minerals (like calcium, magnesium, and phosphorus to name a few) are extracted into the broth in the cooking process. This adds nutrients to the broth that help build and strengthen your bones.
- Supports joint health – glucosamine and chondroitin are released from the connective tissues during the cooking process and help support overall joint health.
- Strengthens hair, skin, and nails – with the combination of collagen and amino acids, bone broth is great for strengthening your hair, skin, and nails.
- Supports digestion – the gelatin in bone broth makes it easy to digest and soothing for the digestive system.
- Anti-inflammatory – anti-inflammatory compounds found in the amino acids in bone broth have been researched and shown to help combat inflammation in the body.
How to Freeze Bone Broth
There really isn’t a “wrong” way to freeze bone broth, but these are tried and true methods that make keeping bone broth on hand in the kitchen so convenient!


Option 1: Ice Cube Trays
This process is probably the most cumbersome (since you have to fill trays, freeze, pop out the cubes, and transfer into a storage container or bag for the final storage), but it’s also the most flexible because you can grab and reheat smaller portions at a time. A silicone tray works really well here to make it easier to unmold the cubes.
Supplies Needed
How to Freeze
- Allow bone broth to cool – allow your bone broth to cool to room temperature before pouring and placing it in your freezer.
- Pour and fill – pour the bone broth into the trays, filling each section approximately ¾ full.
- Freeze – place your trays in the freezer and allow to freeze completely (about 6 hours).
- Label – label your freezer bag(s). It’s good to include the name (bone broth), the date you cooked it, and the portion size of the ice cubes (the last part makes it super easy to thaw out your desired portions without any guesswork!).
- Remove and transfer – once frozen, unmold your bone broth cubes from the tray and transfer them into your labeled freezer bag.
- Store – store in the freezer for up to 1 year.
Option 2: Gallon Bags
Freezing bone broth in gallon freezer bags is arguably the quickest method, but also the most difficult to use afterward for a couple of reasons. One being that your broth is stored in a large quantity (that you may or may not use all at once), and the other is that it is difficult to utilize if all of the broth isn’t fully defrosted. However, if you are planning on using large quantities of broth at a time or like the efficiency of being able to simply pour and store your broth, this may be a great method for you!
Supplies Needed:
How to Freeze:
- Allow bone broth to cool – allow your bone broth to cool to room temperature before pouring and placing it in your freezer.
- Label – label your freezer bag(s). It’s good to include the name (bone broth), the date you cooked it, and the quantity of broth (this last part makes it easy to remember how much broth is in each bag for thawing purposes).
- Pour and seal – pour the bone broth into your gallon size bag(s) and seal them.
- Freeze – to save space, lay your bags flat in your freezer to freeze.
- Store – store in the freezer for up to 3 months.
#3: Plastic Jars
While this is not Cassy’s personal preference, it is absolutely an option to store and freeze your bone broth in plastic jars. Many people worry about glass jars breaking in the freezer (but we are going to share a method next that gives you the best odds against the jars breaking), and this method eases any worry that your broth may be rendered useless if the container breaks.
Supplies Needed:
How to Freeze:
- Allow bone broth to cool – allow your bone broth to cool to room temperature before pouring and placing it in your freezer.
- Label – label your plastic jars using the painters tape or mailing labels. It’s helpful to include the name (bone broth) and the date you cooked it.
- Pour and fill – pour the bone broth into your plastic jars, leaving about 1” of space from the top to allow room for the broth to expand as it freezes.
- Close and freeze – screw the lids on your plastic jars and place them in the freezer.
- Store – store in the freezer for up to 3 months.
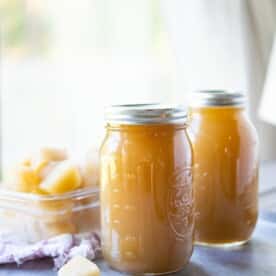
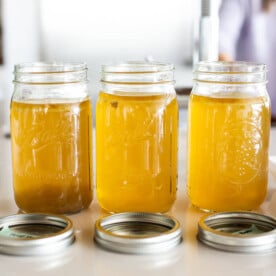
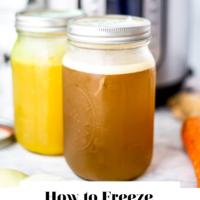
#4: Glass Mason Jars
This is our preferred method! Full details below on how to do this and better your odds against the jars breaking.


Supplies Needed:
- Glass mason jars (see tips below for the best mason jars)
- Painters tape or mailing labels
- Permanent marker
How to Freeze:
- Allow bone broth to cool – allow your bone broth to cool to room temperature before pouring and placing it in your freezer.
- Label – label the lids of your glass jars using painters tape or mailing labels (you can also just write directly on the lid). It’s helpful to include the name (bone broth) and the date you cooked it.
- Pour and fill – pour the bone broth into your mason jars, leaving at least 1” of space from the top to allow room for the broth to expand as it freezes.
- Semi-Close and Freeze – gently screw the lid on your mason jar (but don’t seal it all the way tight–this acts as a defense to help ensure your jars don’t break), then place your mason jars upright in the freezer.
- Tighten the lid – after 24 hours, once your broth is completely frozen, tighten the lid on the mason jar.
- Store – store in the freezer for up to 3 months.
Tips for Freezing in a Mason Jar Without Them Cracking or Breaking
- Use the right jars – the most ideal jar to use is to use one without shoulders (also known as a “widemouth jar”)! Shoulders are where the jar tapers up towards the lid, becoming more narrow. Because the surface of the broth freezes first (like on a lake), the liquid beneath it needs a place to expand once it also freezes. If there’s a pressure point (like at a shoulder) it could cause the jar to crack. If you are using a jar that has shoulders (I use them all the time), be sure to leave about 1″ of room between the top of your liquid and the beginning of the shoulder.
- Let your broth cool completely – make sure your broth is COMPLETELY cooled before putting it in the freezer. Waiting until it’s warm (or at handling temperature) is not enough. It needs to be totally cool!
- Freeze unsealed first – pop the lid of your jar so it can freeze without being totally sealed for the 1st 24 hours. Once frozen, screw it on tightly.
- Spread out the jars – to allow as much frozen air to circulate around the jars as possible, spread the jars out out in the freezer as much as possible. You can always transfer them to a single row or grouping once frozen to stay organized later, but to freeze them at stable temperatures (bettering your odds against breaking glass), this will help.
- Follow the instructions – we know that Ball/mason jars include instructions and notations if they’re freezer safe, follow those!
How to Reheat Bone Broth from Frozen
To reheat your bone broth, defrost it in the refrigerator overnight, then reheat it either in a pot on the stovetop or in the microwave until warmed through.
What are some ways to use bone broth?
Bone broth is so universal and can be used in countless different ways.
- Drink it. Bone broth makes for a delicious beverage on its own. Try adding a pinch of sea salt and squeeze of fresh lemon juice to reinvigorate the flavors and add brightness to the broth.
- Use it as a soup base. Use your bone broth in your favorite soup recipe to give a little extra nutritional punch.
- Make gravy. Bone broth makes a really tasty base to a flavorful gravy that makes the perfect accompaniment to any dish (my personal favorite, mashed potatoes!).
- Bone broth rice. One of my favorite ways to use bone broth is to make rice. Simply replace your water with broth 1:1.


Hello, thank you for your great tips. wish I had read this earlier. A while ago, I made bone broth and freezed them in reused glass jars (I know). There were four total. I finished three out of four. I decided to grab the fourth one and realized the center part of the lid wasn’t pushed in – I could pop it. (Looking back I don’t think this was any issue with the others). Is this a concern for possible botulism?
hi! is there a reason that the broth frozen in ice cube trays lasts a year in the freezer vs the other methods which only last 3 months? thank you!