Today we’re talking about another fabulous book! The talented Kelly Brozyna of The Spunky Coconut has done it again, folks. Her latest book, Dairy-Free Ice Cream, contains 75 ode-to-the-freezer recipes that are all egg, gluten, soy, and refined sugar-free.
In this book, Kelly walks us through her passion for frozen treats, why her family sought health through healing foods, and the delicious history of ice cream.
I have to confess …before Kelly’s book, Paleo-friendly ice cream was lost on me. I’ve owned an ice cream maker for about one year and after many “just wing it” attempts at my own ice creams and sorbets, I realized a quality recipe needed more research than I’d devoted.
I’ve got good news, though! Kelly has done the work for us and simplified the process so you will feel like a natural. Best yet, the ice cream is so delicious and so closely resembling its dairy & refined sugar-filled cousins, that your family will gobble it up without thinking twice.
Are you active on the Fed & Fit Facebook page? If so, great! Check the page for a chance to win a copy of Kelly’s new book.
You can also order your very own copy here.
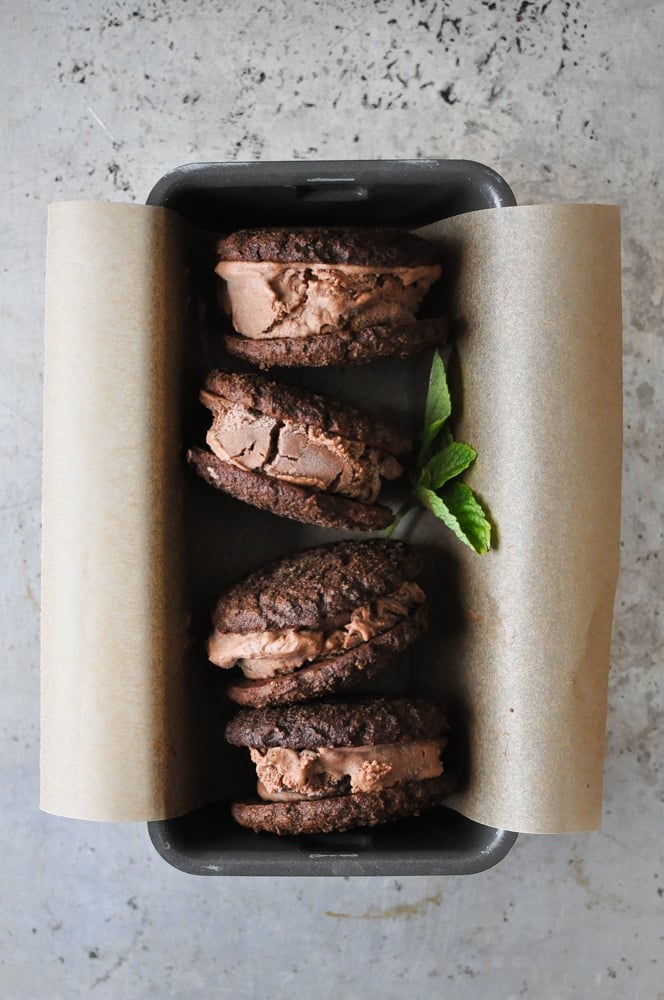
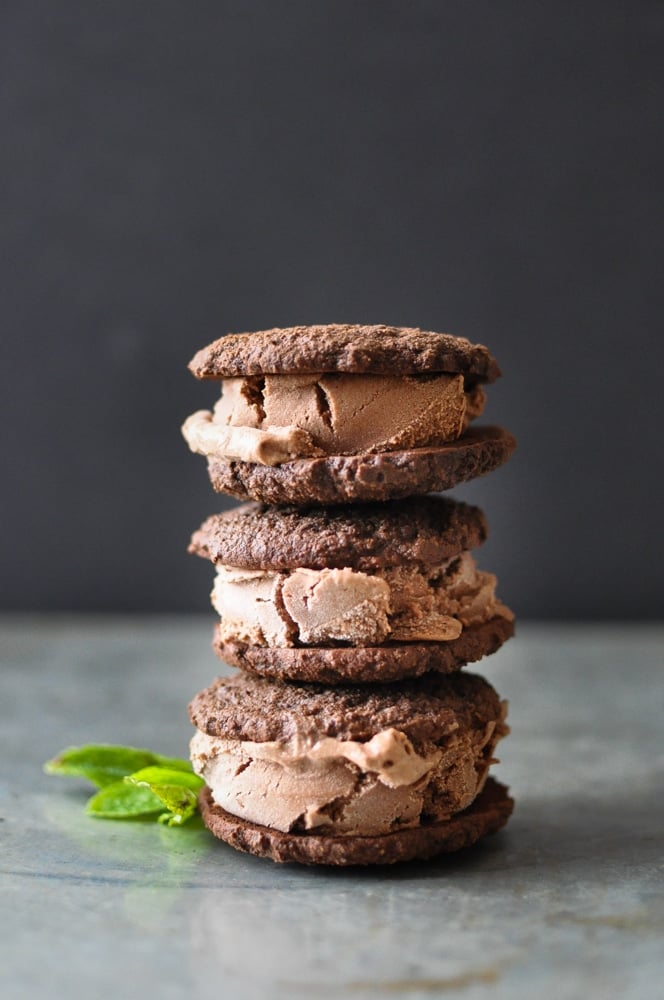
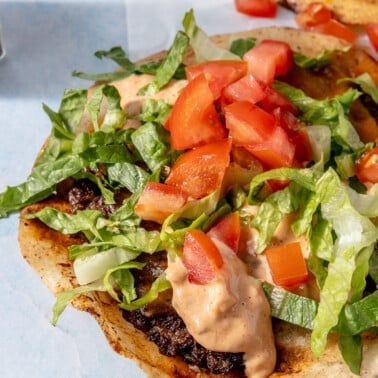
When I was presented with the opportunity to feature a recipe from this fabulous book, I HAD to showcase one of the ice cream sandwiches. How could I not? In my opinion, an ice cream sandwich is (by far) the best frozen snack of all time.
Throw some chocolate, some mint, and some “whoopie pie” in the title and you’ve got yourself a completely irresistible dessert.
Whether you’re wanting to stock your freezer with a quick, pre-portioned sweet treat for the occasional indulgence (like me) or you’re preparing for a big summer BBQ and don’t want to have to worry about making dessert day-of, these frozen whoopie pies will be a crowd-pleaser in any occasion.
Let’s get started with these Frozen Mint Chocolate Whoopie Pies!! It involves a few steps but in the end, you’ll be really, REALLY pleased with the results. You will also be pleased while you work because I know you, and I know you’re going to sample each part as you go. After all, sampling is an important part of the cooking process — for quality control and for soothing impatient, hungry cooks.
Note: Because many of the components have to set, freeze, be ready for assembly, and then freeze again, you may want to spread making these out over two days. I made the ice cream on day one and the cookies/whoopie pies on day two.
First, we’re going to make the chocolate ice cream! Isn’t this exciting?!
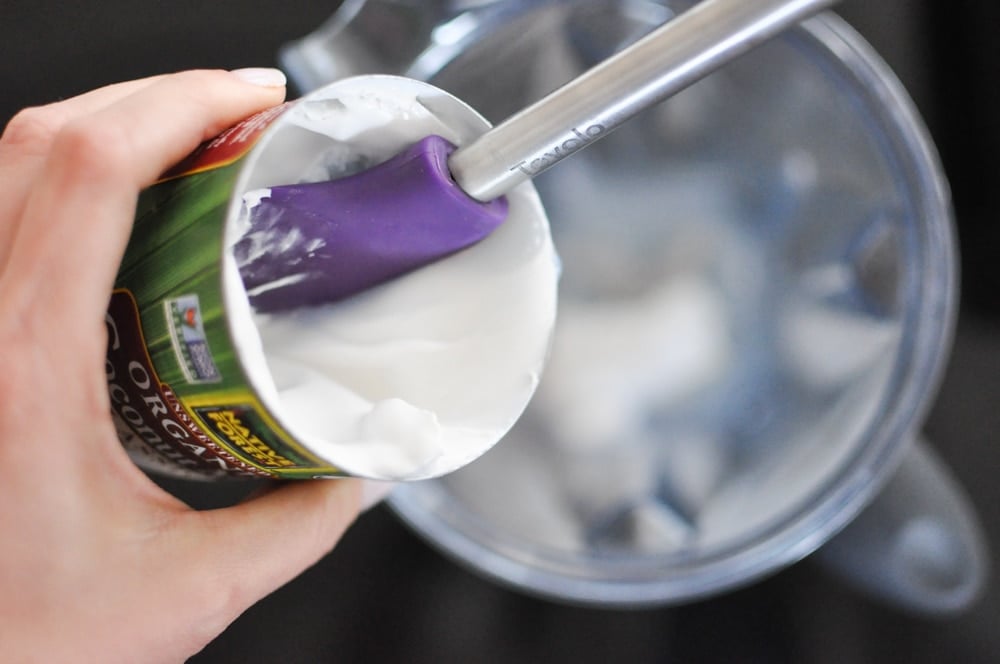
The liquid base of this ice cream is a mixture of both full-fat coconut milk and some almond, cashew, or hemp milk.
This is the brand of canned coconut milk I prefer. You can find it here or at Whole Foods.
Pour the contents of the can into a blender – make sure you scrape out all the solidified coconut fat!
This ice cream is sweetened only with dates! Isn’t that just the neatest? Grab about 10 dates and pinch out the pit. We want to end up with a heaping ½ cup of them.

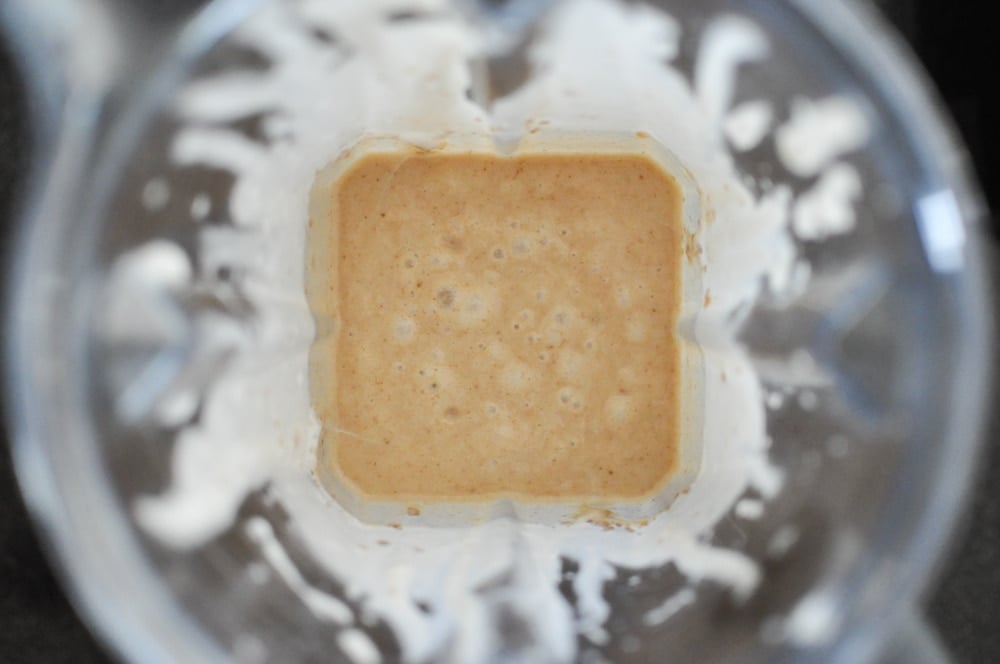
Toss those into the blender with the coconut milk and turn the machine on. We want to blend until the dates are broken up and the mixture is smooth, like so. This may take a few minutes.
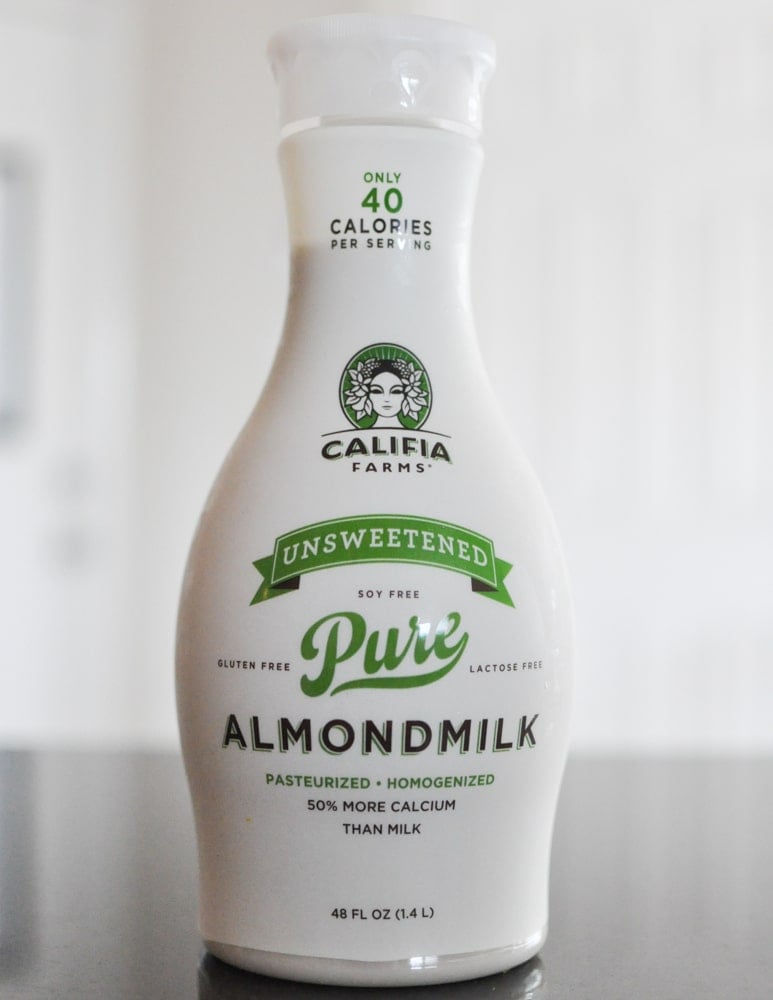
Next up, almond milk! This is the kind I buy. It’s also pretty easy to make at home, if you prefer. Add 1 cup of almond, cashew, or hemp milk to the blender.
Next, add 1/3 cup cocoa powder or raw cocoa powder. And then 1 tablespoon of vanilla extract. Kelly gives us the option of adding a thickener to this recipe. Of the available thickeners she describes, I opted for the grass-fed gelatin. I recommend you snatch up any opportunity to include a bit of this awesome health food in your diet! You can find this one here. To make the thickener, slowly stir 1 tablespoon of gelatin into ¼ cup of boiling water. Whisk or stir until it’s well combined. Pour it into the blender and give it a whirl to combine everything. I recommend you stop it at least once to scrape down the sides, then puree again.
")
")
")
")
Mmm… nice and smooth. I could drink this and be a happy woman.

Pour the liquid into a bowl and freeze for about one hour or refrigerate until cold.
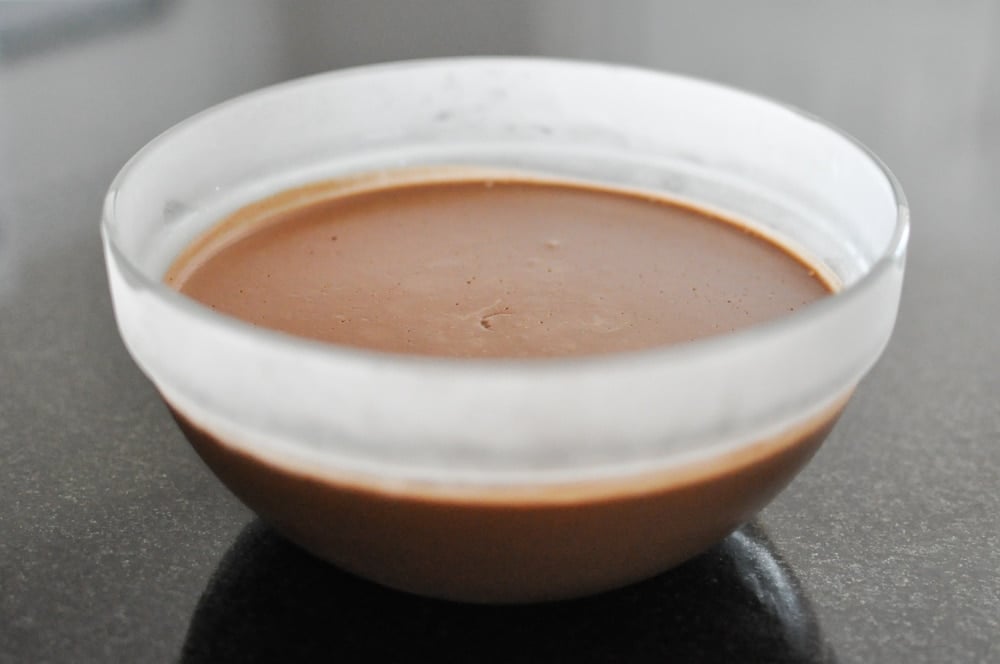
Now, go watch some of that Father of the Bride TBS movie marathon while the mixture sets. It’s done! If you ate it right now, I’d taste like decadent chocolate pudding.
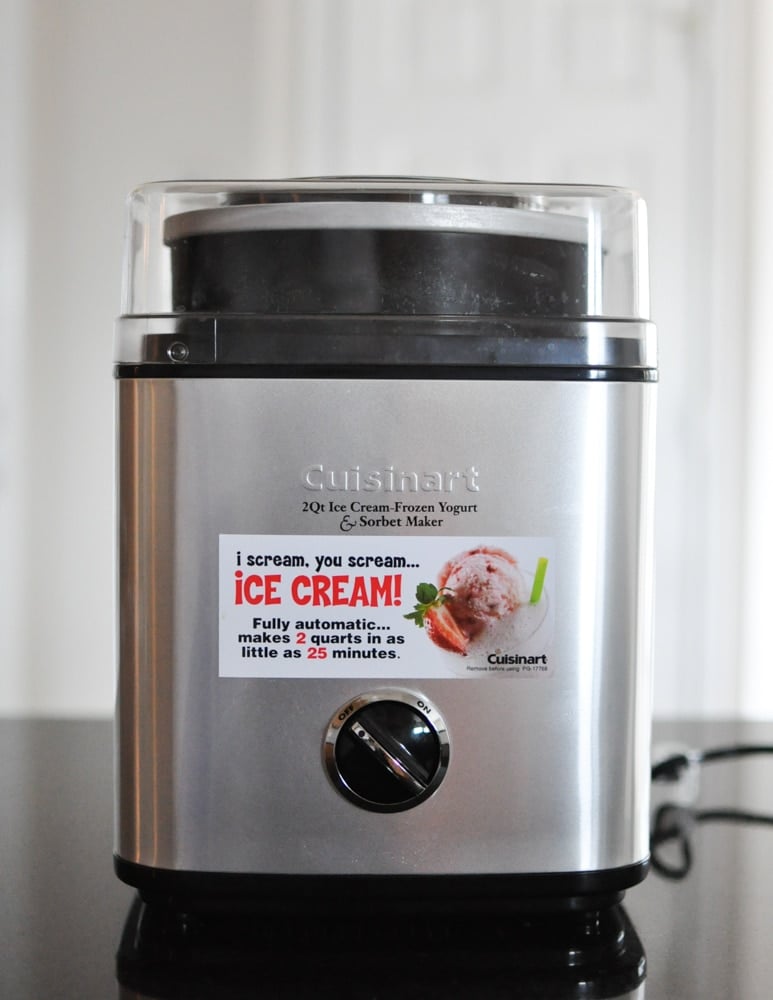
This is the ice cream maker I own. It’s affordable and worked fabulously. Note that you’ll need to have frozen the inner compartment of your ice cream maker at least one day in advance. I started keeping mine in the freezer at all times …you never know when an emergency craving for something frozen and delicious will strike. Thanks to Kelly’s book, I now have 75 new ideas of what to make!
Pour the slightly thickened bowl of chocolate ice cream mix into the frozen compartment of your maker and turn it on for about 20 minutes (may vary according to your manufacturer’s instructions).
Now, back to that movie.
“We want …the chipper …chicken.”
Gosh, I friggin love Steve Martin.
I have a feeling that when the day comes that I’m planning a wedding, my Dad is totally going to whip that line out for grins.
It’s done! Isn’t it marvelous?
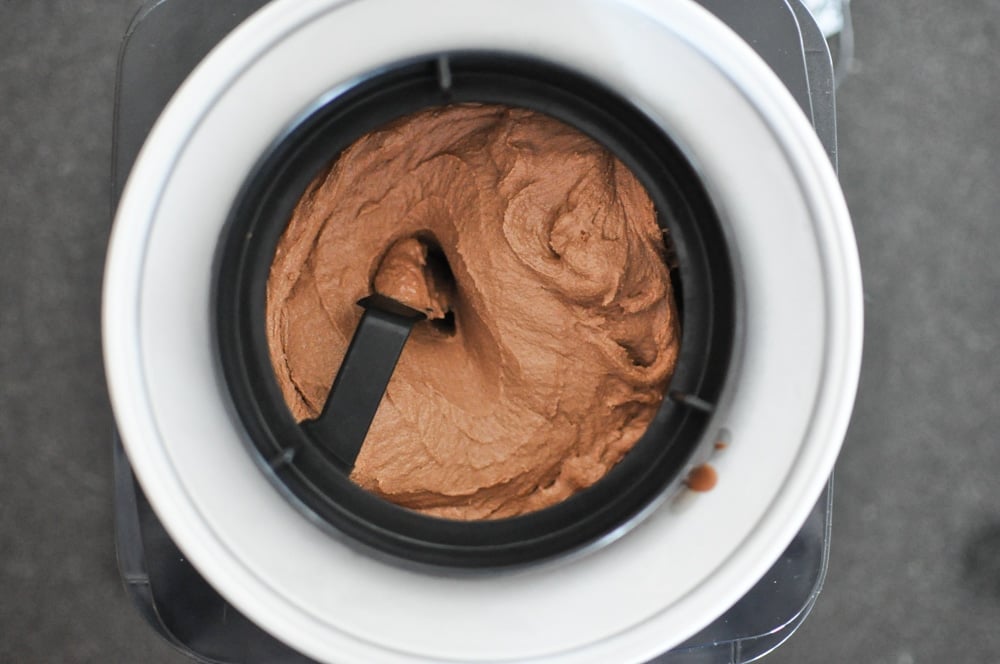
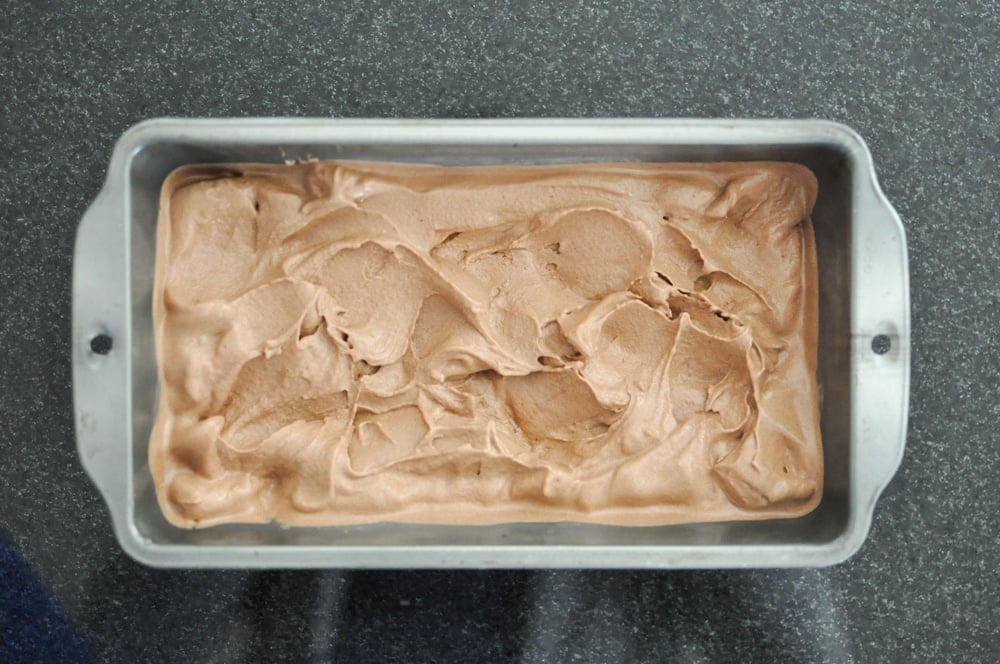
Pull the mixer out, marvel at its Wendy’s Frosty-like consistency, and scrape the contents into a freezer-safe pan. I opted for a bread pan. Pop it in the freezer again and let it set until firm!
Next stage of our whoopie pies! We’re going to make the cakes.
Set your oven to 325 and line a baking sheet with unbleached parchment paper.
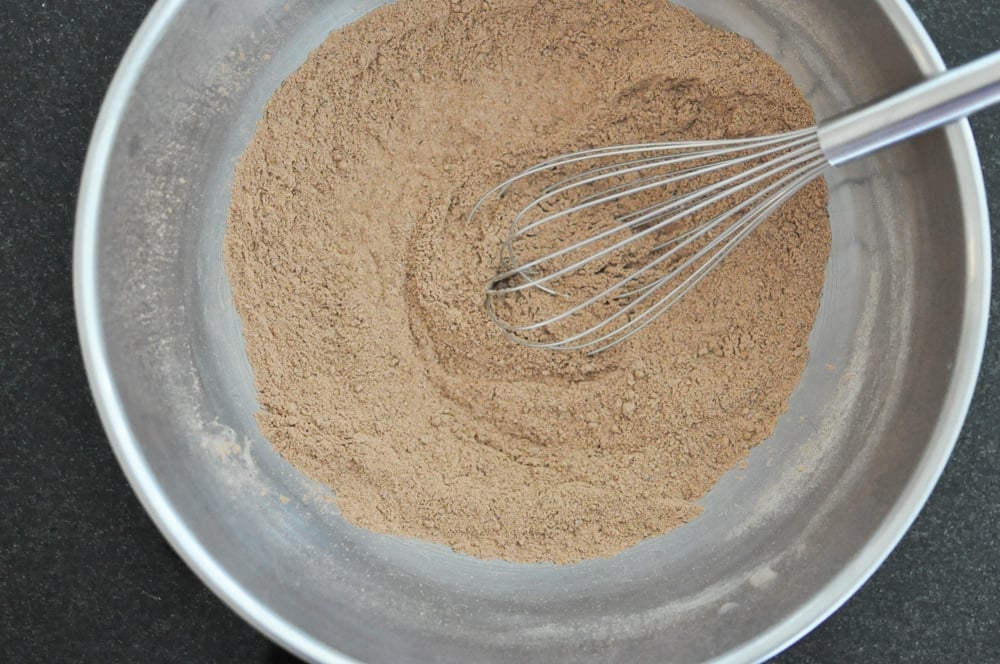
In a large mixing bowl, combine the dry ingredients for the Chocolate Whoopie Pie Cakes.
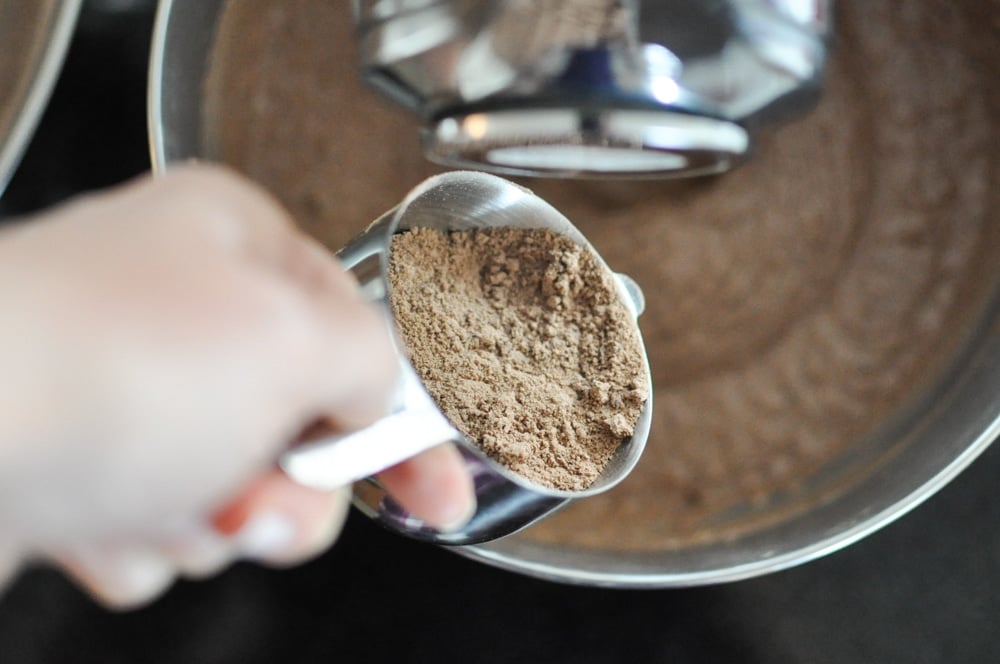
First, add ½ cup coconut sugar. Next, ½ cup cocoa powder. And then ½ cup of sifted coconut flour. We’re then going to need ¼ cup arrowroot flour. And finally, 1 teaspoon of baking soda! Whisk all those ingredients together and then set it aside while we mix the wet stuff.
In a mixer’s mixing bowl, add 1 cup of full-fat canned coconut milk. ½ cup unsweetened applesauce.
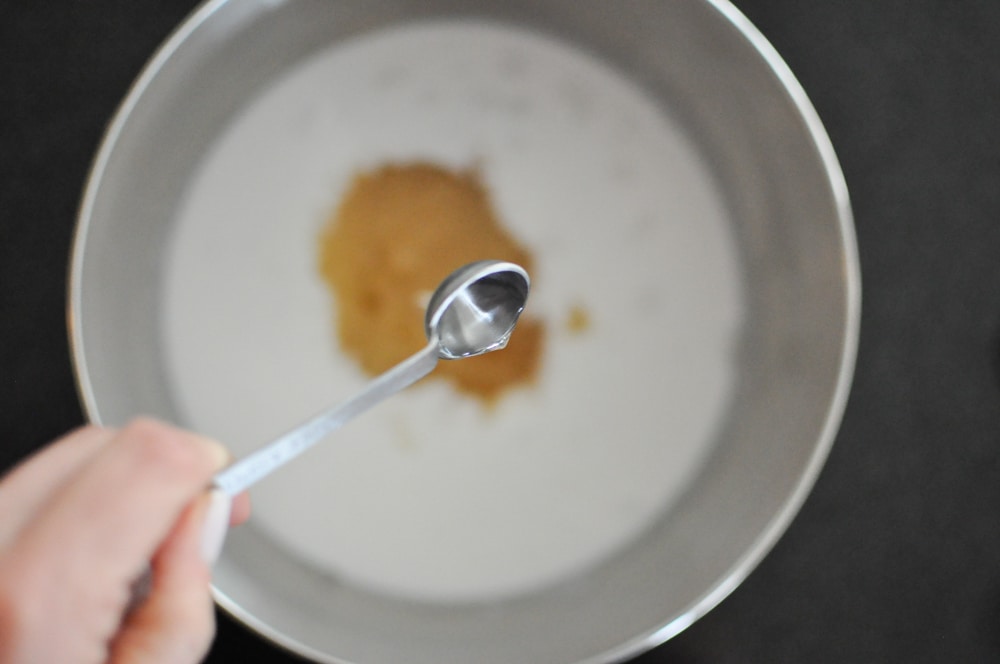
¼ teaspoon of vanilla liquid stevia.
Note that I used regular liquid stevia and the cookies still turned out great.
And now finally, ½ teaspoon mint extract.
Note: use 1 teaspoon if the extract is alcohol-free.
Turn that mixer on!
Yes, this stand mixer belonged to my grandmother.
Why is it so easy to upgrade winter boots and summer purses but springing for new and improved kitchen appliances such a stretch? While the mixer is running, add in ¼ cup melted coconut oil. Again, with the mixer running, slowly add in the dry mixture until it’s all incorporated.
Turn the machine off and start your auction for who gets to lick the whisks!
I’d give both to anyone who will clean my kitchen.
Okay maybe just one …I’m not that generous.
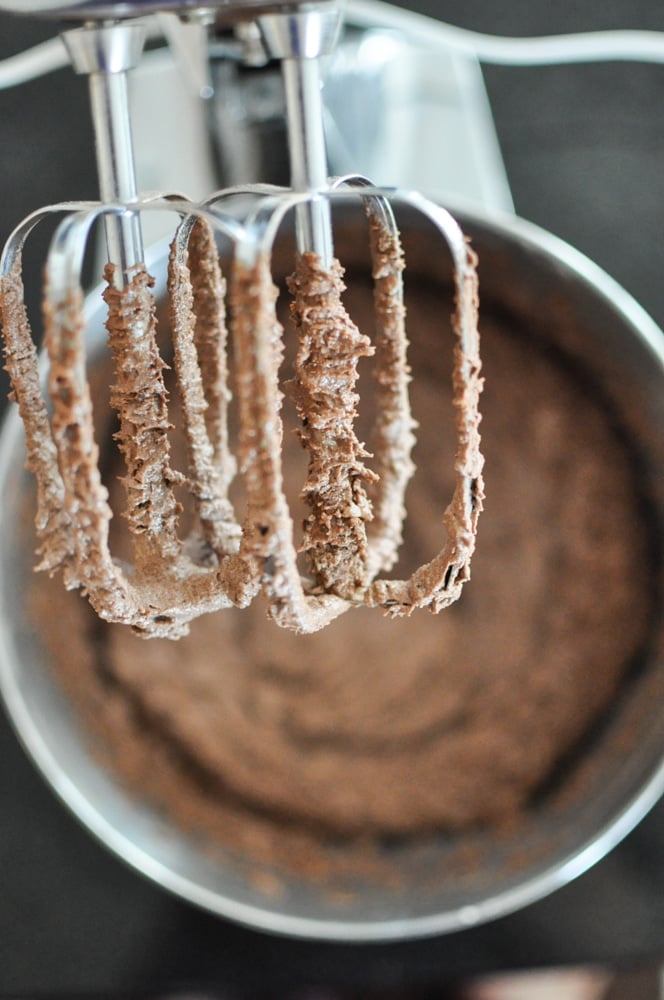
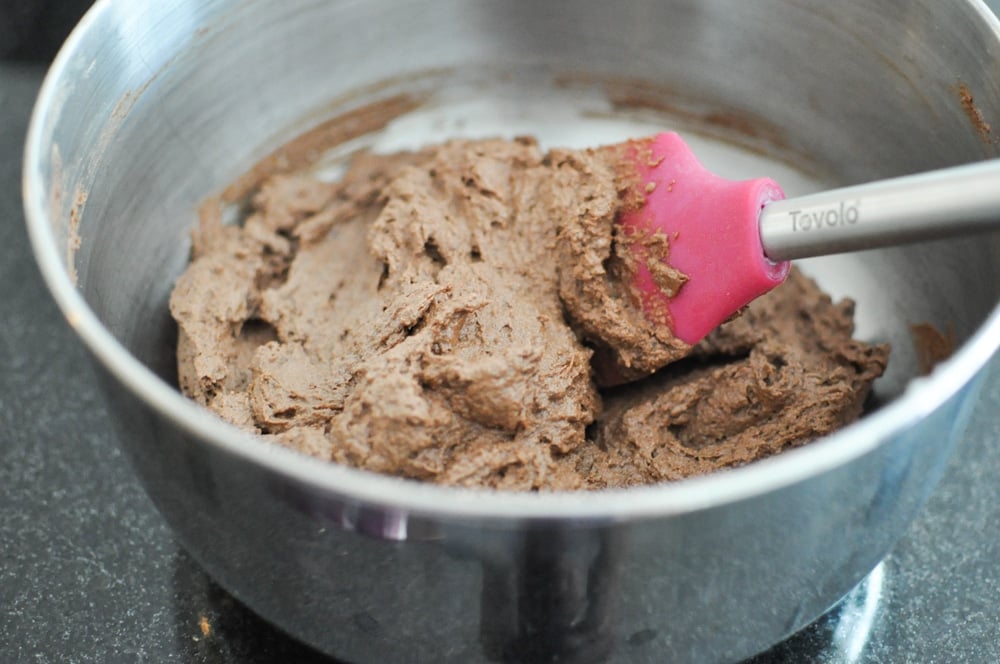
Scrape down the sides of the bowl.
Kelly’s instructions call for a 1/3 cup (size 12) ice cream scoop for these cookies.
I used the #40 I have on hand and it worked great!
Scoop the cookies onto the parchment paper.
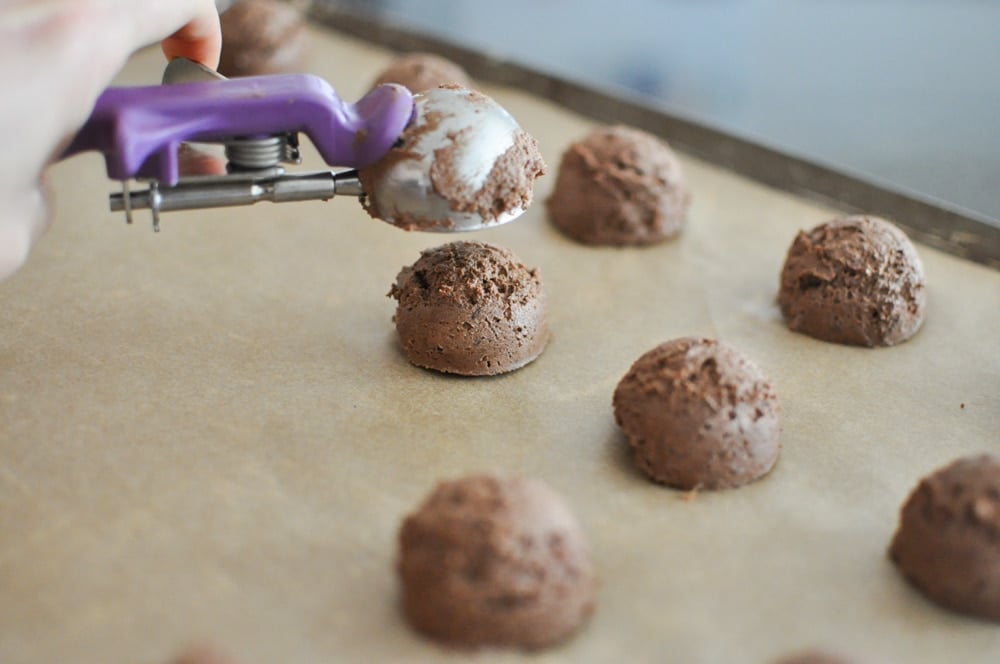
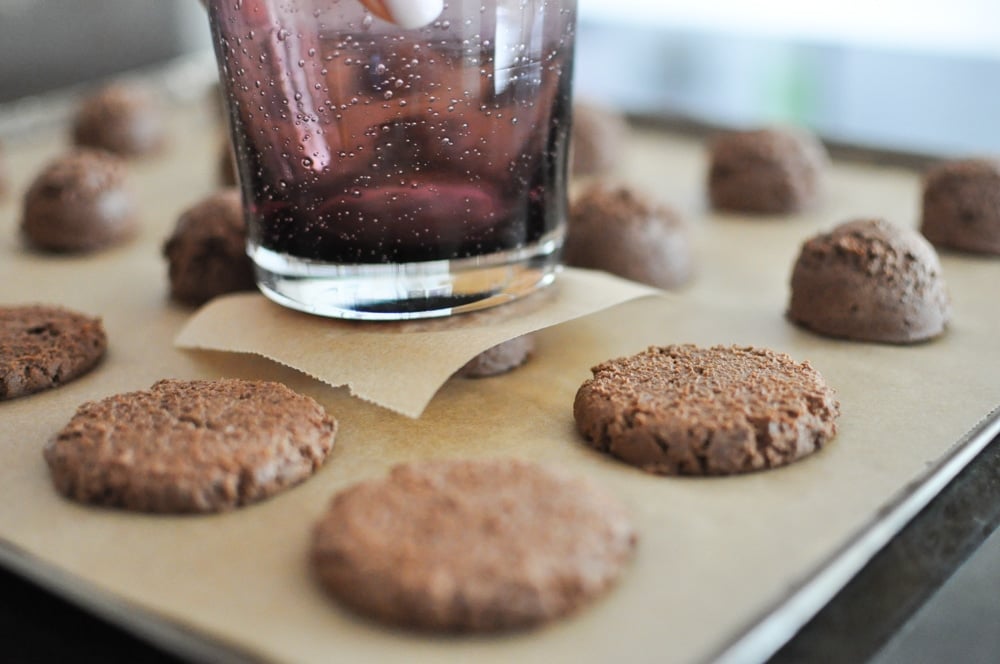
Using either your hands (wet with water) or another square of parchment paper and heavy cup, press the balls into flat cookies. Like so!
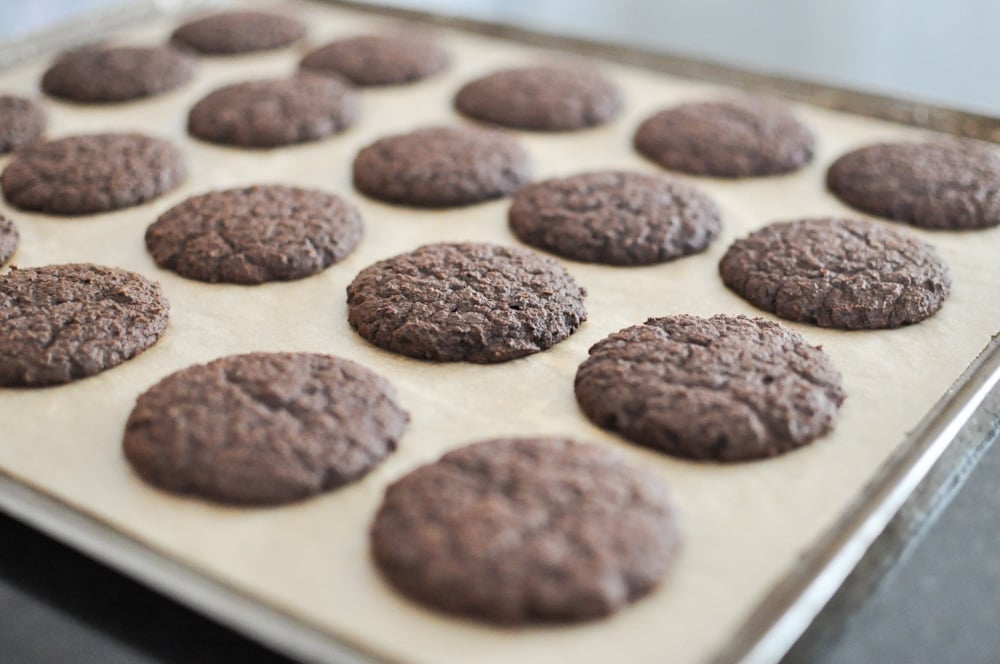
Bake at 325 for about 25 minutes, or until they look like this.
Now, the cookies need to cool. I know there is nothing more challenging than letting the most marvelously warm, minty, chocolatey cookies just “cool” on your counter without wanting to gobble up every last crumb. I say, we take a page from Eli’s book …maybe take a nap, maybe watch more Father of the Bride, definitely don’t go wash dishes …that would be work and you’d want a warm cookie reward.
These cookies are meant for bigger things.

After they’ve cooled and survived every warm cookie lover in the house, we’ll need to transfer them to the freezer so that they’re firm and easy to work with when we make the whoopie pies.
I used a square baking pan and separated each layer of cookies with a sheet of parchment paper to ensure that they don’t stick to each other. When the cookies are firm and the ice cream is set, we’re ready to start assembly!
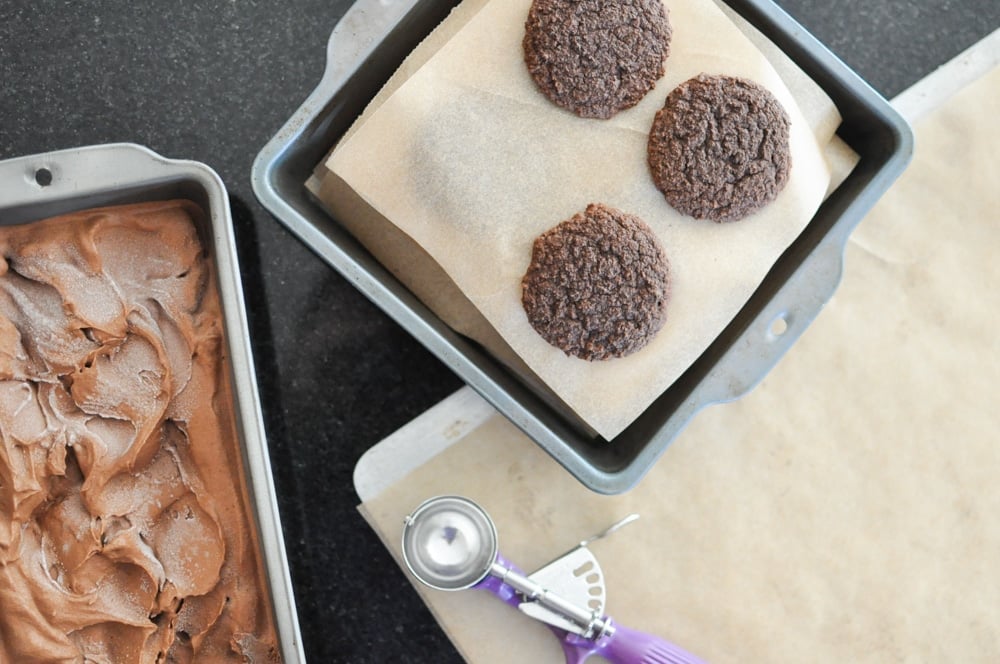
The ice cream is most spoon-able after you let it sit out for a few minutes to soften.
You know what, go ahead and spoon yourself up a bowl. You’re going to have leftovers anyways (high five!) and you probably need to run some QC. Using the same scoop you used to make the cookies, spoon a heaping amount of ice cream onto one of the frozen cookies. Like so! Add another cookie on top. And press down.

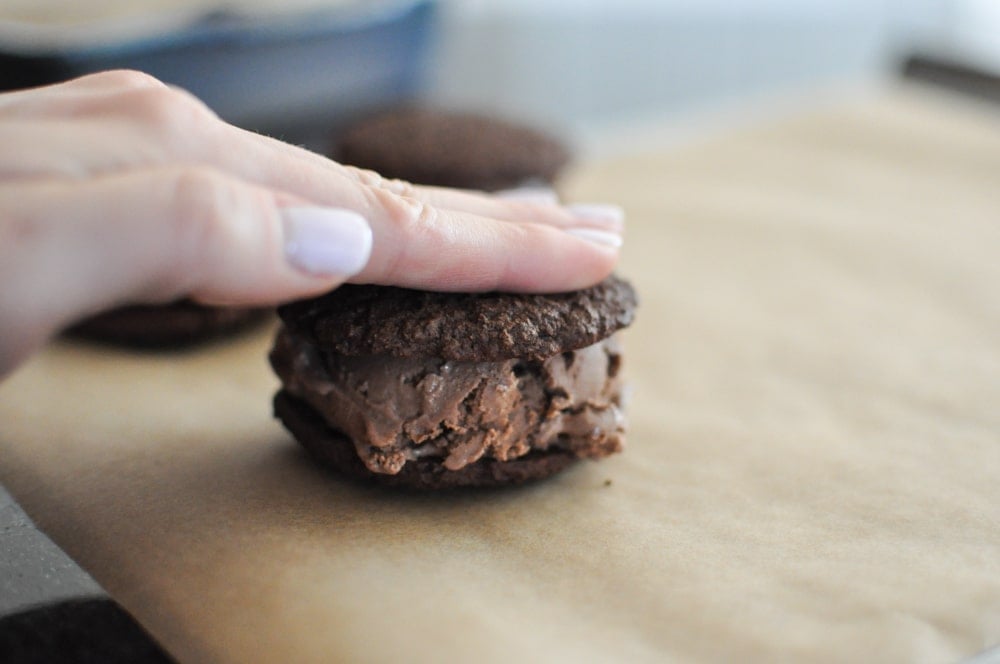
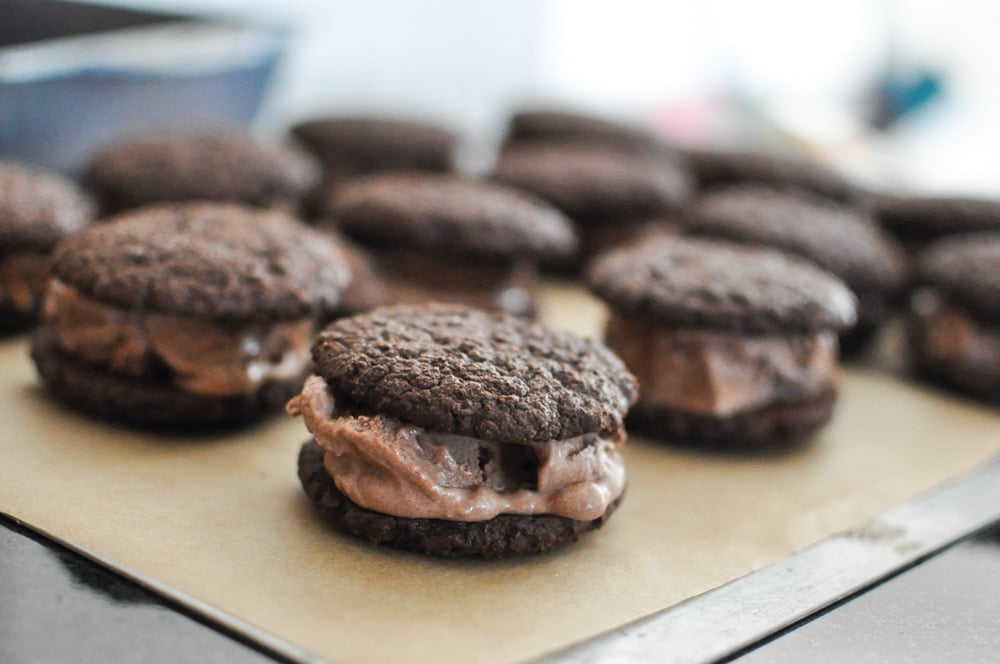
All finished!
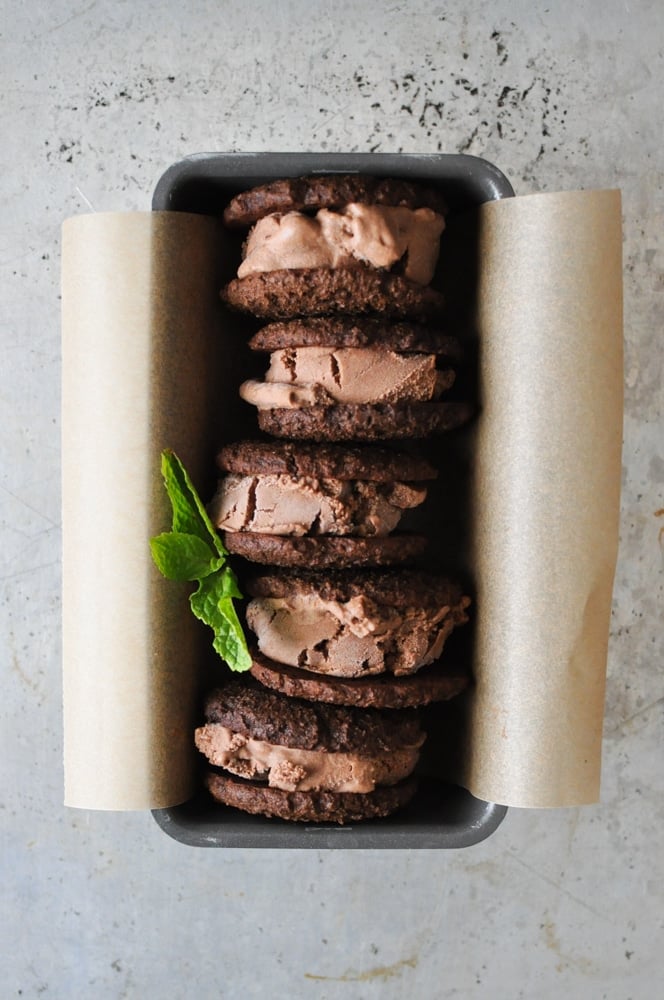
Pop them back in the freezer to firm up again, let them thaw for a few minutes before serving, and then enjoy!
I recommend you keep them stored in an air-tight container in your freezer.
Frozen Mint Chocolate Whoopie Pies

Ingredients
Chocolate Ice Cream:
- 1 13.5-ounce can full-fat coconut milk
- 1/2 cup soft, pitted Medjool dates about 10
- 1 cup almond cashew, or hemp milk
- 1/3 cup cocoa powder or raw cocoa powder
- 1 tablespoon vanilla extract
- optional: thickener made with 1 tablespoon grass-fed gelatin & 1/4 cup boiling water
Chocolate Whoopie Pie Cakes:
- 1/2 cup coconut sugar
- 1/4 cup flax meal
- 1/2 cup cocoa powder
- 1/2 cup coconut flour sifted
- 1/4 cup arrowroot flour
- 1 teaspoon baking soda
- 1 cup canned full-fat coconut milk
- 1/2 cup unsweetened applesauce
- 1/4 teaspoon vanilla liquid stevia may substitute regular
- 1/2 teaspoon mint extract use 1 teaspoon if alcohol-free
- 1/4 cup melted coconut oil
Instructions
- Chocolate Ice Cream
- Puree the coconut milk and dates in a blender until smooth.
- If desired, make the optional thickener: whisk the gelatin in with 1/4 cup boiling water, until dissolved.
- Add the rest of the ingredients, including the thickener, in the blender and puree until smooth.
- Freeze for one hour or refrigerate the mixture until it's cold.
- Pour the cooled ice cream mixture into your ice cream machine and turn on, per the manufactures instructions. Note: mine took about 20 minutes.
- Move the churned ice cream (now has a texture of soft serve) into a freezer-safe container and freeze until hard.
- Chocolate Whoopie Pie Cakes
- Preheat oven to 325 F and line a baking sheet with parchment paper.
- In a large mixing bowl, whisk all the dry ingredients together.
- Using either a stand or electric hand mixer, mix all the wet ingredients together except the coconut oil.
- After thoroughly combined, turn the mixer on and slowly drizzle in the melted coconut oil.
- Add the dry ingredients into the wet and combine with the electric mixer until smooth.
- Using either a size 12 scoop (for large cookies) or size 40 scoop (for small cookies), scoop an even amount of dough onto the parchment paper-lined baking sheet.
- Using either wet hands or a separate piece of parchment paper and a heavy cup, press the cookie dough balls into flat discs.
- Bake at 325 F for approximately 25 minutes, or until they lightly spring back when touched.
- Let them cool completely then transfer to a freezer-safe container, each cookie separated by parchment paper, so that they can harden completely.
- Frozen Mint Chocolate Whoopie Pies
- Let the chocolate ice cream soften for a few minutes on the counter so that it is scoop-able.
- With the same size scoop used for the cookies, scoop a heaping amount of chocolate ice cream and place it on the backside of one cookie. Place another cookie on top of the ice cream and press down. Repeat for the entire batch.
- Freeze the ice cream sandwiches until set.
- Let them thaw for a few minutes before serving and then enjoy!


Hi, could this be made without an ice cream maker? Could it just be frozen or could you refrigerate it and make a pudding?
Absolutely! If you choose to make a pudding out of it, I would multiply the gelatin by at least 4. If you freeze it, I recommend you take it out ever couple hours to break it up with a large fork – so that it doesn’t create one big ice cube. You could also pour it into popsicle molds!
Does this recipe work with coconut or rice milk instead of the nut/hemp milk and with either honey or maple syrup instead of the stevia?
It looks and sounds delicious! I hope I can make it with some adjustments…
Hi Loui! I think the milk substitution would work just fine if you use the same volume. As for the sweetener, it may alter the chemistry of the cookie (because of the moisture) but is worth a try!
Beautiful photography! This looks amazing. I’m thinking I need to invest in this book. Are there options if you don’t own an ice cream maker?
Thanks, Alexa! While you can definitely just freeze the recipes straight away, they won’t be as fluffy and ice cream-like (and probably difficult to scoop). If you feel like a mini splurge, the ice cream maker I linked to is about $80. There are some other makers out there that run between $30 and $50, too! I just can’t vouch for how well they work 🙂
I so NEED this book! It’s on my amazon wish list and may just accidentally slip into my cart 😉
Haha I totally understand that! I seriously love this book.