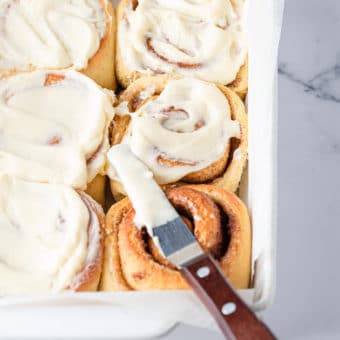
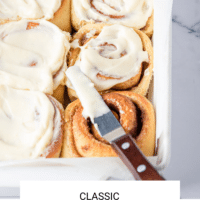
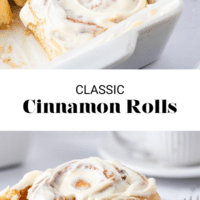
Move over store-bought cinnamon rolls, this delicious homemade cinnamon roll recipe is about to have a permanent spot in the breakfast treat lineup!
If you’re looking for more cinnamon roll recipes, we’ve got a couple! Check out these gluten free cinnamon rolls and these vegan cinnamon rolls.
What makes this the Best Cinnamon Roll recipe?
These cinnamon rolls are so gooey and delicious! Brittany Angell developed this recipe (and several other baked goods on the site) for us, and because she’s such a gifted recipe developer, her recipes are always so trusty and fail-proof. Every ingredient and recipe step is intentional and well thought out, and the result of that (in this case) is a pan of absolutely perfect classic cinnamon rolls.
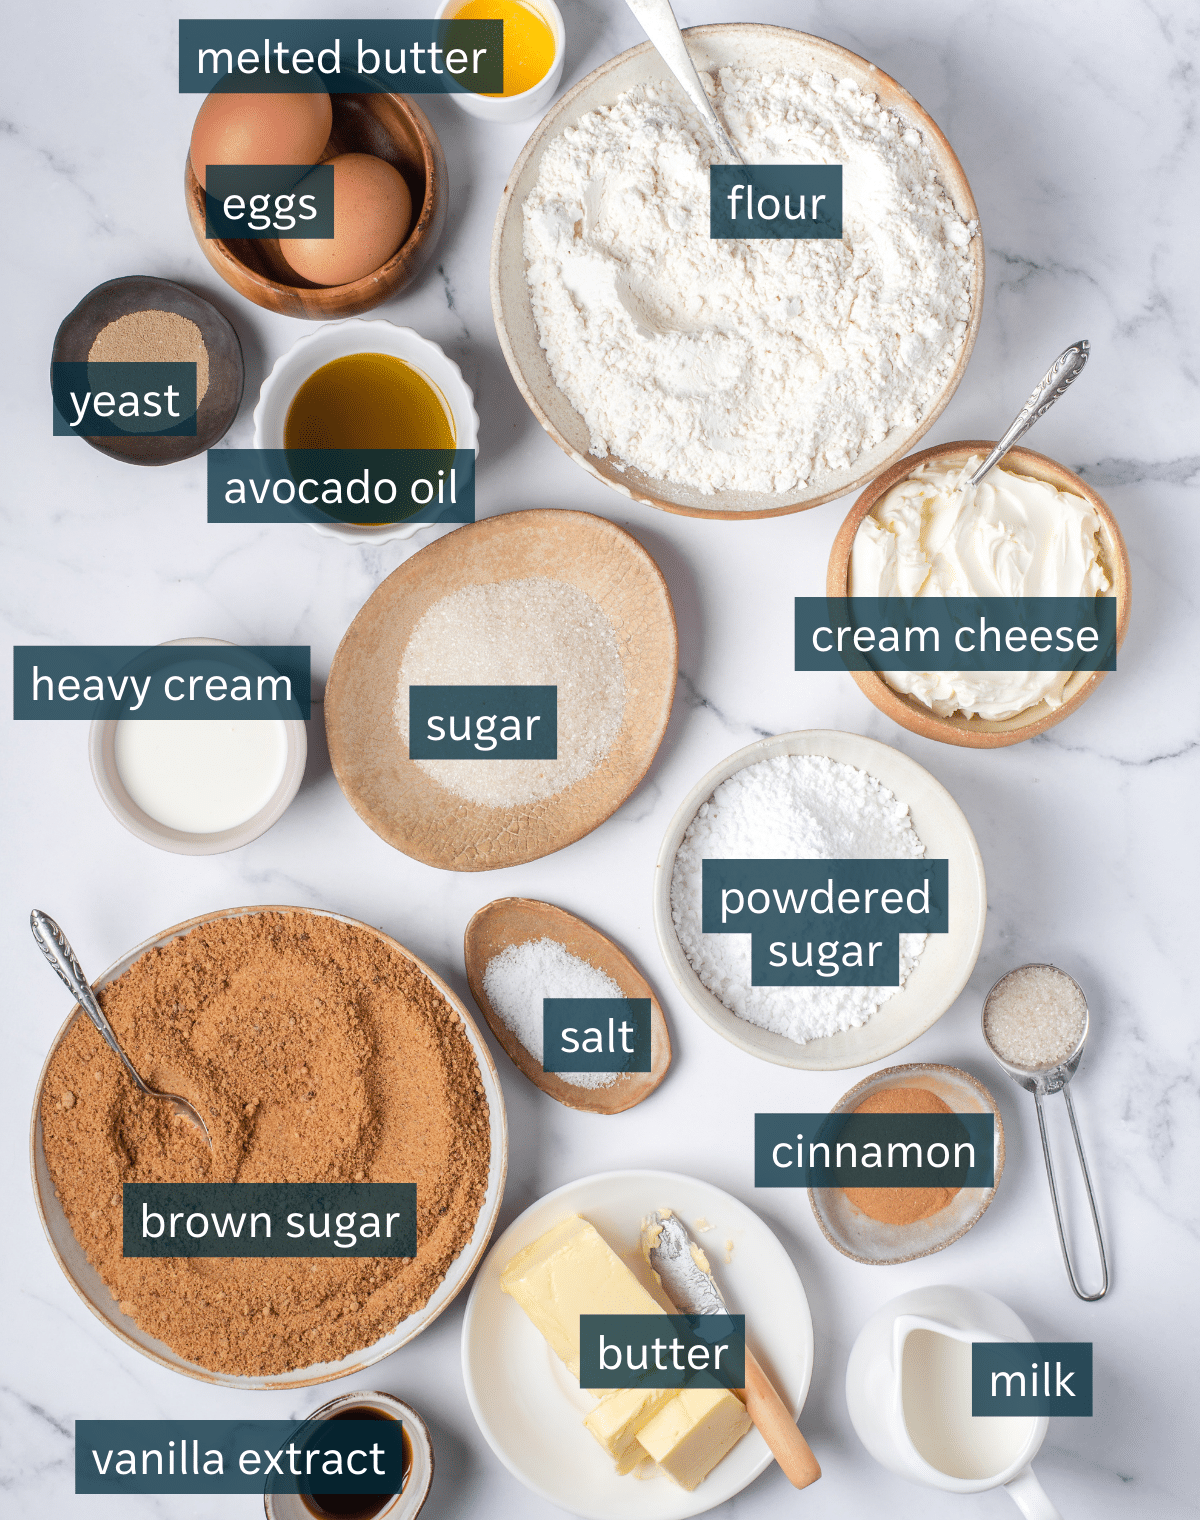
Classic Cinnamon Rolls Ingredients
The ingredient list is on the lengthy side, but remember, YOU’RE MAKING HOMEMADE CINNAMON ROLLS! Making these delicious bits of breakfast magic requires time, following specific instructions, and, of course, an assortment of ingredients. The good thing is that all of the ingredients are really common, so they should be super easy to grab at the grocery store. Here’s what you’ll need:
For the Yeast + Milk Mixture
- Milk – to start, you’ll need ¾ cup + 1 tablespoon (161 grams) of milk. Both 2% and whole milk work great here.
- Cane Sugar – in addition to the milk, you’ll also need 1 tablespoon of organic cane sugar.
- Instant Yeast – lastly, for the yeast and milk mixture, you will (of course) need yeast! 2 teaspoons of fast-acting/instant yeast should do the trick.
For the Dough
- Flour – now for the dough! 3 cups + 1 tablespoon (430 grams) of all-purpose flour makes up the base of our cinnamon roll dough.
- Eggs – in addition to the flour, you’ll also need to grab 2 large eggs.
- Avocado Oil – to add some extra moisture to the dough, you’ll need a ¼ cup (46 grams) of avocado oil.
- Cane Sugar – a ¼ cup (57 grams) of organic cane sugar sweetens the dough perfectly.
- Salt – as with most baked goods, you’ll also need to throw a little bit of salt into the mix. For this recipe, you’ll need ¾ of a teaspoon.
For the Filling
- Butter – 4 tablespoons of room temperature salted butter gets slathered onto the dough ahead of the cinnamon and sugar.
- Brown Sugar – on top of the butter goes 1 ½ cups of brown sugar.
- Cinnamon – to finish the filling off, you’ll need 2 teaspoons of ground cinnamon.
For the Cream Cheese Frosting
- Cream Cheese – what’s a cinnamon roll without frosting?! And what’s cream cheese frosting without cream cheese?! For this recipe, you’ll need 6 ounces of cream cheese.
- Powdered Sugar – 1 cup of powdered sugar sweetens the frosting.
- Butter – 4 tablespoons of salted butter goes into the frosting to add a creamy richness.
- Vanilla Extract – for just a hint of vanilla, you’ll also need to add 1 teaspoon of vanilla extract to the mix.
- Milk – 1-2 tablespoons of milk thins the frosting just a tinge.
- Salt – to finish off the frosting, counter the sweetness, and enhance all of the other flavors, you’ll need a pinch of salt.
For the Pan
- Butter – you’ll add 2 tablespoons of melted butter to the pan to keep the cinnamon rolls from sticking.
- Heavy Cream or Milk – 4 tablespoons of heavy cream or milk gets brushed on the cinnamon rolls before they go into the oven.
Ingredient Modifications
Be careful making too many swaps and substitutions to this recipe. Baking is a science, so too many changes can throw the whole recipe off. Here’s what we know works really well:
- Make it gluten-free: swap the flour for King Arthur’s Measure for Measure all-purpose GF flour.
- Make it dairy-free: use full-fat coconut milk or full-fat oat milk instead of cow’s milk, vegan butter instead of regular butter, and a vegan cream cheese (like Kite Hill) instead of regular cream cheese.
What type of yeast is best for this Cinnamon Roll Recipe? How can you tell if your yeast is still active?
This recipe calls for fast-acting (or instant) yeast. You’ll know that your yeast is active when it has started to bubble and froth — if it doesn’t bubble and froth, your milk was either too hot or not warm enough when you added the yeast in. To troubleshoot, let the yeast mixture sit in a warm spot (on top of a heated oven) for another 5 or so minutes.
Supplies Needed to Make this Recipe
- Measuring Cup
- Stand Mixer
- Baking Scale
- Large Glass Bowl
- Spatula
- Saran Wrap
- Oven Thermometer (Optional)
- Parchment Paper
- Ruler
- Baking Pan
How to make Cinnamon Rolls
Here’s the deal, this recipe is pretty extensive (there are a lot of steps and really, really specific instructions), but it is *not* hard. It was written with both seasoned and first-time bakers in mind, so regardless of where you’re at on that spectrum, I know that you can tackle this recipe. Here’s how you’ll do it:
- Preheat the oven + make the milk and yeast mixture – preheat the oven to 200°F, and to a measuring cup, add the milk and sugar. Warm the milk/sugar mixture up in the microwave for about 25-30 seconds, then give it a stir and make sure it is only lukewarm — if it’s hot (rather than lukewarm), allow it to cool for a minute or two. Stir in the yeast and place the cup on top of the preheating oven.
- Measure the dough ingredients – using a baking scale, measure out the dough ingredients (flour, eggs, avocado oil, cane sugar, and salt) and add them to the bowl of your stand mixer.
- Check the yeast mixture – take a look at the yeast mixture — if it has started to bubble and froth, your yeast is alive and ready to use.
- Add the yeast mixture to the dough and mix – once bubbly and frothy, pour the yeast mixture into the bowl with the dough ingredients. Attach the dough hook to the stand mixer and mix starting on low and working your way up to medium-speed. Keep the mixer on for about 7 minutes — after this time, you should end up with a smooth, tacky, and sticky dough.
- Add the dough to a glass bowl and let rise – prepare a large glass bowl by coating it with oil. Using a spatula, scrape the dough out of the mixing bowl into the prepared glass bowl, and cover it with saran wrap. Turn off the oven and open the door, then place the bowl into the warm oven and set a timer for 10 minutes, keeping the oven door open a crack for those 10 minutes. After the 10 minutes is up, close the oven door and set the timer for 50 minutes. You’ll know that the dough is done rising when it doubles in size (see tips and tricks below if you are struggling to get a good rise). Remove the dough from the oven and turn the oven back on to preheat it to 375°F.
- Press out the dough – place a large sheet of parchment paper on your work surface, and sprinkle a good amount of flour across the paper. Add your cinnamon roll dough to the center by flipping the bowl upside down, then sprinkle more flour on top of the dough — use just enough to prevent sticking (try not to overdo it). Press the dough out so that it is 14 inches by 12 inches.
- Add the filling to the dough – spread the softened butter across the surface of the dough, leaving ½ of an inch without butter around the edges. Then, sprinkle the brown sugar and cinnamon over the buttered surface.
- Roll the dough – using either your hands (this will give you a tighter roll with more layers) or the parchment paper as a guide, start rolling the dough. To begin, roll up a little at a time moving back and forth across the whole width as you go. After you do your first roll, give the dough a tiny tug to make sure it’s nice and tight, and then continue the process. After each new roll, give the dough another little tug to keep the roll nice and tight. When you reach the end, roll the dough so that it is seam-side down.
- Measure and cut the rolls – using a sharp knife, trim off the end pieces if they are less thick/uniform. Using your ruler and knife, mark every 1 ½ inches on the roll (this will give you 9 same-size buns). Using a sharp knife, bench scraper, or floss, gently cut each roll.
- Add the cinnamon rolls to a pan + let them rise – place the two tablespoons of melted butter into your pan, then add the cinnamon rolls to the pan, spacing them a ½-inch apart if possible. Brush 2 tablespoons of the heavy cream or milk on the tops and sides of the rolls, then cover the pan with saran wrap or a kitchen towel and place it on top of the warm oven until the buns double in size (this should take 30-60 minutes). Once doubled in size, remove the saran wrap or kitchen towel and brush them a second time with the remaining 2 tablespoons of milk or cream.
- Bake – place the cinnamon rolls into the 375°F oven, and bake for 20-23 minutes. Keep an eye on the rolls and cover them with tinfoil for the last few minutes if they brown too quickly. When finished, they should be golden brown and you should see no raw pieces on the top of the buns.
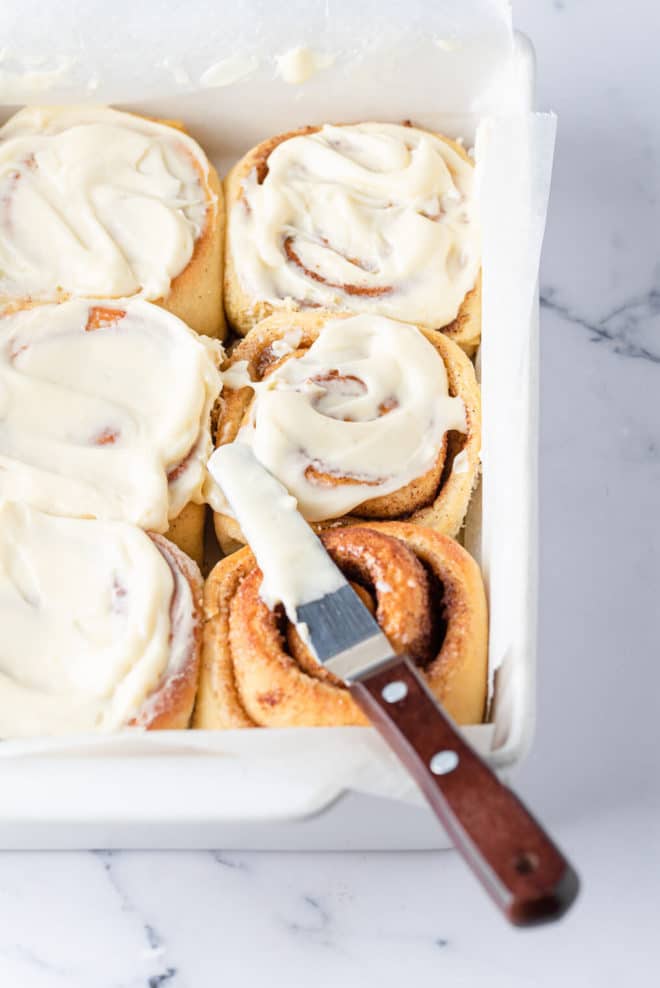
- Make the frosting – while the buns bake, make your cream cheese frosting. Add all of the frosting ingredients to a medium bowl or the bowl of your stand mixer and beat on medium-high until fluffy and smooth. Spread over the hot buns when you remove them from the oven.
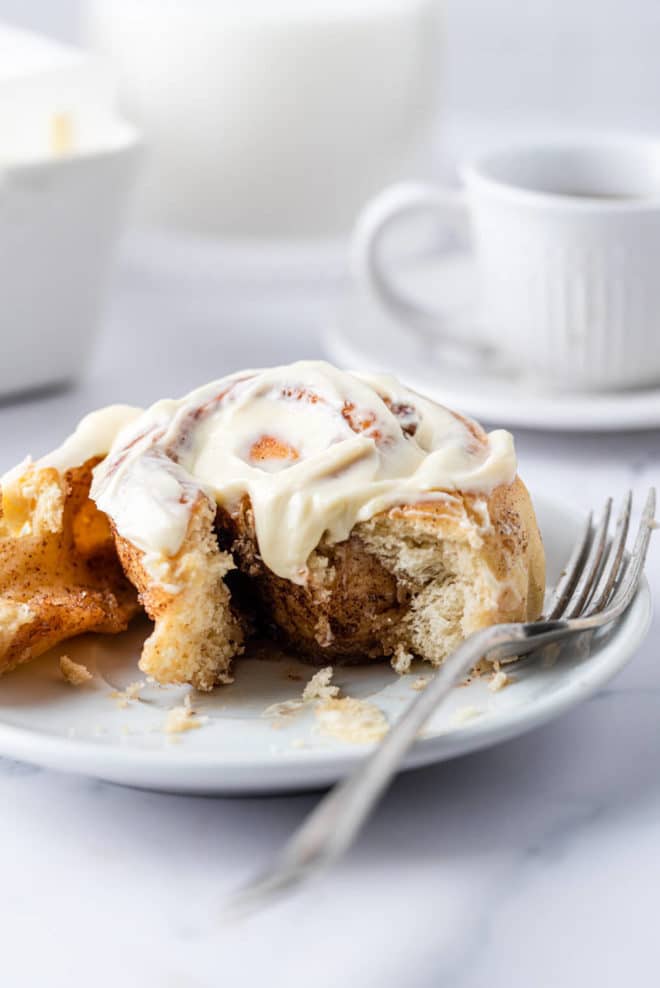
- Enjoy!


Cinnamon Rolls Tips and Tricks
Below are Brittany’s best tips and tricks for classic cinnamon rolls:
- Use a baking scale: for best results use a baking scale to make these cinnamon rolls. The cup amounts are included primarily to give you an idea of the amounts needed. The flour and liquid amounts need to be exact for the recipe to turn out perfect.
- Make sure your milk is lukewarm: the temperature of your milk should be lukewarm. If it’s hot, it will kill the yeast, and if it’s cold, you won’t be able to tell if it is alive and will work in the bread for you.
- The dough should be tacky/sticky: when fully mixed, this cinnamon roll dough should be tacky/sticky.
- Use a glass bowl: using a glass bowl in step 4 is important. It conducts heat best and allows for the dough to warm and proof up nicely.
- If your dough isn’t rising: if, after 45 minutes, your dough has not risen, this typically means that it’s not warm enough to do so. Remove it from the oven, turn on the oven to 475°F, place the bowl of dough on the warmest spot on your stovetop, and reset the clock for the proofing time. This can also be the result of not using the gram measurements and the dough being too dry, which requires a longer rise.
- Use softened butter: make sure the butter for the filling is a soft, easy-to-spread consistency. If it’s melted, it may just run off the dough.
- Invest in an oven thermometer: I recommend investing in a little $10 oven thermometer that hangs on the rack so that you can make sure your temperature is what it is supposed to be. Oven temperature can make or break how bread recipes turn out.
- Use the right pan: for the pan, a variety of sizes can be used. The most ideal pan size for these buns is an 11×9. A 10-inch deep cast-iron skillet or a 10-inch springform pan will also work. Make sure that the sides of your pan are at least 2 inches tall, but 3 inches is preferable.
- Make the frosting more quickly, if needed: if you are in a rush, you can make the frosting quicker by melting the butter, then adding the cream cheese into the microwave for 30-45 seconds. Then, whisk the two together with your remaining ingredients. Whipping them does make the frosting texture a bit better, but this works well in a pinch.
Just for You
Breakfast Recipes
Want more recipes like this?
Cinnamon Rolls Frequently Asked Questions
Best Cinnamon Rolls Recipe
Ingredients
FOR THE YEAST + MILK MIXTURE:
- ¾ cup + 1 tablespoon 161 grams milk (2% or whole)
- 1 tablespoon organic cane sugar
- 2 teaspoons fast-acting/instant yeast
FOR THE DOUGH:
- 3 cups + 1 tablespoon 430 grams all-purpose flour
- 2 large eggs
- ¼ cup 46 grams avocado oil
- ¼ cup 57 grams organic cane sugar
- ¾ teaspoon salt
FOR THE FILLING:
- 4 tablespoons salted butter room temperature
- 1 ½ cups brown sugar
- 2 teaspoons ground cinnamon
FOR THE CREAM CHEESE FROSTING:
- 6 ounces cream cheese
- 1 cup powdered sugar
- 4 tablespoons salted butter
- 1 teaspoon vanilla extract
- 1-2 tablespoons milk
- Pinch of salt
FOR THE PAN:
- 2 tablespoons butter melted
- 4 tablespoons heavy cream or milk divided
Instructions
- Preheat the oven to 200°F.
- To a measuring cup, add the milk and sugar. Warm the milk/sugar mixture up in the microwave for about 25-30 seconds, then give it a stir and make sure it is only lukewarm — if it’s hot (rather than lukewarm), allow it to cool for a minute or two. Stir in the yeast and place the cup on top of the preheating oven.
- Using a baking scale, measure out the dough ingredients (flour, eggs, avocado oil, cane sugar, and salt) and add them to the bowl of your stand mixer.
- Take a look at the yeast mixture — if it has started to bubble and froth, your yeast is alive and ready to use. Once bubbly and frothy, pour the yeast mixture into the bowl with the dough ingredients.
- Attach the dough hook to the stand mixer and mix starting on low and working your way up to medium-speed. Keep the mixer on for about 7 minutes — after this time, you should end up with a smooth, tacky, and sticky dough.
- Prepare a large glass bowl by coating it with oil. Using a spatula, scrape the dough out of the mixing bowl into the prepared glass bowl, and cover it with saran wrap. Turn off the oven and open the door, then place the bowl into the warm oven and set a timer for 10 minutes, keeping the oven door open a crack for those 10 minutes. After the 10 minutes is up, close the oven door and set the timer for 50 minutes. You’ll know that the dough is done rising when it doubles in size (see tips and tricks below if you are struggling to get a good rise). Remove the dough from the oven and turn the oven back on to preheat it to 375°F.
- Place a large sheet of parchment paper on your work surface, and sprinkle a good amount of flour across the paper. Add your cinnamon roll dough to the center by flipping the bowl upside down, then sprinkle more flour on top of the dough — use just enough to prevent sticking (try not to overdo it). Press the dough out so that it is 14 inches by 12 inches.
- Spread the softened butter across the surface of the dough, leaving ½ of an inch without butter around the edges. Then, sprinkle the brown sugar and cinnamon over the buttered surface.
- Using either your hands (this will give you a tighter roll with more layers) or the parchment paper as a guide, start rolling the dough. To begin, roll up a little at a time, moving back and forth across the whole width as you go. After you do your first roll, give the dough a tiny tug to make sure it’s nice and tight, and then continue the process. After each new roll, give the dough another little tug to keep the roll nice and tight. When you reach the end, roll the dough so that it is seam-side down.
- Using a sharp knife, trim off the end pieces if they are less thick/uniform. Using your ruler and knife, mark every 1 ½ inches on the roll (this will give you 9 same-size buns). Using a sharp knife, bench scraper, or floss, gently cut each roll.
- Place the two tablespoons of melted butter into your pan, then add the cinnamon rolls to the pan, spacing them a ½-inch apart if possible. Brush 2 tablespoons of heavy cream or milk on the tops and sides of the rolls, then cover the pan with saran wrap or a kitchen towel and place it on top of the warm oven until the buns double in size (this should take 30-60 minutes). Once doubled in size, remove the saran wrap or kitchen towel and brush them a second time with the remaining 2 tablespoons of milk or cream.
- Place the cinnamon rolls into the 375°F oven, and bake for 20-23 minutes. Keep an eye on the rolls and cover them with tinfoil for the last few minutes if they brown too quickly. When finished, they should be golden brown and you should see no raw pieces on the top of the buns.
- While the buns bake, make your cream cheese frosting. Add all of the frosting ingredients to a medium bowl or the bowl of your stand mixer and beat on medium-high until fluffy and smooth.
- Spread the frosting over the hot buns as soon as you remove them from the oven. Enjoy!
Recipe Notes
- For best results, use a baking scale to make these cinnamon rolls. The cup amounts are included primarily to give you an idea of the amounts needed. The flour and liquid amounts need to be exact for the recipe to turn out perfect.
- The temperature of your milk should be lukewarm. If it’s hot, it will kill the yeast, and if it’s cold, you won’t be able to tell if it is alive.
- When fully mixed, this cinnamon roll dough should be tacky/sticky.
- Using a glass bowl in step 6 is important. It conducts heat best and allows for the dough to warm and proof up nicely.
- If, after 45 minutes, your dough has not risen, this typically means that it’s not warm enough to do so. Remove it from the oven, turn on the oven to 475°F, place the bowl of dough on the warmest spot on your stovetop, and reset the clock for the proofing time. This can also be the result of not using the gram measurements and the dough being too dry, which requires a longer rise.
- Make sure the butter for the filling is a soft, easy-to-spread consistency. If it’s melted, it may just run off the dough.
- I recommend investing in a little $10 oven thermometer that hangs on the rack so that you can make sure your temperature is what it is supposed to be. Oven temperature can make or break how bread recipes turn out.
- For the pan, a variety of sizes can be used. The most ideal pan size for these buns is an 11×9. A 10-inch deep cast-iron skillet or a 10-inch springform pan will also work. Make sure that the sides of your pan are at least 2 inches tall, but 3 inches is preferable.
- If you are in a rush, you can make the frosting quicker by melting the butter, then adding the cream cheese into the microwave for 30-45 seconds. Then, whisk the two together with your remaining ingredients. Whipping them does make the frosting texture a bit better, but this works well in a pinch.
Nutrition
Like this recipe?
Leave a commentRecipe Contributors
Brittany Angell
Recipe Developer

Brandi Schilhab
Copywriter


Anyone make these a day before!!? Please send tips. What stage do I do up to and stop and put in fridge? Would love some tips please! Want to make them for Xmas morning but can not do all the steps that day
Hi!!!!! Thanks for the recipe!!! Also can I change milk for oat-milk? Or any other type of milk?
Hi Melanie! Great question! You can! Any milk should work great!
Meridith – any report back on how they did preparing 1 day ahead?
Hi! Looking forward to making these. Kind Arthur website says the 1:1 flour is not good for yeasted recipes. Any advice?
Hi Sam! Brittany Angell recommended the Measure for Measure flour specifically for this recipe, so it should be alright! ~Melissa
Thank you! Looking forward to Saturday morning cinnamon rolls!!
Can’t wait to make these for Christmas morning! I’ve made gluten free ones in the past that NEVER turn out so I’m excited to try this recipe with the GF flour exchange you recommended. Can I make the dough ahead of time (steps 1-11) so all I have to do is bake them Christmas morning?
Hi Amber! I think this should be ok! Brittany Angell recommends putting the dough in a tightly sealed container so that it doesn’t dry out straight into the fridge after making it. It will slowly proof in the fridge. I would cap the time in the fridge at 24 hours at the longest. Then the next day – roll the dough out as normal then allow them to proof fully before baking. Enjoy! ~Melissa
Can you make the dough ahead of time then bake the next day?
Hi Meredith! I think this should be ok! Brittany Angell recommends putting the dough in a tightly sealed container so that it doesn’t dry out straight into the fridge after making it. It will slowly proof in the fridge. I would cap the time in the fridge at 24 hours at the longest. Then the next day – roll the dough out as normal then allow them to proof fully before baking. Enjoy! ~Melissa