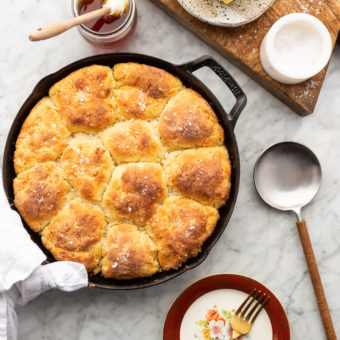
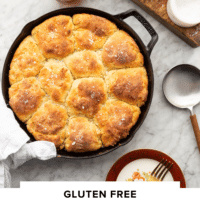
There’s not much better in this world than a delicious, hot biscuit. I tried and tested multiple rounds of this recipe to achieve the ideal biscuit texture that we can now confidently bring to you! These gluten free buttermilk biscuits are light, flaky, and buttery. The buttermilk adds a slight tart, sour flavor that is countered by a touch of sweetness from a few tablespoons of sugar, making for the perfect balance. All finished off with a sizzling, melted butter pour that takes the flavor and texture to the next level!
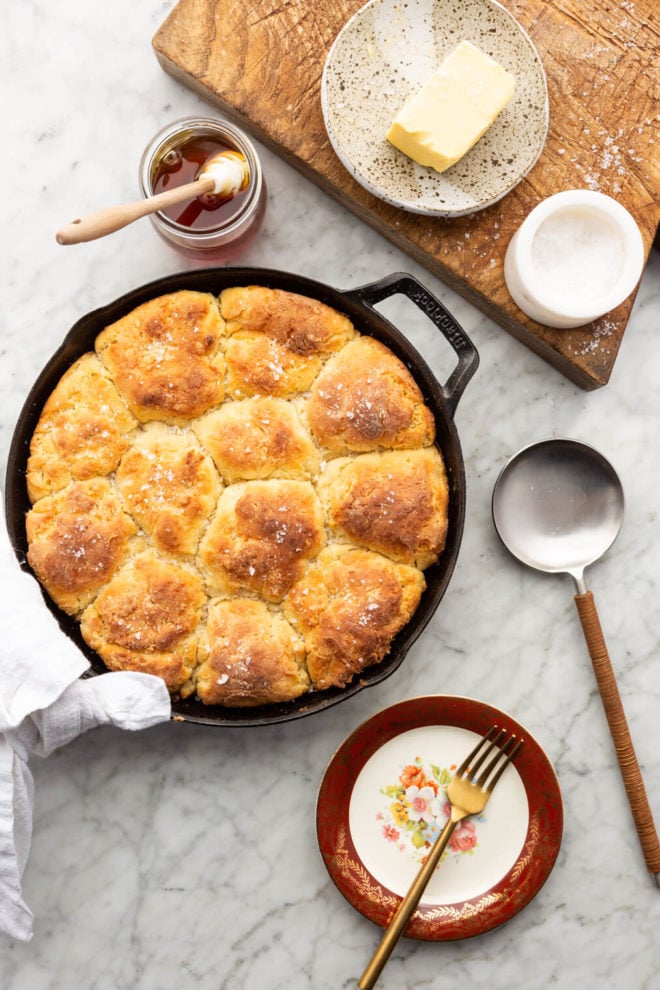
Table of Contents
This recipe is…
Ingredients Needed
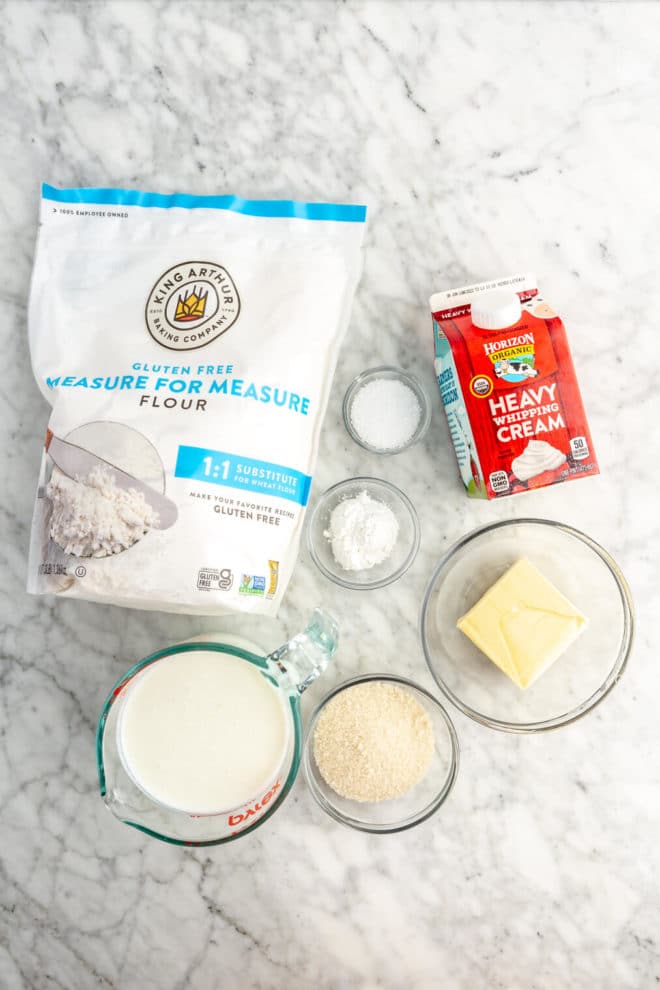
- 4 cups of gluten-free all-purpose flour plus ½ cup for shaping (we recommend King Arthur Measure for Measure)
- 6 tablespoons of sugar
- 4 teaspoons of baking powder
- 2 teaspoons of Kosher salt
- 10 tablespoons of butter, very cold
- 2 cups of full-fat buttermilk
- 1 ⅓ cups of heavy cream
- ½ cup of butter, melted, to finish
- Flaky sea salt, to garnish
Additional Optional Ingredients and Flavor Variations
While this classic biscuit recipe is divine, there are also a bunch of fun ways to play with the flavors. Here are some of our ideas:
- Add spices. Mix in some garlic powder, black pepper, or za’atar seasoning for a sharp and peppery biscuit.
- Use fresh herbs. Add chopped parsley, chives, basil, or whatever fresh herb you love into the batter for an aromatic dough.
- Make it savory. Add shredded cheese and chopped chives or green onion for a delicious savory biscuit.
How to Make Gluten Free Biscuits


- Grate and freeze. Grate the cold butter and place it in the freezer, while you get everything else together. The extra cold butter creates steam pockets in the dough when baking and gives these biscuits a lovely, fluffy texture.
- Preheat the oven. Preheat the oven to 425℉ and butter the bottom and sides of a 10-inch cast iron skillet. If you don’t have a cast iron skillet, you can also use a round baking pan.
- Combine dry ingredients. In a large bowl, mix together the 4 cups of flour, sugar, baking powder, and salt.
- Add butter. Add the chilled butter to the dry ingredients and gently toss to distribute.
- Add wet ingredients. Pour the buttermilk and heavy cream into the dry ingredients and stir until just barely combined.
- Drop biscuits. Place the remaining ½ cup of flour in a bowl. Use a scoop, spoon, or a ½ cup measuring cup to shape the dough into balls (you’ll want them to be a scant ½ cup in size). Place the dough into the bowl with the extra flour. Coat with a light dusting of flour. Gently shake off the excess flour, and place each biscuit tightly into the skillet. You’ll want the biscuits to be very close together with all sides touching.
- Bake. Bake the biscuits for 35 minutes or until golden brown.
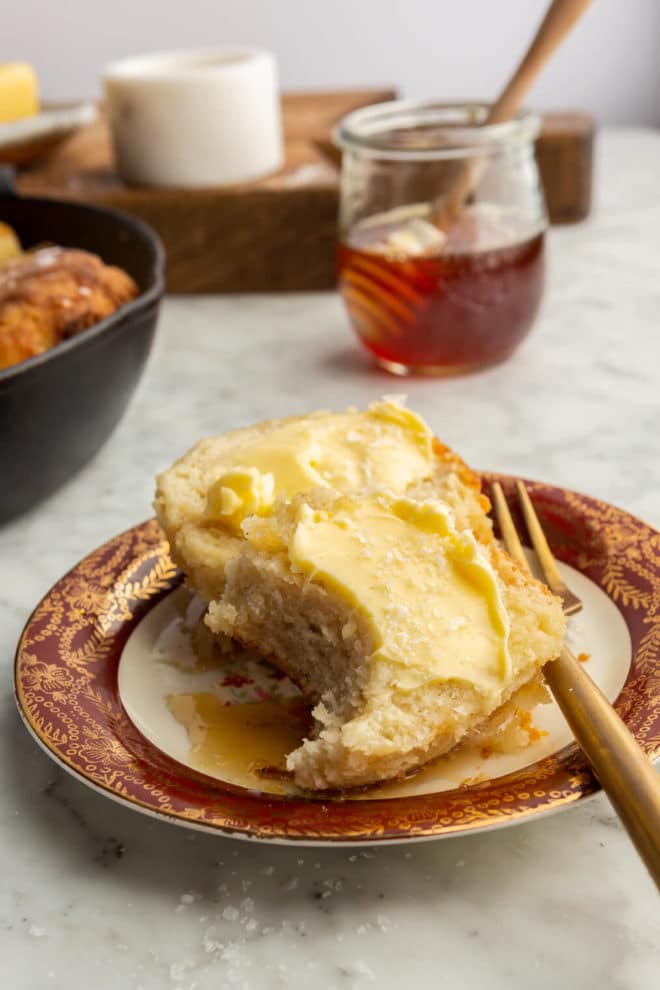
- Finish with butter and salt. Pour the melted butter over the biscuits as soon as they are out of the oven, and sprinkle with flaky sea salt.
- Serve and enjoy!
How to Serve
There are so many delicious ways to top these gluten-free biscuits. Here are some ideas:
- Sausage Gravy and Eggs. Serve topped with your favorite sausage gravy and a couple of over-easy eggs for the ultimate biscuits and gravy meal.
- Strawberries and Jam. Add a smear of butter topped with some strawberry jam and freshly sliced strawberries.
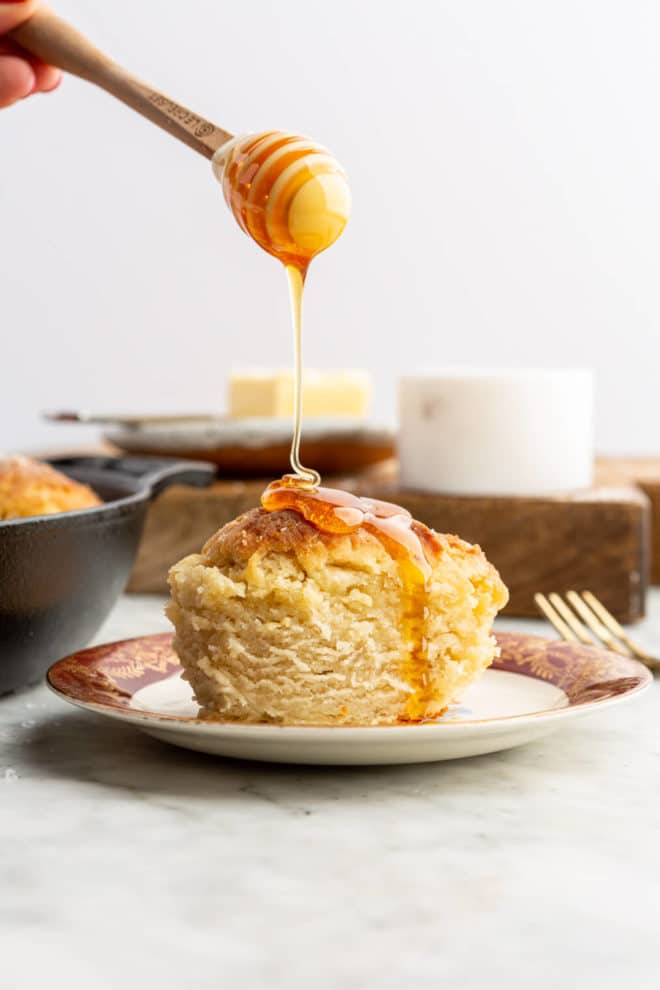
- Honey. Don’t underestimate the power of a drizzle of honey with a pinch of flaky sea salt for a sweet and salty bite.
How to Store
When it comes to storing (assuming you can resist the urge to gobble up these biscuits whole when they’re fresh out of the oven), you have several options. With each option, you want to make sure your biscuits are completely cooled, either in the pan or on a cooling rack, before storing.
- Store on the counter. Store in an airtight container or in a resealable bag (with as much air removed as possible) at room temperature. Stored on the counter, biscuits are best consumed within 1-2 days so that they don’t dry out.
- Store in the fridge. Store in an airtight container in the fridge for 3-5 days. If you really want to protect the biscuits from the cold air, you can individually wrap them in saran wrap or parchment paper before placing them in the container.
- Store in the freezer. Wrap each biscuit in saran wrap or parchment paper, then place in an airtight container or freezer bag (making sure to squeeze out any excess air), then store in the freezer for up to 3 months.
Frequently Asked Questions
Our favorite gluten free flour is King Arthur Measure for Measure flour. We use this flour in all of our baking recipes and love the overall texture and flavor that it brings to each item.
Crumbling in baked goods often occurs because the binding agent isn’t strong enough. If your gluten-free flour doesn’t contain a binder, such as xantham gum, you’ll want to add about a teaspoon for this recipe. If you use King Arthur’s Measure for Measure flour, you should be golden for moist and flaky biscuits that hold together beautifully.
The key for the fluffiest biscuits is the shredded, ice-cold butter in the dough. This creates pockets of steam while baking and gives a lovely, fluffy texture.
We haven’t tested a dairy-free biscuit option, but we do have it on our list to develop. In the meantime, THESE gluten and dairy-free biscuits look like a great option.
We recommend freezing the biscuits after baking to ensure the best texture post reheat.
More Favorite Baked Good Recipes

Buttermilk Gluten Free Biscuit Recipe
Ingredients
- 4 cups gluten-free all-purpose flour plus ½ cup for shaping (We recommend King Arthur Measure for Measure)
- 6 tablespoons sugar
- 4 teaspoons baking powder
- 2 teaspoons Kosher salt
- 10 tablespoons butter, very cold
- 2 cups full-fat buttermilk
- 1⅓ cups heavy cream
- ½ cup butter, melted, to finish
- Flaky sea salt, to garnish
Instructions
- Grate the cold butter and place it in the freezer, while you get everything else together. The extra cold butter creates steam pockets in the dough when baking and gives these biscuits a lovely, fluffy texture.
- Preheat the oven to 425℉ and butter the bottom and sides of a 10-inch cast iron skillet. If you don’t have a cast iron skillet, you can also use a round baking pan.
- Mix together the 4 cups of flour, sugar, baking powder, and salt.
- Add the chilled butter to the dry ingredients and gently toss to distribute.
- Pour the buttermilk and heavy cream into dry ingredients and gently stir until just barely combined.
- Place the remaining ½ cup of flour in a bowl. Use a scoop, spoon, or a ½ cup measuring cup to shape the dough (you’ll want them to be a scant ½ cup in size). Place the dough into the bowl with the extra flour. Coat with a light dusting of flour. Gently shake off the excess flour, and place each biscuit tightly into the skillet. You’ll want them to be very close together with all sides touching.
- Bake the biscuits for 35 minutes or until golden brown.
- Pour the melted butter over the biscuits as soon as they are out of the oven, and sprinkle with flaky sea salt.
- Serve and enjoy!
Recipe Notes
- Store on the counter: store in an airtight container or in a resealable bag (with as much air removed as possible) at room temperature. Stored on the counter, biscuits are best consumed within 1-2 days so that they don’t dry out.
- Store in the fridge: store in an airtight container in the fridge for 3-5 days. If you really want to protect the biscuits from the cold air, you can individually wrap them in saran wrap or parchment paper before placing them in the container.
- Store in the freezer: wrap each biscuit in saran wrap or parchment paper, then place in an airtight container or freezer bag (making sure to squeeze out any excess air), then store in the freezer for up to 3 months.


I LOVE this recipe. I make it all of the time. The first time I made it with the exact flour as the recipe called for and they were easy to set up and shape. The second (and subsequent) times I used an different 1 for 1 flour, Bob’s Red Mill. At first I thought it was ruined it because the batter was runny. I almost threw it away, DON’T DO THAT! I poured it into a greased pan and baked it. Topped with the butter at the end and cut it up into squares. It is so delicious! I actually prefer it this way because I don’t have to shape them. So good!
I’ve tried making several gluten-free biscuits. Some are good, but none really seemed to actually capture the amazing goodness of a true Southern biscuit… until this one. Amazing!!! Also easy to make! A family favorite now.
No way! To be compared to the amazingness that is a Southern biscuit… biggest compliment ever!!!! We are so so happy y’all loved them, Liz!
These were delicious!!! Easy and quick to put together. Absolutely will be added to our holiday and special meal menus. Well done!
Awww yay! We are so so happy you enjoyed them, Nelly!
I was AMAZED at how quickly these came together and how easy these were. I didn’t have buttermilk so I made some with 2% and vinegar and also didn’t have heavy cream so just used 2% and they were still magical. Can’t wait to make them again with the actual ingredients. Soooo yummy and sooo easy
We’re so glad you loved these, Katlyn! Thanks so much for sharing this with us!
What a great method!! I made these today with modifications to make them diary free, and while I’m sure the original version would be even tastier, my family is very impressed! Thank you for sharing this, I really love how you shape the biscuits with the extra flour.
For anyone wondering, to make them dairy free I used almond milk + vinegar for buttermilk sub, and instead of the cream I added a little more fat. I would have used nondairy butter but was out, so instead I used shortening as the fat.
Thanks so much for sharing this with us, Natalie! We’re so glad your family loved them!
So…I’m hoping these still turn out okay. I followed the directions to a T except realized my store gave me 1% buttermilk at the last minute while I was making them. The batter was extremely crumbly and would not hold shape at all. I used the King Arthur measure for measure flour, too.
Oh no, Danielle! I hope they turned out!
They absolutely turned out okay…probably not quite as good as they would’ve had I had full fat buttermilk, but my family loved them & I can’t wait to make them again with the full fat buttermilk!
I’m so glad your family loved them, Danielle!
Best GF biscuit recipe Ive found since becoming gluten intolerant 3 years ago!!! For flour I used Bob’s Red Mill 1 for 1 GF flour and Bob’s Red Mill quinoa flour (equal amounts) baked in an iron skillet and best GF biscuits ever, moist and not crumbly!
We are so glad to hear you loved these biscuits, Becky! Thank you so much for taking the time to share your feedback with us! -Team FF
These are so delicious! My first time making biscuits, and they were extremely easy and quick to make. Will definitely be making them again in the future!
Yay! So glad to hear it was a win. Thank you for taking the time to share with us! -Team FF
I loved making these! I didn’t add 6 tablespoons of sugar… just 4 tablespoons. But, the next time I make these delicious biscuits, I will use only 2 tablespoons of sugar. I don’t like sweet biscuits. Perfect texture and so easy!
So glad you enjoyed with those adjustments, Keri! Thank you for sharing with us! -Team F&F
If you use regular flour, would it be the same amount?
Hi Clare! Yes, 1:1 sub for regular flour.
Will you share what the weight of flour is in grams for this recipe?
Hi Jana! The weight of 4 cups of gluten free, measure for measure flour is 240g.