When I am just aching to have some semblance of control during the most hectic and unpredictable seasons of life, cleaning and organizing often looked-over spaces in my home always seems to bring me a real sense of peace, which is why we today we are walking you through how to organize your pantry. Organizing the pantry seems like a bear of a task, but there are ways to make it manageable, and looking at the finished product seriously makes you feel like a million bucks. It’s funny how the little things make the biggest difference, huh?!
Below, you’ll find our thoughts and recommendations for what works when organizing a pantry, our favorite organizers, a few tips + tricks, and then a step by step guide that’ll walk you through organizing your own pantry!
Why organize your pantry?
With the amount of time I spend in the kitchen and in and out of my pantry, it just makes sense to keep it cleaned, organized, and well maintained. Knowing exactly what you have helps you with not only meal creation (have you seen all of our pantry staple recipes?!), but also keeps things from sitting on the back of a shelf and expiring, thus lessening food waste. We’re certainly here for that!
Sections to Organize
This is going to vary person by person and all depends on items that you use and keep stocked in your pantry. For example: if you are a mama of young kiddos, you may have a bin for breakfast cereal, while someone who never eats cereal wouldn’t have a use for that bin and may find a broad category like “breakfast” more useful. Generally speaking though, the categories below (with examples of each included) are pretty universal and may require only a bit of tweaking from person to person:
- Breakfast items – pancake mix, muffin mix, granola, oats, cereal
- Grab + Go Snacks – fruit snacks, individually bagged crackers, meat sticks, protein bars
- Unopened Condiments – mayo, mustards, ketchup, BBQ sauce, salad dressings
- Pasta + Grains – pasta, rice, quinoa, farro
- Baking Supplies – flour(s), sugar(s), chocolate chips, baking powder
- Sauces, Jars, and Cans – canned tomato sauce, jarred pasta sauce, canned tuna fish, canned coconut milk, canned beans
- Oils + Vinegars – avocado oil, olive oil, apple cider vinegar, rice wine vinegar
- Supplements – collagen, protein powder, vitamins
- Chips + Crackers – large bags of chips, cracker boxes
- Bread – bagels, sandwich bread, English muffins
- Nuts + Seeds – cashews, pecans, chia seeds, flax seeds
- Fruits – apples, oranges
- Veggies – potatoes, onions, squash
Our Favorite Pantry Shelf Organizers
When it comes to pantry organization, having the right organizers makes a big difference. First, you want something effective. For this reason, we recommend bins and baskets that you can see through (think: clear bins, wire baskets). If you can’t see what’s in each bin at a glance, you wind up with the same problem of forgetting about items and risking expiration and food waste. Finding organizers that you think are attractive is super important too! After all, you’re putting in the hard work of cleaning and organizing your pantry, and the more you look at it and love it, the more likely you are to maintain it. So, effectiveness + your personal style both play a role in your organizer selection! Here are some of our favorites for you to choose from:
- Bins – bins are typically larger and are great for organizing your broader categories that include many items like: baking supplies, breakfast items, pasta + grains, supplements, etc. We love these large clear plastic containers, and these stackable bins are great too. This lazy Susan organizer is great for oils and vinegars.
- Baskets – baskets are typically a bit smaller than bins and work better for categories that contain fewer items like: unopened condiments, bread, nuts + seeds, etc. If you’re looking for a plastic-free organizing solution, different sized baskets are your best bet. These wire baskets are stylish and functional, as are these, and these.
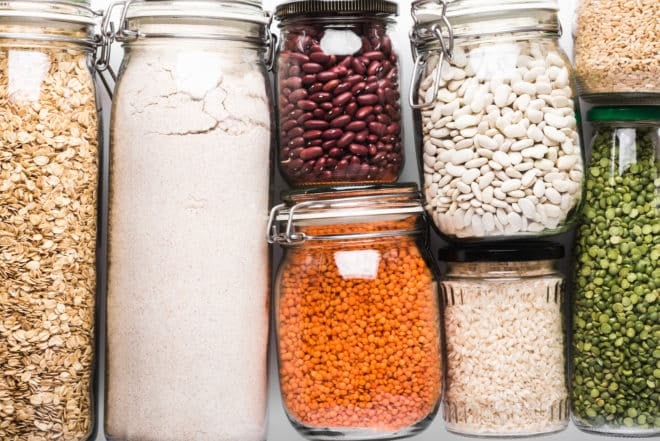
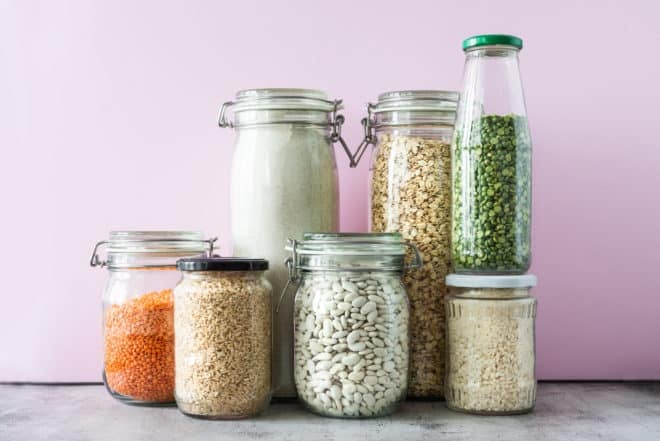
- Jars – jars require a bit more maintenance than bins and baskets, and for this reason, we don’t recommend you dumping every single pasta, grain, nut, sugar, and flour into jars. Keep it to your most used items (think: if you use oats every morning, put oats in a jar; if you regularly bake on the weekends, put your favorite flour in a jar), or items that are traditionally messy in the bag (we’re looking at you arrowroot starch). Both airtight, these glass jars and these BPA-free plastic jars, are great choices.
- Risers – risers are great for your cans and jars. When cans and jars are stuck into a basket, they all look exactly the same and even though they’re more organized than they previously were, it can be really difficult to see what’s what. We like this clear plastic riser, and this bamboo expanding riser.
Pantry Door Organizer
Pantry door organizers are a fantastic use of typically wasted space. We really like this sturdy wire option. Keeping items that are used often, like drink mixes (Liquid I.V. is my favorite), vitamins, and even Ziploc baggies, in your door organizer makes things really handy. The wire option above is completely customizable and has three different sized baskets (small, medium, and large depth) that can be swapped and configured for your specific needs.
Tips + Tricks
We want your pantry to be both attractive + functional! Here are our best tips for a practical pantry.
- Transition from Shelves to Baskets + Bins – having all of your pantry goods organized by category in bins and baskets is practical for a few reasons. First, the sections of your pantry are clearly defined, which saves you time rummaging around trying to find the flour, oil, or that item that you really need, but hardly ever use. It’s also super helpful to be able to pull out an entire bin to use, rather than juggle each individual item. For example, if you’re baking your favorite homemade chocolate chip cookies, it’s much easier to pull out the “baking supplies” bin and have everything right in front of you than search through the pantry for each individual ingredient. Lastly, it just looks beautiful! I know that may seem silly, but having a space that I am so frequently in look tidy and beautiful just brings me some kind of unexplainable joy!
- Use Risers – risers make such a huge difference in the amount of food waste you have. One of the biggest reasons our pantry goods expire and get thrown away is because we simply just forgot that they were there in the first place. Risers really eliminate canned goods and jars from hiding out on the back of a shelf.
- Kid Snack Storage – if your kiddos are old enough to grab their own snack, having a bin or basket either on the bottom shelf or floor of your pantry is a life-saver! Make sure that the snacks stocked in that basket are approved for your kiddos to take as they please.
- Labels – this is HUGE! Label, label, label those pantry organizers! Having a beautifully organized pantry doesn’t mean a whole lot if it isn’t clearly labeled. Every member of your family (except for your littlest littles) should be able to open the pantry door, and know exactly where to grab from to get what they’re looking for. Labels are also super helpful when you’re putting away groceries. We like these pre-made labels and these DIY write-on labels. If your bins and baskets don’t have a solid, flat area for a label sticker, consider this mini chalkboard labels + chalk marker option; super cute and 100% functional!
Now it’s your turn!
Okay, so we gave you all of our best pantry organization advice and now it’s time to put it to the test as you reorganize your pantry! Here’s the process:
- Map it out. Visualize, and even put on pen + paper, your ideal pantry. What category sections do you need? What do you want your baskets and bins to look like? Will you use jars for your most used items? Will you label with stickers or chalkboard labels? What about a door organizer…will you utilize that? Map it ALL out!
- Pull everything out. Completely empty your pantry – take out every single thing. As you’re taking things out, start putting like items together. This will help you finalize your pantry sections.
- Give it all a good wipe down. It isn’t often that you have your pantry completely empty! Take advantage of that and wipe down every surface in your pantry.
- Toss + donate. Toss out any expired goods (remember to recycle the packaging!) and donate anything that you know your family won’t use. Your local food bank is a great place to take any non-perishable donations.
- Configure your organizers. Place your bins, baskets, and risers in your pantry. Move it all around a couple of times and make sure you feel really good about your final layout.
- Add in your pantry goods. Place all of your current goods into their proper bins, baskets, and risers.
We hope you leave this article feeling inspired and confident in how to organize your pantry! Once your pantry is organized, move on to your closet (read: how to clean your closet) and then check out these other at-home activities that’ll leave you feeling rested + productive! We’d love to hear from you – what are your favorite organization hacks? Share your experience with us in the comments below! Cheers to organized spaces!