Today we’re talking about one of my favorite techniques for better chicken every time – dry brining! This simple trick will totally change your chicken game.
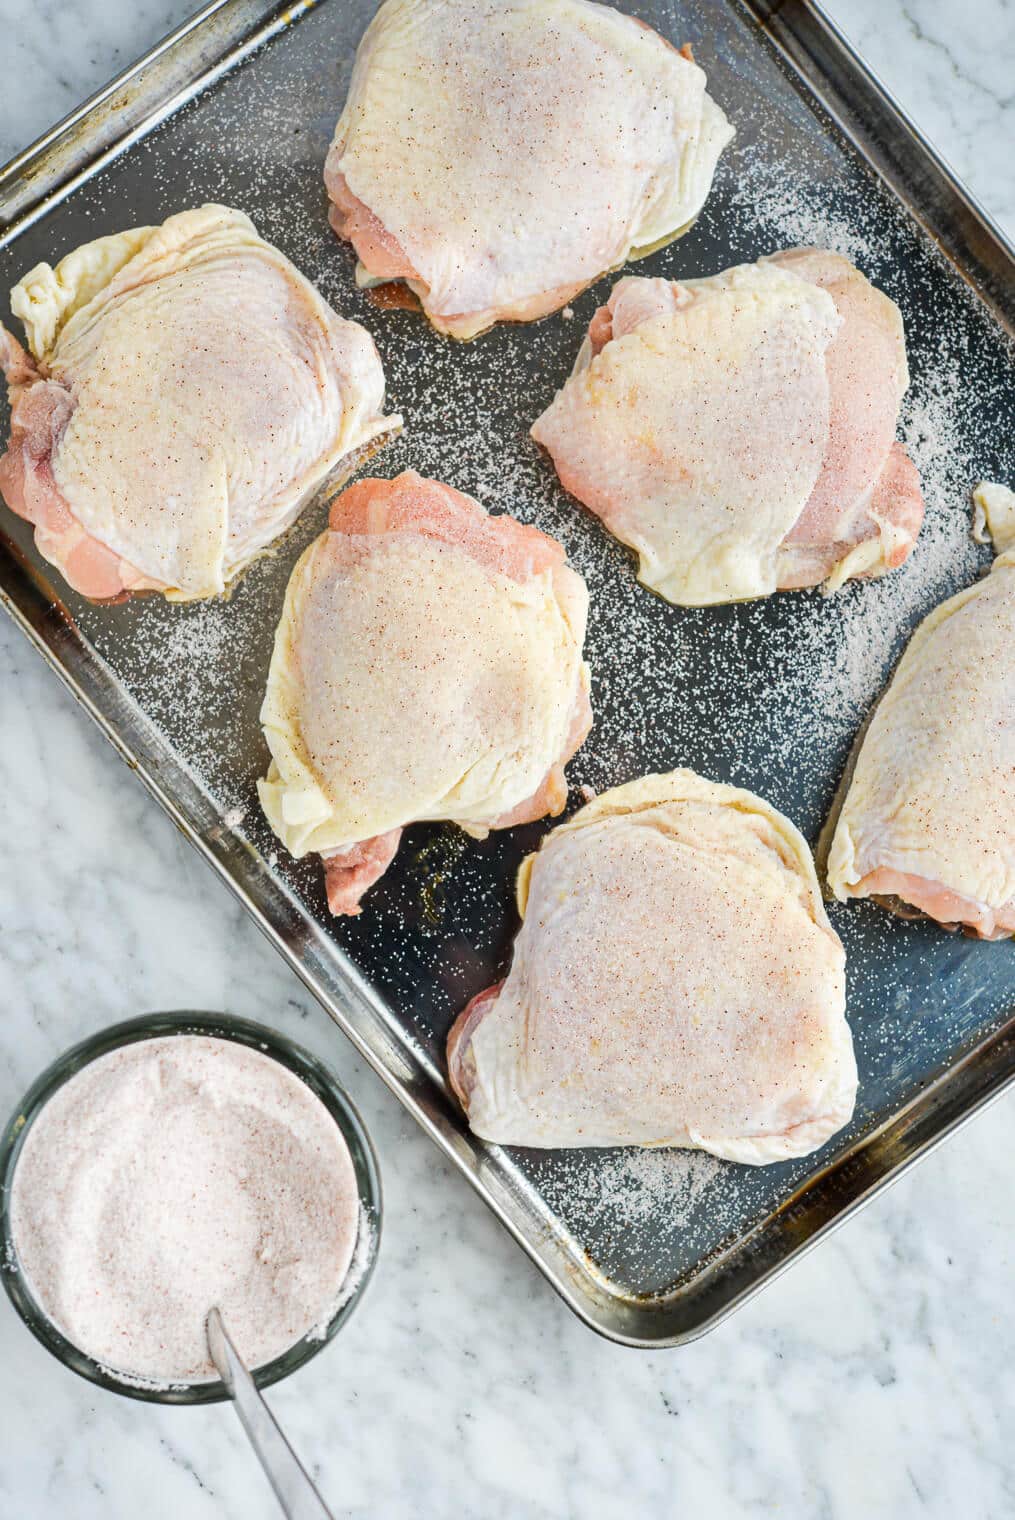
Table of Contents
This recipe is…
Chicken can easily be bland, dry, and boring – but I’m here to tell you, it doesn’t have to be! I’m all about easy ways to make your food taste better, and dry brining is one of the easiest ways to do it.
What is a dry brine?
A dry brine is simply salting a piece of meat and letting it sit before cooking. You may have heard of wet brining before, but the two are quite a bit different.
For a wet brine, you boil a mixture of water, sugar, salt, and aromatics, then place the meat in the mixture and refrigerate for up to a day. This results in a more tender, flavorful, and juicier end product. However, wet brining requires quite a bit more work, and depending on the size of what you are brining (think: a whole turkey) it can be a bit impractical.
A dry brine gives you similar results to a wet brine and allows for meat that is tenderized, flavorful, and easier to crisp and caramelize. It is easier and quicker than a wet brine, because all you have to do is salt the meat on both sides at least half an hour before cooking, then let it sit.
Is a dry brine or a wet brine better?
Honestly, it depends on what you are cooking, what you want the outcome to be, and how much time you have! Here’s a quick overview:
Use a wet brine if…
- You have a relatively small piece of meat (for example, chicken breasts or pork chops).
- You have at least 4 hours to brine.
- You don’t mind a little extra work and time for making and cooling the brine.
- You’d prefer juicier meat over crispy skin or a more caramelized surface.
Use a dry brine if…
- You’re using a larger piece of meat, like a whole chicken or turkey.
- You’re short on time.
- You’re using beef or skin-on chicken.
How does a dry brine work?
A dry brine works through osmosis! Essentially, salting the meat ahead of time will draw moisture out of it. This moisture will then break down the salt and reabsorb into the protein, both tenderizing it and flavoring it. Thanks to this process, your protein will be salted throughout, instead of just on the outside, and the exterior will be drier – which is ideal for good caramelization.
Benefits of Using a Dry Brine
Overall, a dry brine has three main benefits:
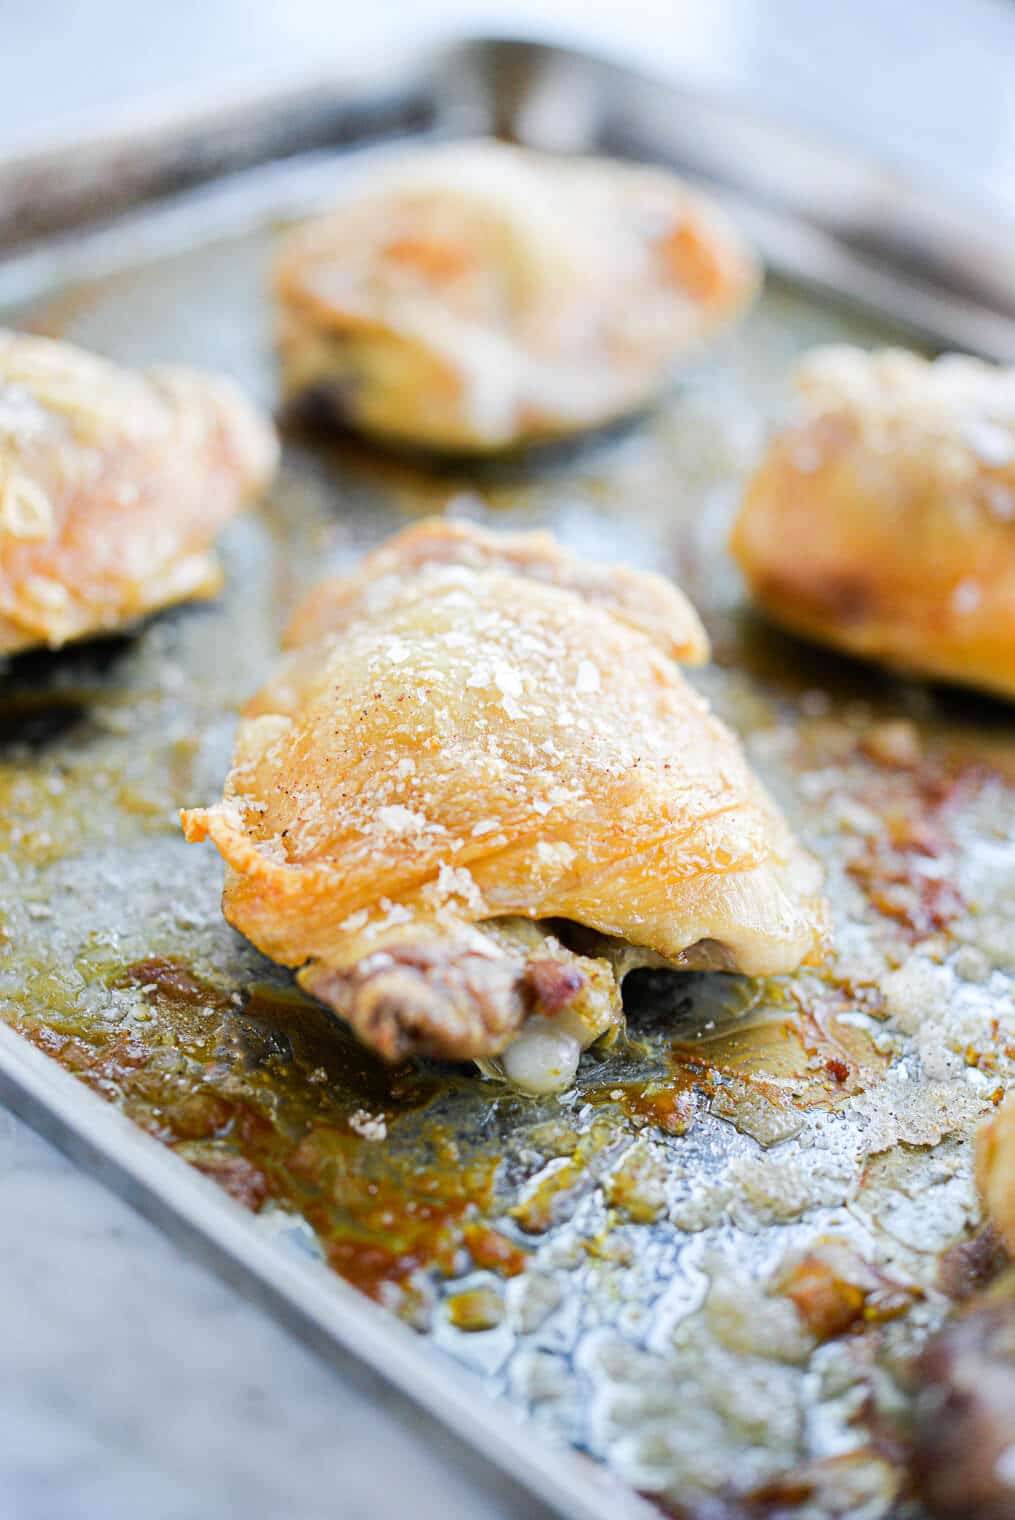
- It removes excess moisture. Now, don’t mistake this for a dry end product – instead, your meat will still be juicy inside, but the drier exterior will be easier to brown.
- It seasons meat all the way through. Typically, you’ll season your meat right before cooking. This creates a flavorful crust, but for thicker cuts, the middle can taste quite bland. With this simple fix, your entire cut of protein will be filled with flavor.
- It tenderizes meat. Salt naturally breaks down the tendons in meat, and with enough time, a dry brine can help create a more tender end product.
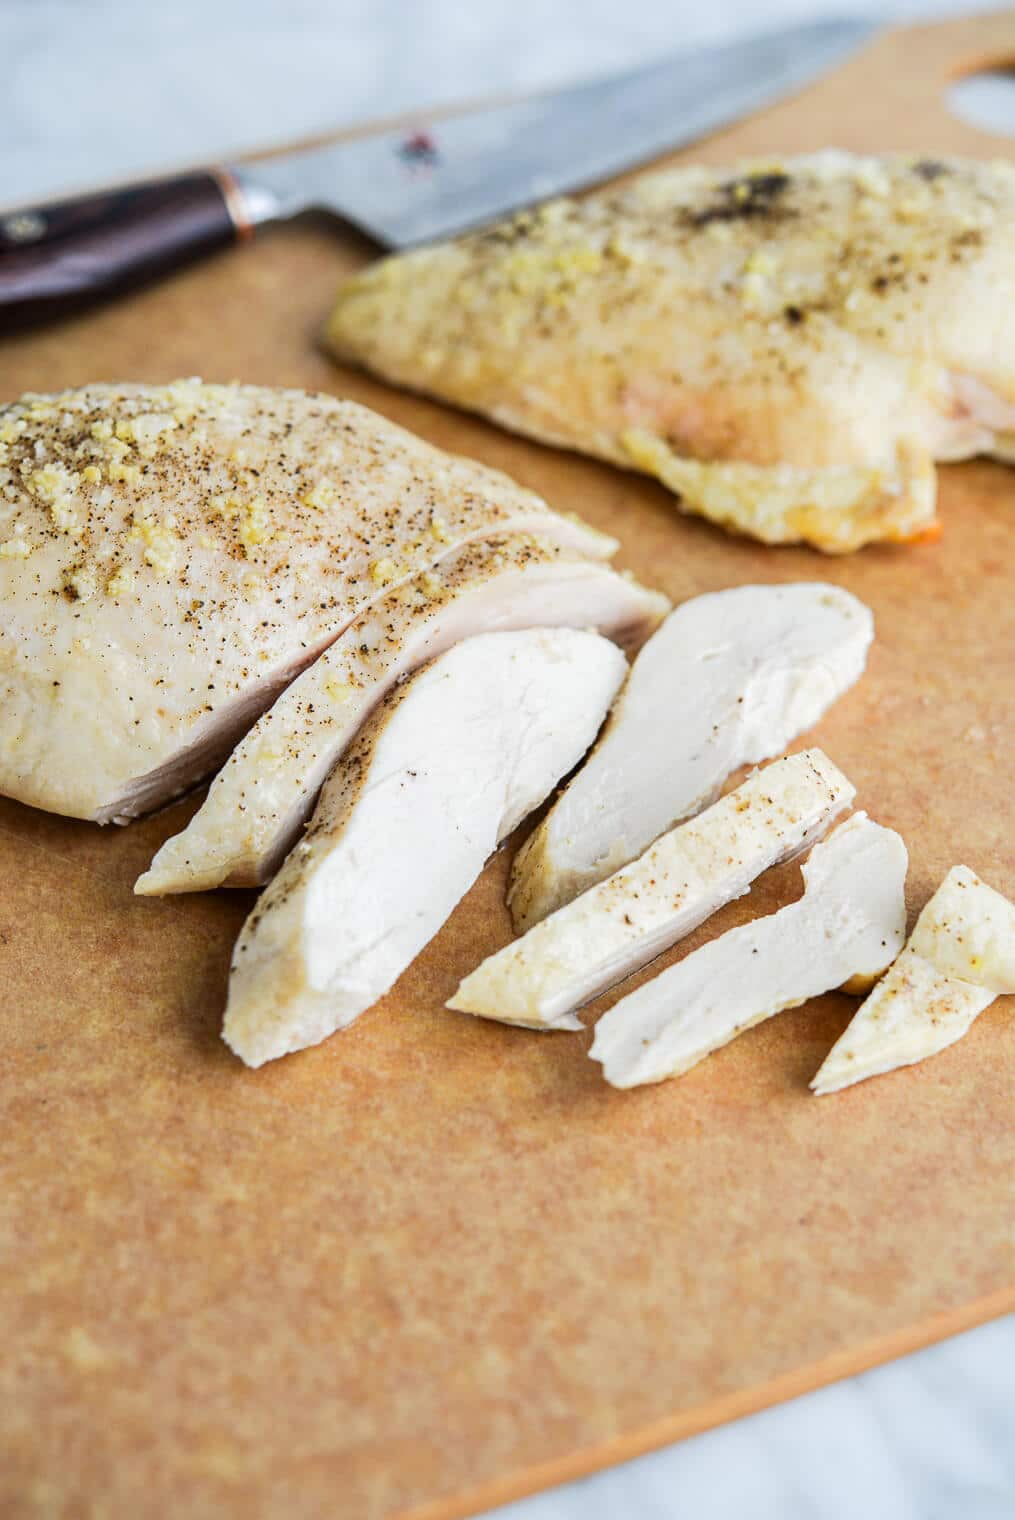
How to Dry Brine Chicken
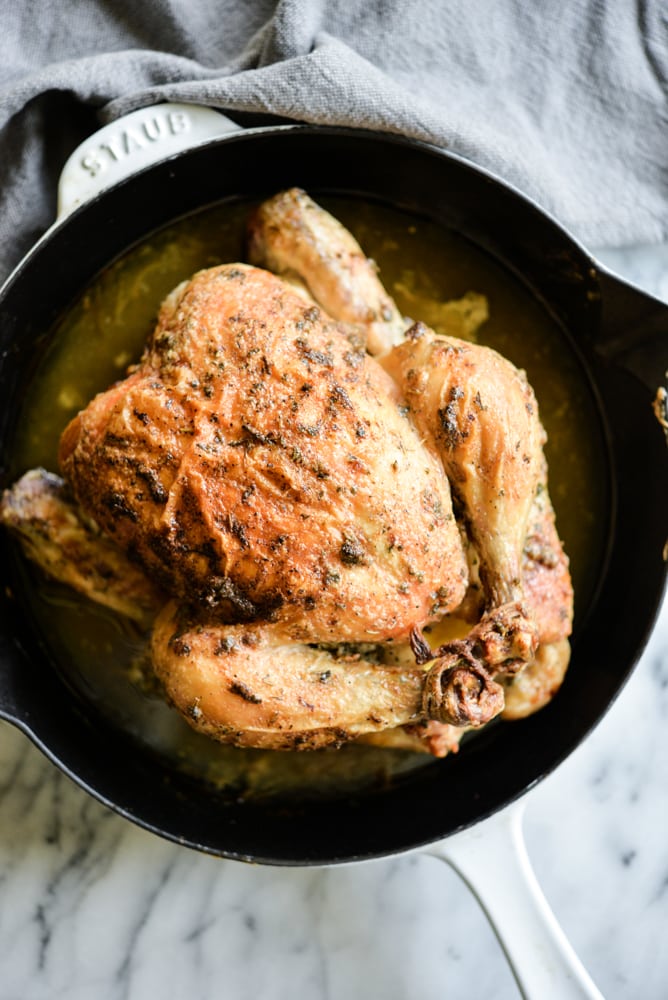
Luckily, dry brining chicken is really simple! My favorite thing to dry brine is a whole chicken, because it creates crispier skin, but it works great on other cuts, too. Below I’ll talk about how to dry brine any cut of chicken.
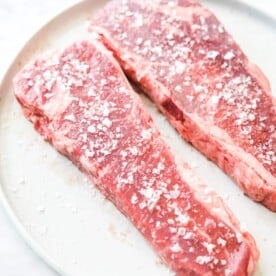
What type of salt is best?
The best type of salt to use for dry brining is kosher salt because it sticks the best and distributes more evenly, but coarse sea salt will also work if you have it on hand! I wouldn’t recommend using fine sea salt or regular table salt for brining, but if it’s all you have, it’ll work in a pinch – just use half the recommended amount listed below!
Whole Chicken
Here’s what you’ll need to do to dry brine a whole chicken:
- Pat it completely dry, then set it on a rimmed baking sheet or other dish. I personally like to place mine in a 9×13 inch dish with a thick layer of paper towels – the chicken will lose more juice than you’d think! Alternatively, you can place the chicken on a rack, which will allow the skin on the bottom to dry out a bit.
- Salt the chicken. Salt the chicken with coarse or kosher salt on both sides, and in the cavity. On average, you can use about 1 teaspoon per pound – but it doesn’t have to be exact! If you’d like, you can also add herbs like thyme and rosemary or spices like black pepper to further flavor the chicken.
- Refrigerate for 8-24 hours. After you’ve salted it, place the chicken in the refrigerator for 8-24 hours. If you’d like, you can loosely cover it with a piece of aluminum foil or parchment paper, but don’t seal the foil. This allows the chicken skin to properly dry out so you’ll wind up with super crispy skin!
- Cook as directed. Once you’re ready to bake, simply pull the chicken out of the fridge and follow the recipe instructions to roast in the oven.
Bone-In, Skin-On Chicken
Smaller bone-in, skin-on cuts like chicken thighs, wings, breasts, or legs are also great candidates for dry brining!
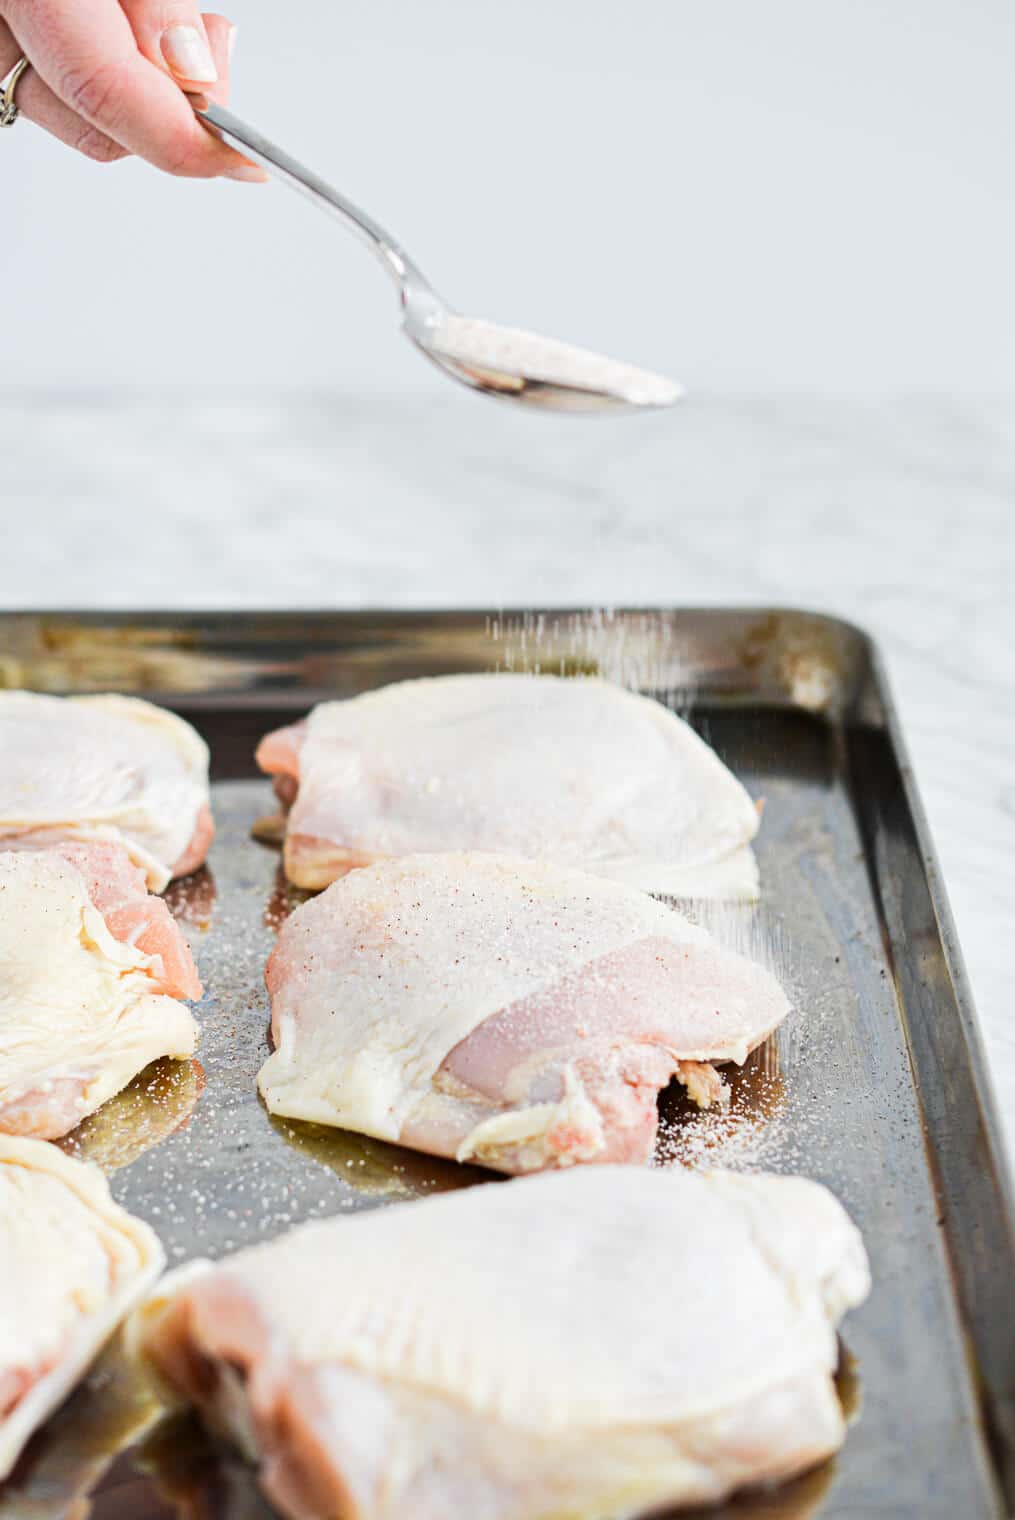
- For these, simply pat them dry, place them on a paper towel-lined dish.
- Salt on both sides. You’ll use about ¾ teaspoon coarse or kosher salt per pound of chicken.
- Refrigerate for at least one hour, or up to about 12 hours.
I recommend leaving the chicken uncovered if you’re just refrigerating for a few hours, or using a loose tent of foil or parchment if brining overnight.
Boneless, Skinless Chicken
For boneless, skinless chicken all you’ll need is a super quick dry brine!
- Simply pat the chicken dry on both sides, place on a plate or in a dish.
- Salt on both sides with about ½ a teaspoon of coarse or kosher salt per side.
- Refrigerate the chicken for 30 minutes to 1 hour, then cook as directed!
Frequently Asked Questions
Here’s a quick cheat sheet for how long to dry brine your chicken:
Whole Chicken: 8-24 hours
Bone-In Skin-On Chicken Breast, Thighs, Legs, or Wings: 2-12 hours
Boneless, Skinless Chicken Breast or Thighs: ½-1 hour
No, there is no need to rinse dry brined chicken! The salt will have penetrated the chicken, so it won’t be too salty. Just make sure you don’t salt it again before cooking!
There you have it – my super simple dry brine chicken technique! I hope that this tutorial helps you get tender, flavorful chicken every time.
More Favorite Brining Recipes

How to Dry Brine Chicken

Ingredients
- Chicken – whole bone-in, skin-on, or boneless-skinless cuts
- Coarse or kosher salt
Instructions
- Pat chicken completely dry, then set it on a rimmed baking sheet or other dish.
- Salt the chicken with coarse or kosher salt on both sides, and in the cavity.
- Whole chicken: use about 1 teaspoon of salt per pound
- Bone-in, skin-on cuts: use about 3/4 teaspoon of salt per pound
- Boneless, skinless cuts: use about 1/2 teaspoon of salt per pound
- After you’ve salted the chicken, place it in the refrigerator according to the times below. If refrigerating overnight or longer, place a loose tent of foil or parchment paper over the chicken.– Whole Chicken: 8-24 hours– Bone-In, Skin-On Cuts: 2-12 hours– Boneless, Skinless Chicken Breasts or Thighs: ½-1 hour
- Once the chicken is done brining, cook your chicken as the recipe directs – there is no need to rinse the chicken before cooking!


About dry brining chicken thighs. What I can’t find ANYWHERE on the net:
Do you put the salt under the skin or on top? or both?
Great question, Mariana! Just on top!!
Shouldn’t you at least brush most of that salt off the chicken just before you cook it?